
What is a DaVinci Resolve Project?
A DaVinci Resolve project (.drp) is a file that contains one or more edited timelines that have information about the cuts and color-correction you do to your video and audio clips. It doesn’t include the actual media files.
To move a DaVinci Resolve project to another computer, go to the Project Manager and export the project archive with the media files selected. Copy the “.dra” file over to the required computer. Then restore the same project archive inside Resolve from the other computer.
A DaVinci Resolve Project Archive contains files including the actual project file “.drp”, media files like “.mp4”, render cache, and proxy files.
However, a Project Library (formerly called a “database”) is a collection of all the project files excluding the media files and proxy files.
You can transfer an entire project library along with the media files to another computer or external drive.
To move a project from one project library to another project library, go to the “Project Manager”, click on the “Show/Hide Project Libraries” icon, then copy the required project using “Ctrl + c” and paste it inside the desired project library.
To save a DaVinci Resolve project to an external drive, go to “File” > “Export Project” and choose a location inside your external hard drive.
Today, we’ll see how to save a project file or an entire project library to another computer along with media files, and fixes to common issues – step-by-step with pictures. (Very useful for beginners and newcomers to DaVinci Resolve versions 18.6, 18.5, 18, 17, etc!).
How To Move DaVinci Resolve Project To Another Computer?
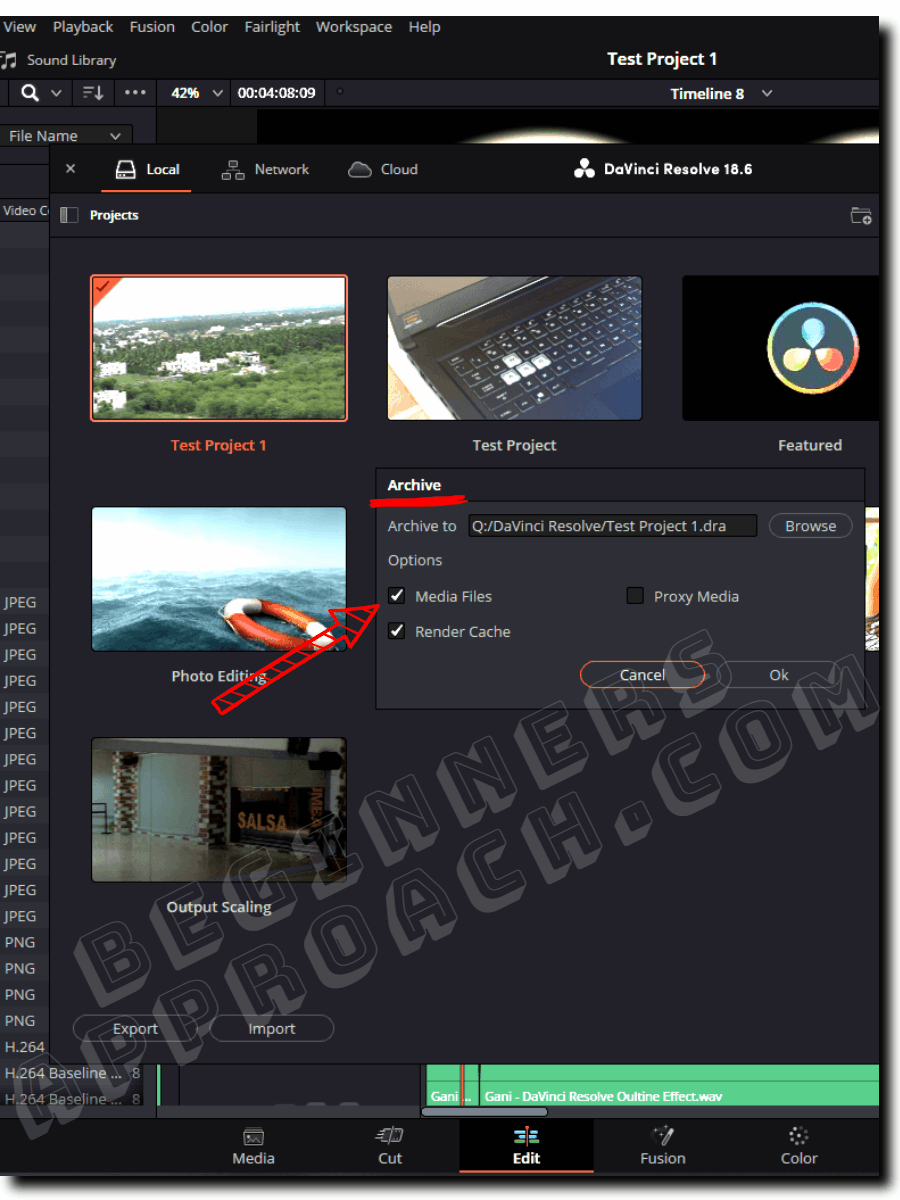
Step #1 – Export Project Archive Including Media Files
- Navigate to “File” > “Project Manager“.
- Right-click your desired project.
- Choose “Export Project Archive“.
- Choose a location for saving the entire project with media.
- Enter a name for the archive file, let’s say, “test–project.dra“.
- Enable the “Media Files” checkbox.
- Enable the “Render Cache” and “Proxy Files” checkboxes, if required.
- Give “Ok”.
- Your entire project is exported along with media as shown in the screenshot below.
Click here for a more detailed guide on exporting an entire project with media in DaVinci Resolve.
Step #2 – Copy The “.dra” file and Paste It on Another Computer
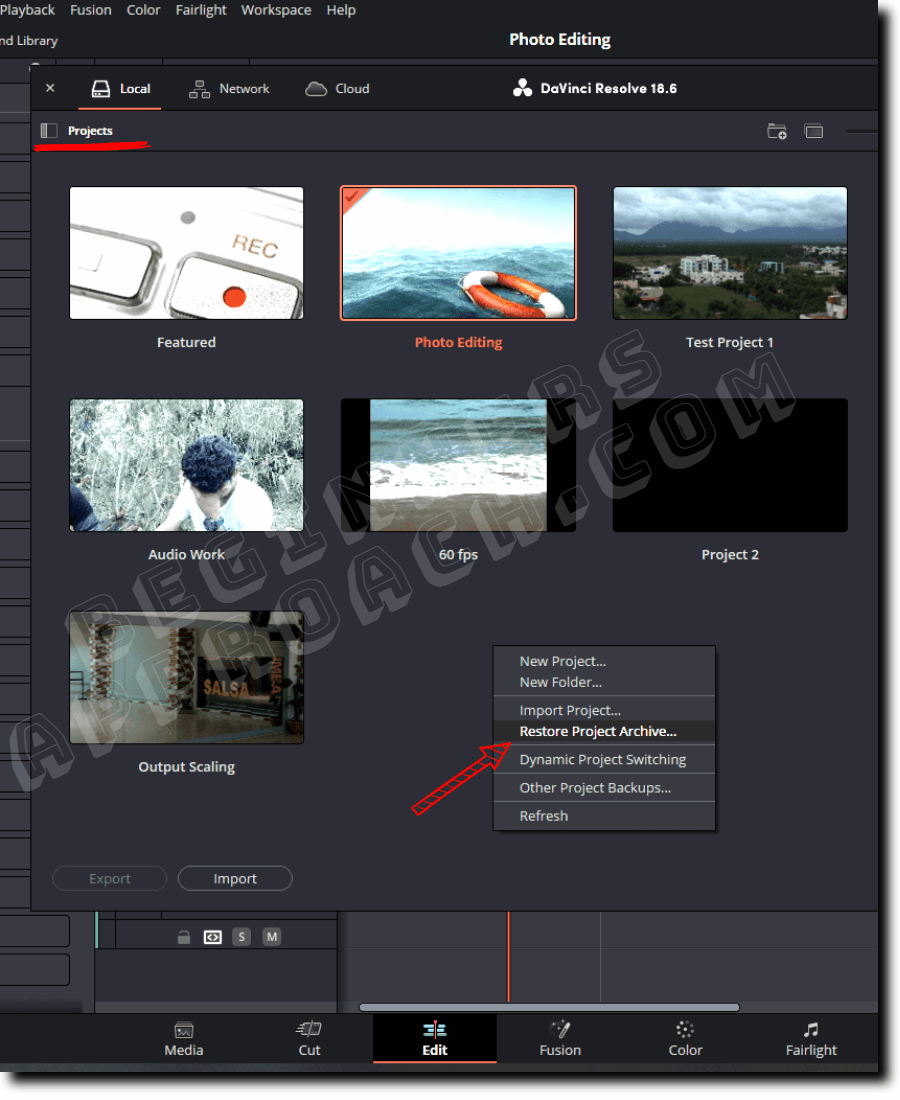
Step #3 – Restore The Project Archive “.dra” File On the Other Computer Inside Resolve
- Navigate to “File” > “Project Manager“.
- Right-click on an empty space.
- Click on “Restore Project Archive…” as shown in the image below.
- Select your “.dra” file and hit Import!
- The project file is now moved over to the new computer with all the settings intact.
DaVinci Resolve automatically imports the “.drp” project and relinks the media files, which will save you a lot of time.
Copy all the project libraries folders and all the media files separately, if you want all the projects and all the media files.
How to Move a DaVinci Resolve Project Library to Another Computer?
- Go to “File” > “Project Manager”.
- Click on the “Show/Hide Project Libraries” icon.
- Select your database one by one and right click -> select “Open File Location”.
- Now copy the folder “Resolve Projects” and go to your external hard drive, create a new folder, and paste it there. (Always keep in mind that you should paste “Resolve Projects” inside another empty folder.)
- Now do the same to other project libraries (that is, “open file location” > copy “Resolve Projects” > paste inside an empty folder in your hard drive.)
- Now copy all of your media files to your external hard drive.
The next step is to go to your new computer and connect your project library.
How to Connect DaVinci Resolve Project Library?
- Launch DaVinci Resolve.
- In the “Project Manager” window, click on “Add Project Library”.
- Click on “Connect“.

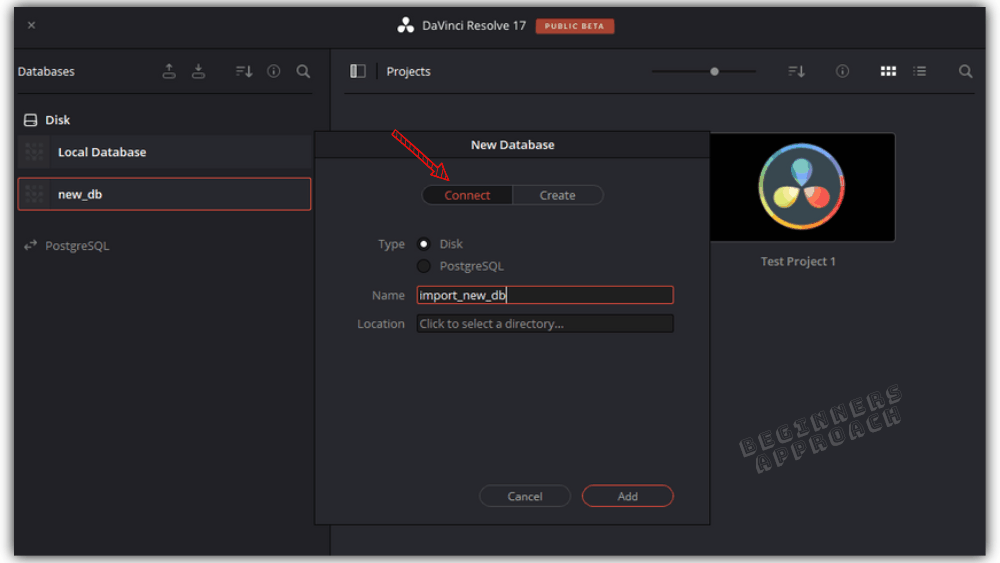
- (Let the “Type” be “Disk” – Default value – found on the older version of Resolve)
- Enter a proper name with no spaces.
- Choose the same folder that has your project library (database) which was copied in the earlier steps. (Remember to choose the folder that you created which has the “Resolve Projects”)
- Click on “Add“.
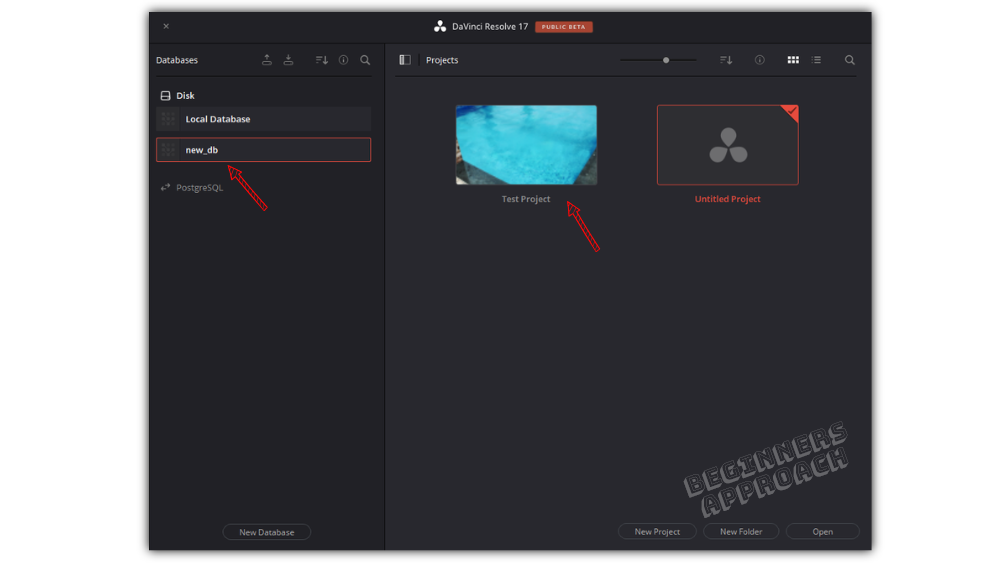
- The new project library is imported and displayed below your local project library.
- Now go to any project inside that project library and select all the clips inside Media Pool and “Relink Selected Clips” with your media files to avoid “Media Offline” error message.
- Now do the same to other project libraries.
- All the required project libraries and media files are successfully saved to the new computer.
Now, let us suppose, you have many project libraries – each having many projects.
How to Move a Project to Another Project Library?
- Go to “File” > “Project Manager.
- Click on the “Show/Hide Project Libraries” icon.
- Select your project library, that has your project.
- Then select and copy (“Ctrl + C” or “Cmd + C”) your project.
- Click on the desired project library and paste it (“Ctrl + V” or “Cmd + V”).
- The project is saved to the desired project library.
How to Save DaVinci Resolve Project To External Drive
- Launch DaVinci Resolve and select your project from the “Project Manager”.
- Go to “File” > “Export Project“.
- Choose your desired location in the external hard drive connected to your computer.
- Click on “Save“.
- It saves the project file as a “.drp” extension – which means the “DaVinci Resolve Project” file.
The “.drp” file doesn’t include your source media files. The size of a .drp file will be comparatively less compared to your huge media files, say around a few MB for a large project and less than 1 MB for a small project.
To copy all the project files along with the media files, refer to the above sections on moving project archives.
If you are sure you just need to share the drp file with a colorist, and he/she has media files, then it’s a matter of importing the project file (.drp) and relinking the media clips in the timeline.
Click here to read more on exporting projects in DaVinci Resolve – in detail.
How to Restore a Project in DaVinci Resolve?
- Go to the “Project Manager” window (either by launching Resolve or clicking on the house icon from the bottom right-hand corner).
- Right-click on the empty area or grey space.
- Click on “Import Project“.
- Select your project file with the “.drp” extension.
- Click on “Open“.
- Your project is now imported.
After opening the project, if you see that the clips display “Media Offline”, then select all the clips, right-click on any one clip, select “Relink Selected Clips” and choose the desired folder which has your media files.
How to Move a Timeline from one Project To Another?
Sometimes you might need a timeline (which is part of one project) in another project within the same database. In that case,
- Open an existing project, that has your timeline.
- Locate the timeline in the Media pool.
- Copy it using “Ctrl + C” or “Cmd + C”.
- Go to “Project Manager” by clicking on the house icon from the bottom right-hand corner.
- Double-click your desired project to open it.
- Paste the timeline using “Ctrl + V” or “Cmd + V”.
- You’ll notice that along with the timeline, the media files are also copied (which are part of your timeline).
If you need to copy the timeline to a project which is part of another project library, then you simply copy the timeline using “Ctrl + C” or “Cmd + C”, select the desired project library and project from the “Project Manager” and paste it inside the media pool (of the desired project). All the media that are part of the timeline are also copied!
Learn more about copy and paste operations in DaVinci Resolve here.
How to Export a Timeline from DaVinci Resolve?
There will be situations when you might need to export a single timeline and take it to other computers. Project archiving will copy all the timelines and the related media – which is something you don’t want.
If you want a particular timeline, and its related assets that you want copied. Then,
- Go to “File” > “Export” > Select “Timeline“.
- (Make sure you are already in the desired timeline before exporting).
- Choose your folder location.
- Click on “Save”.
- It will save the file with a “.drt” (DaVinci Resolve Timeline) extension.
If you want to export multiple timelines, then:
- Go to “File” > “Media Management“.
- Click on the “Timeline” tab.
- Select your desired timelines.
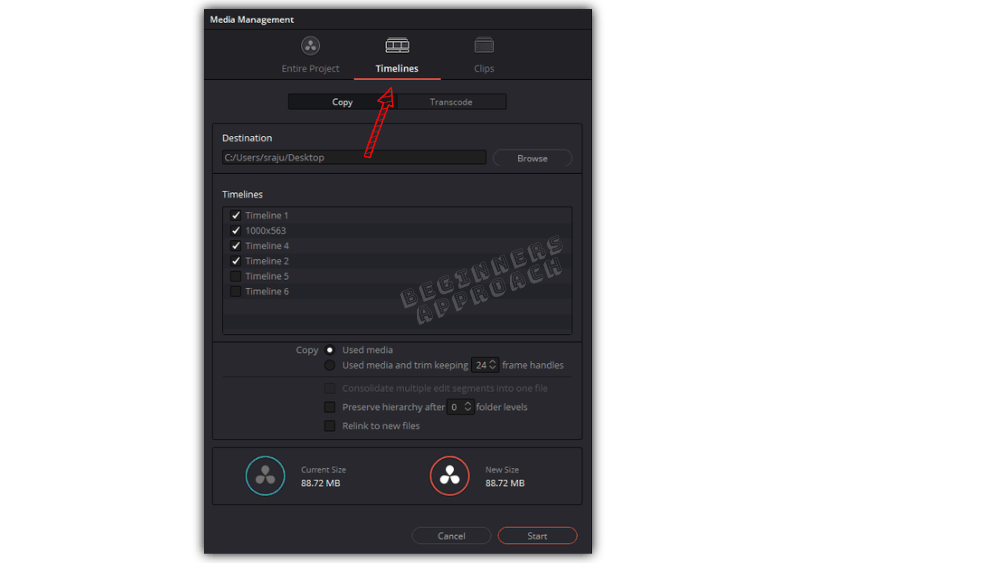
- Choose your destination folder.
- Make sure you are under the “Copy” tab (instead of Transcode)
- Then click on “Start“.
- All the selected timelines will be copied as “.drt” files along with the media files.
How to Import a DaVinci Resolve Timeline
- Go to “File” > “Import” > Select “Timeline“.
- Choose your folder location which should contain the timeline in “.drt” format.
- Click on “Open“.
- It will load the timeline with all the related media files.