This is part of the DaVinci Resolve GIF series.
To export GIF in DaVinci Resolve, first upgrade to the latest version 18.5 (or above). Then, go to the “Deliver” page, and click on the “Custom Export” section. Under the “Video” tab, select “GIF” from the “Format” dropdown. Start rendering!
DaVinci Resolve version 18.5 (and above) supports the export of GIFs natively.
If you are in earlier versions like 18.1, 18, 17, 16, etc., then you can’t export natively from Resolve. But there are workarounds for that as well – we will see that in a bit.
The best recommendation is to update to the latest version of DaVinci Resolve 18.5.
Let’s explore the export of GIFs in DaVinci Resolve in detail – step-by-step – with pictures, both natively and externally using free online tools.
There are 2 types of GIF Export in Resolve:
- DaVinci Resolve versions 18.5 and above = Export GIFs natively.
- DaVinci Resolve versions 18.1, 18, 17, 16, etc. = Export in a video format and then convert it to a GIF file.
I will cover both of them in detail with plenty of screenshots.
After you have completed your editing, color grading, etc., now it’s time for you to export the gif.
How to Export Animated Gif in DaVinci Resolve 18.5?
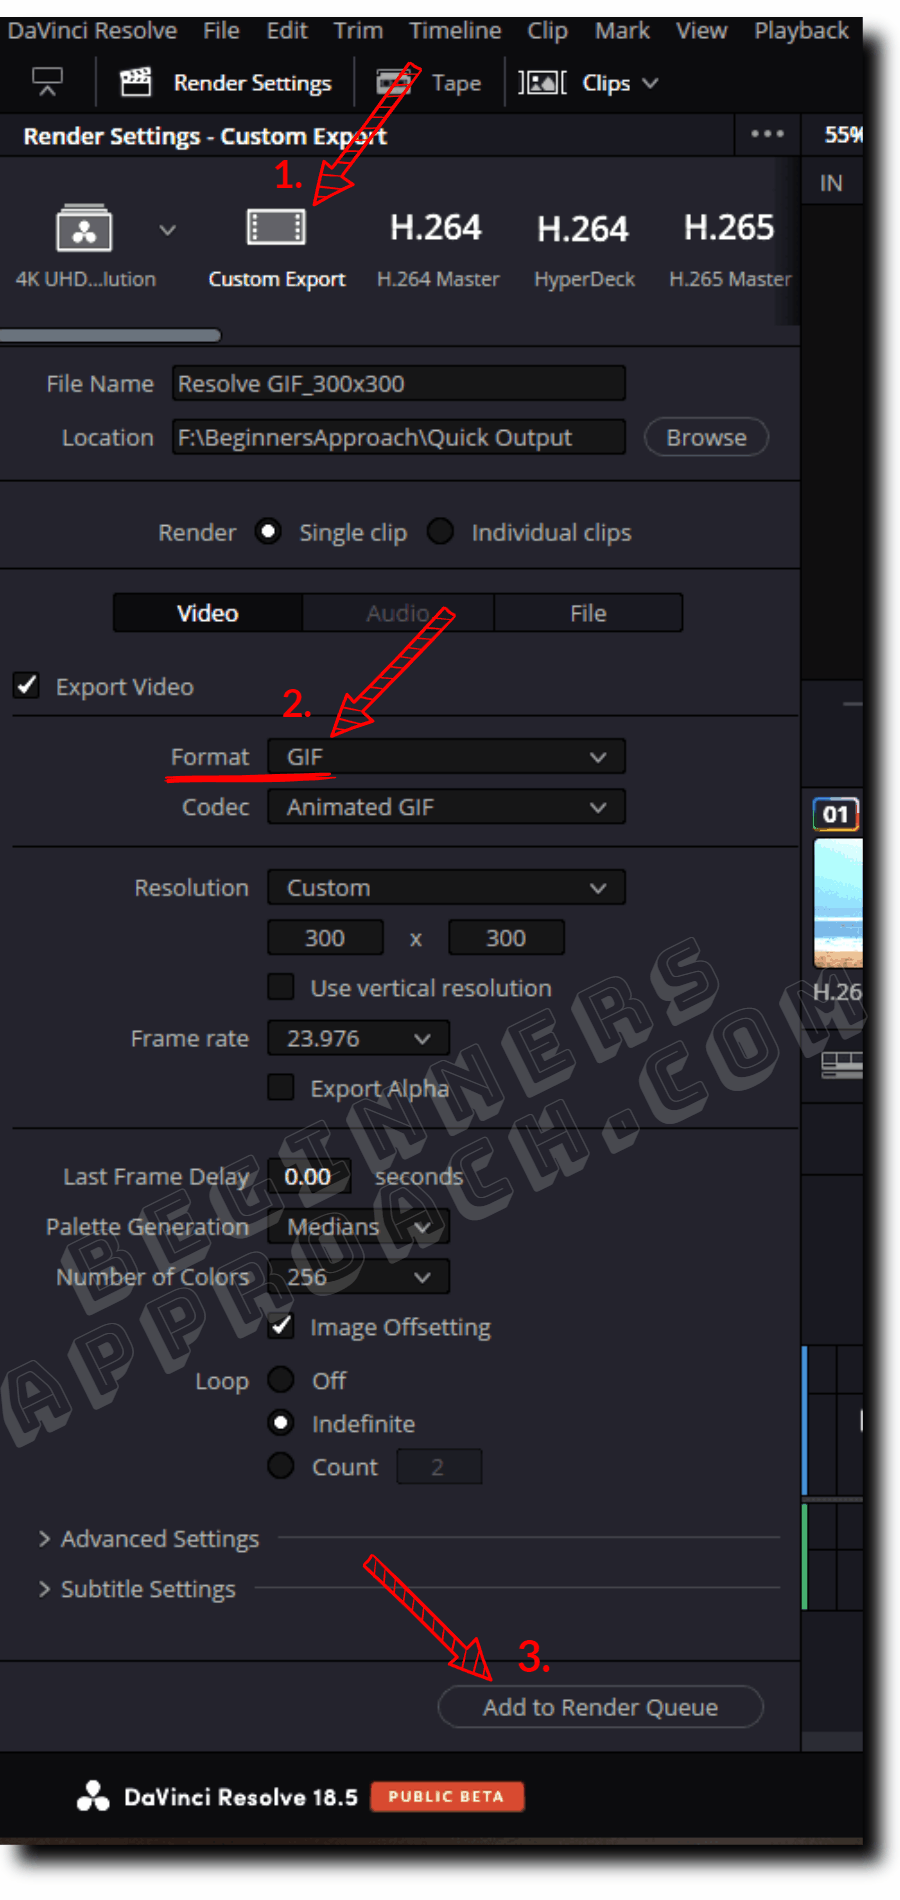
- Go to the “Deliver” page.
- Under the “Render Settings”, click on the “Custom Export”.
- Make sure the “Export Video” checkbox is enabled.
- Select “GIF” from the “Format” dropdown.
- Select “Animated GIF” from the “Codec” dropdown (the default value).
- Set your required “Resolution”, say, “300 x 300” or “1280 x 720”.
- Set the required “Frame Rate”, say, “23.976”.
- Click on the “Add to Render Queue” button.
- Click on the “Render All” button from the right-hand side.
- The animated GIF is now exported natively!
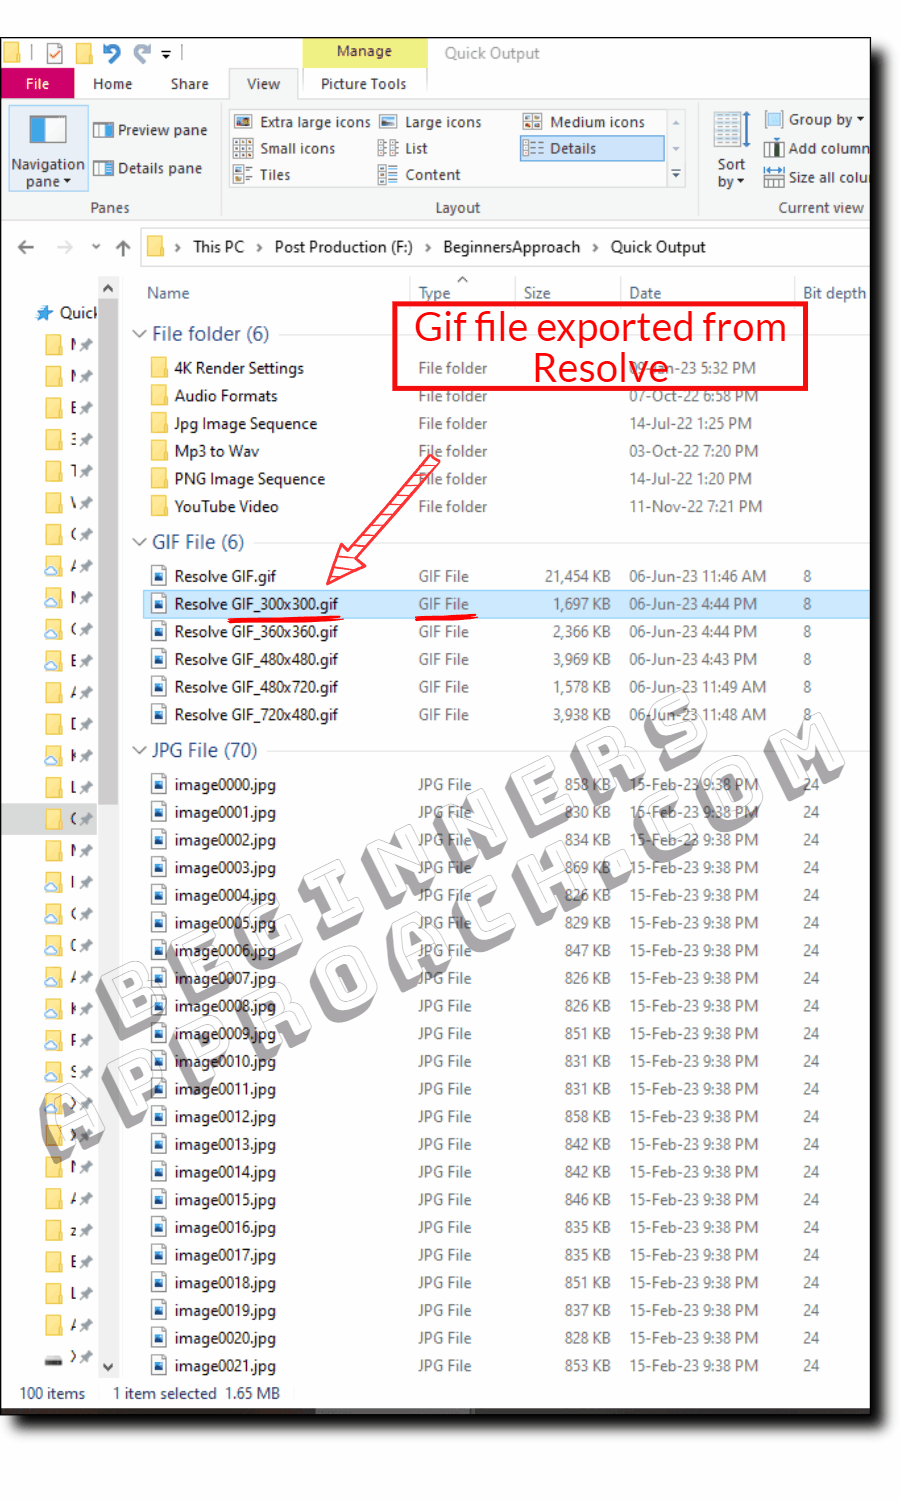
Here’s my GIF file generated natively from DaVinci Resolve version 18.5:
Important Settings Before Exporting GIFs from Resolve
In order to be efficient with the GIF export, you must first decide on the resolution and the duration of the GIF. High resolution like 4K or 1080p will result in huge file sizes.
Ensure you clearly know your output file size and duration.
Hence, it is a better option to create a new timeline within the existing project and set the timeline resolution to your required one, say, “300 x 300” by choosing the “Custom” option. See the screenshot below:
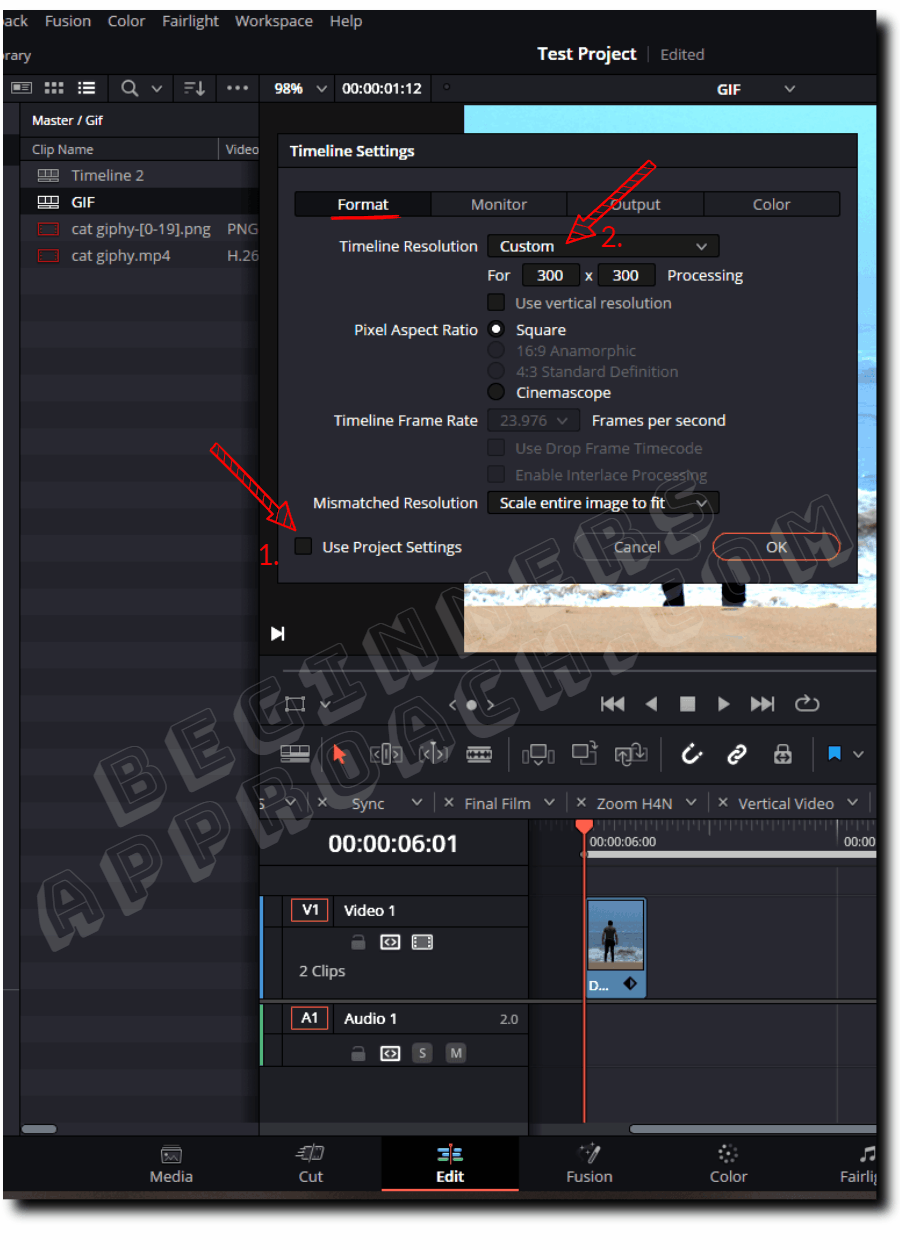
A resolution of, say, “300 x 300” with a duration of 70 seconds resulted in a file size of “1.7” MB.
The resolution, duration, and file size are purely subjective and should be based on your requirement.
GIF Export Work-around in DaVinci Resolve Versions 18, 17
It is not possible to make animated gifs in DaVinci Resolve versions earlier than 18.5, like 18.1, 18, 17, 16, etc. Alternatively, you can export your footage from Resolve as .mp4 and then convert that into a gif file using online tools.
After finishing your editing and color grading, go to the “Deliver” page, and click on the “Custom Export” section. Under the “Video” tab, select “Mp4” from the “Format” dropdown. Select “H.264” from the “Codec” dropdown.
Set the “Encoder” to the default value. Set your required frame rate, say, “23.976”. And then start rendering.
With the exported mp4 file, follow the below steps.
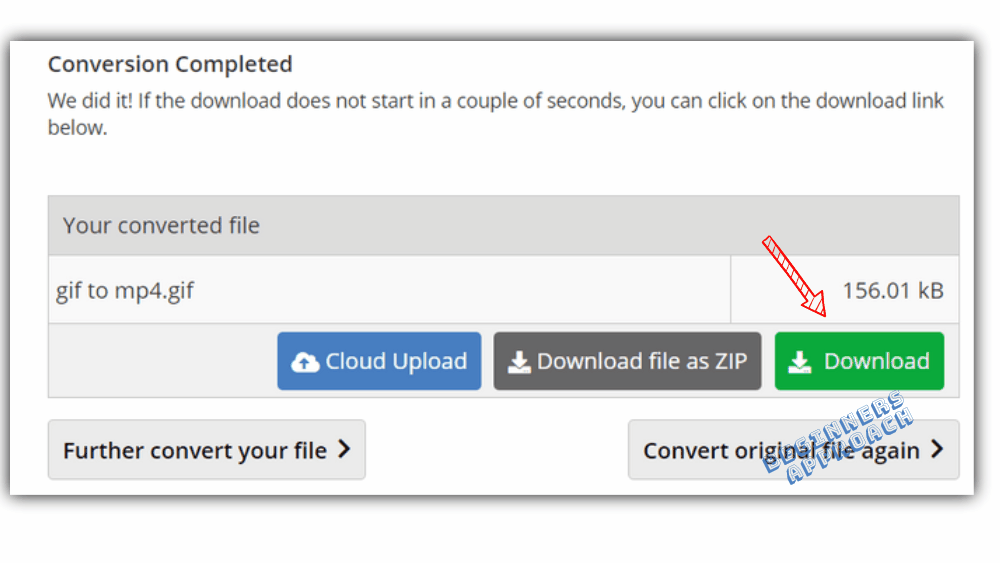
How to Convert Mp4 or Other Formats into Gif using Online Tool?
- Navigate to “https://image.online-convert.com/convert/mp4-to-gif“.
- Upload your video file.
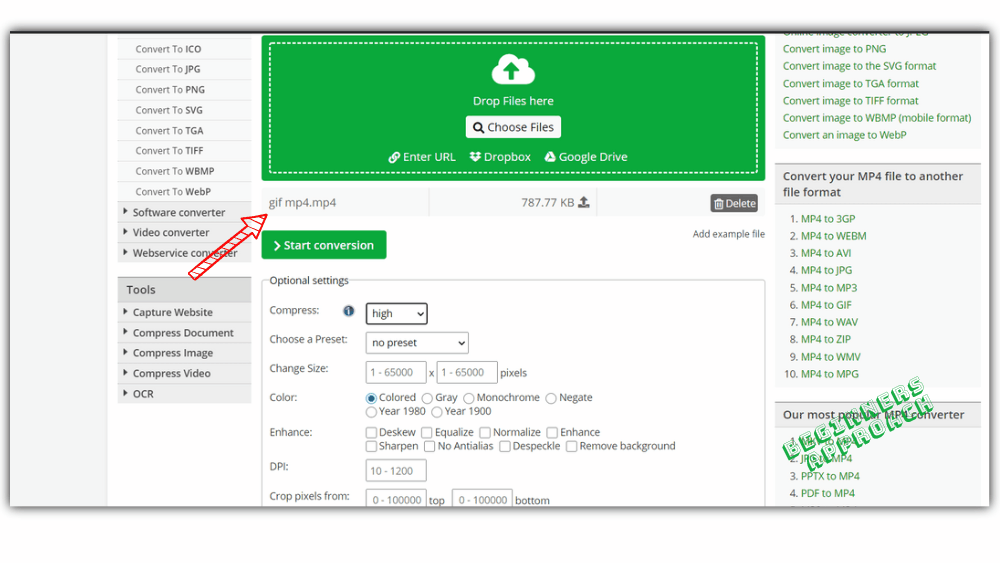
- If required, update the “Optional Settings” to fit your needs.
- Start conversion.
- Download your gif file.