If you’re a beginner or newcomer to DaVinci Resolve (versions 18.5, 18, 17, etc.), today’s guide will quickly show you how to edit text (title) in Resolve.
To edit the text in DaVinci Resolve, select the “Text” block in the timeline. Then click on the “Inspector” tab. Under the “Title” tab, change the “Font”, “Size”, “Position”, “Zoom”, “Background”, etc. to edit the text inside the title.
Let’s explore the editing of text and related issues in detail – step-by-step with pictures.
How to Edit Text (Title) in DaVinci Resolve?
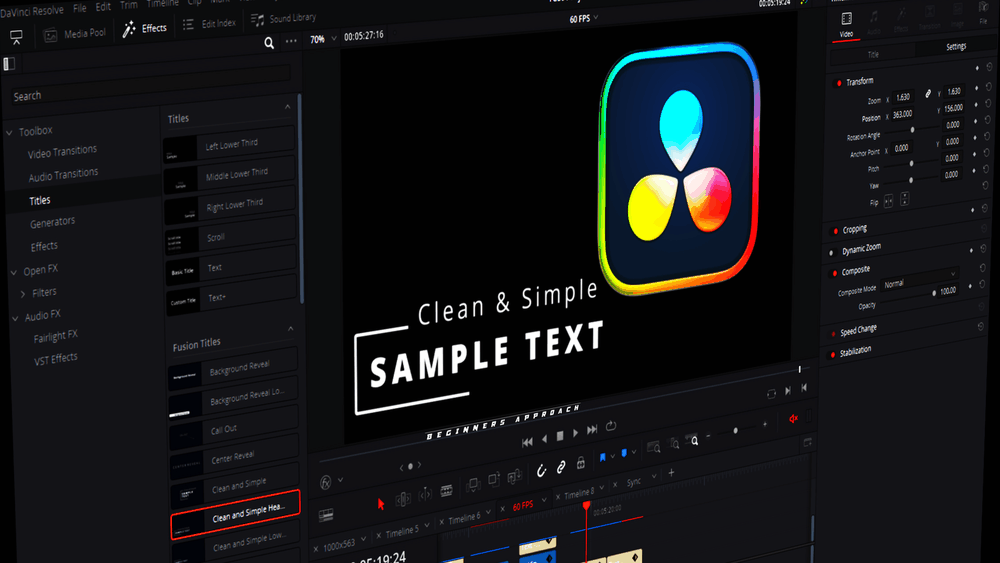
- Go to the “Edit” page > Effects tab > “Titles” > ” Text”.
- Drag and drop the text title on your timeline.
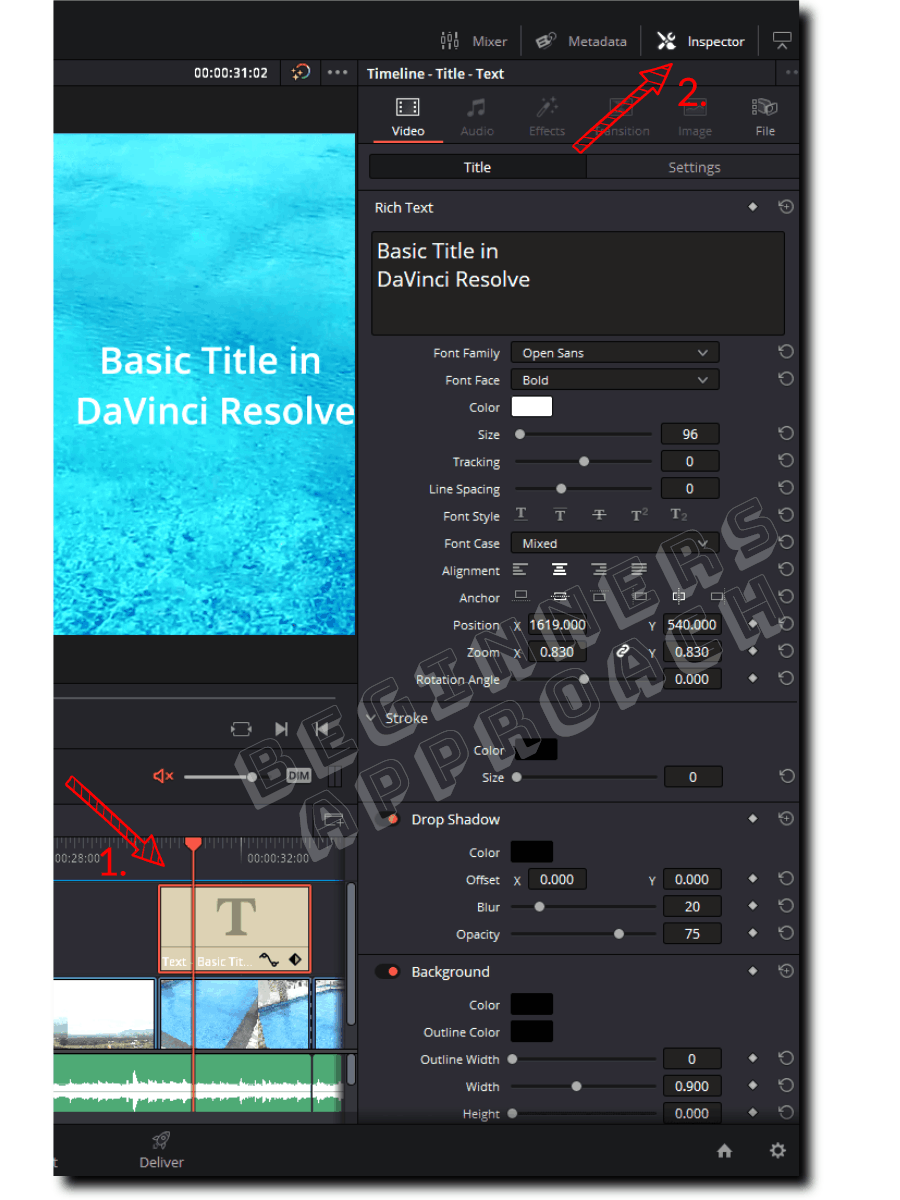
- Click on the “Text” in the timeline to highlight it (after dragging and dropping the “Text” from the “Effects” tab on top of your clip.)
- Click on the “Inspector” tab (from the upper right corner) to reveal settings for modification.
- Under the “Title” tab, change the “Font”, “Size”, “Position”, “Zoom”, “Background”, etc., to your liking.
- Under the “Settings” tab, you can zoom in and out, crop, choose “Composite” modes, etc.
Best Way to Edit Text in DaVinci Resolve – Onscreen Control and Mouse
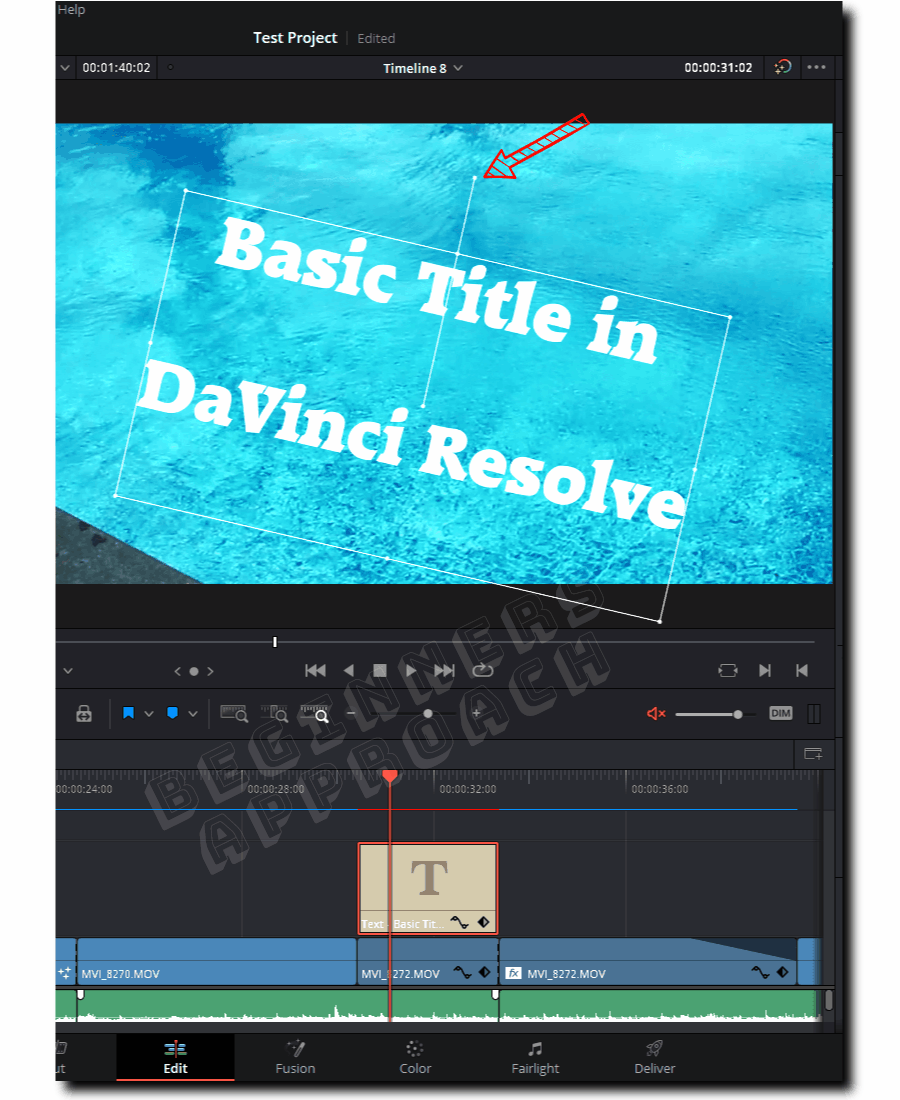
- After you’ve dropped the text (title) in the timeline, do a single click on the text on the screen (timeline viewer) and you’ll see a rectangular box.
- Now with the help of a mouse, you can drag the text box to your desired place on the screen.
- Double-click to edit the text on the screen.
- Do a single click and then drag the top handle to rotate the text.
- Grab the corners to zoom the text in and out.
Keep in mind that you’ll be unable to edit the “Text +” and “Fusion Titles” on-screen on the timeline viewer.
However, you can edit the “Text +” from the “Inspector” tab.
Or you can also use the “Transform” tool (as discussed below).
How to Move Text (Text+) in DaVinci Resolve?
- Under the “Edit” page, drop the “Text” or “Text +” generator on the timeline from the “Effects” library > “Titles”.
- Click on the “Transform” tool (a rectangle-shaped icon) located at the bottom left corner of the screen (timeline viewer).
- You’ll see a rectangle box around the text.
- Now drag the box to move the text to the desired place on the screen.
- The “Text” generator can also be moved by clicking (single click) on the text on the screen (timeline viewer) and moving it to the desired place.
- However, the “Text+” generator lacks on-screen control and can only be moved through the “Transform” tool.
- Alternatively, click on the text in the timeline, go to the “Inspector” tab > “Settings” > change the value of “Position X and Y” to move your text (under the “Transform” section).
Editing Text With Multiple Lines in DaVinci Resolve
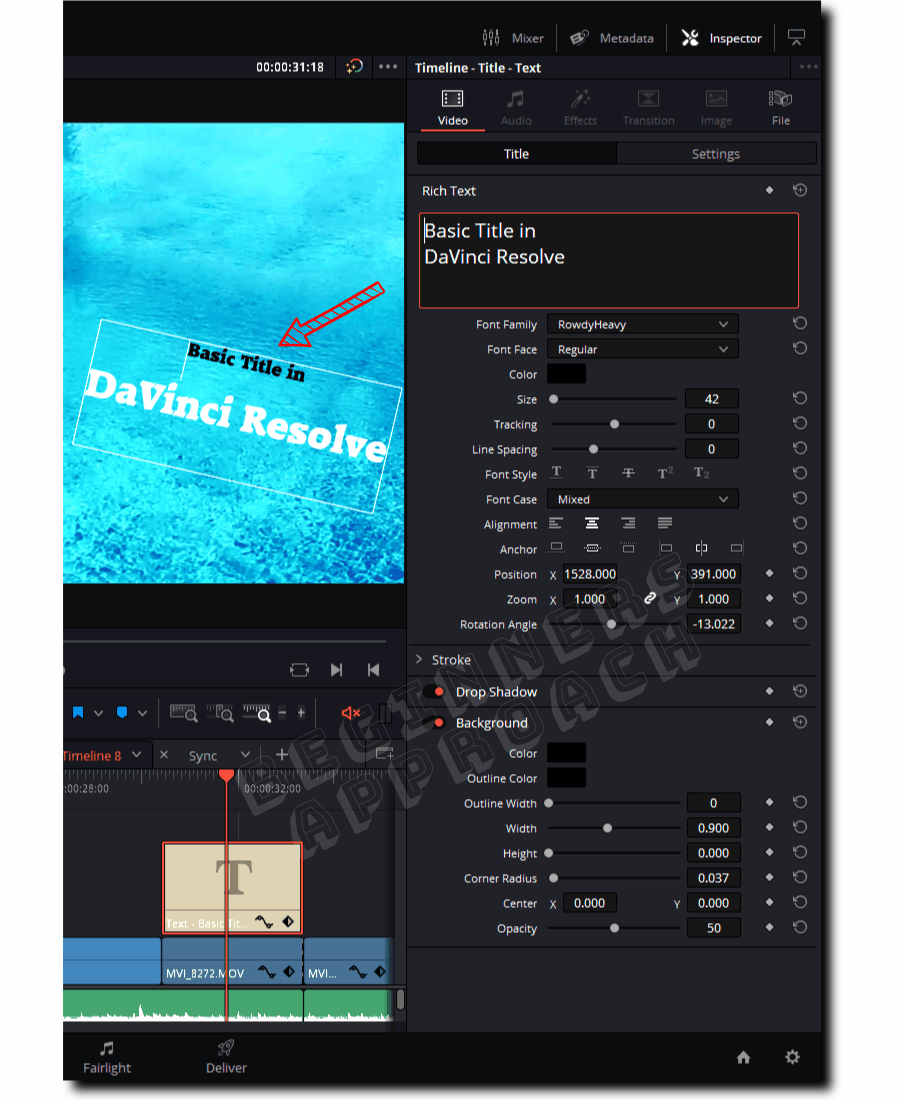
After adding the “Text” title on top of your clip, go to the “Title” settings under the “Inspector” tab. Enter your text, say, “Basic Title in”, press enter (return) key, and then input your second line text again.
You can do the same on the timeline viewer (on-screen control) by double-clicking the text.
Now you have a text with multiple lines. You can edit them as if they were completely different text.
Here’s how to edit an individual line in a text containing multiple lines:
- In the timeline viewer, double-click on the text. Select the first line (by left-clicking before the first letter and then dragging to the last).
- Now go to the “Inspector” > “Title Settings” > decrease or increase the “Size“, to differentiate it from the second line.
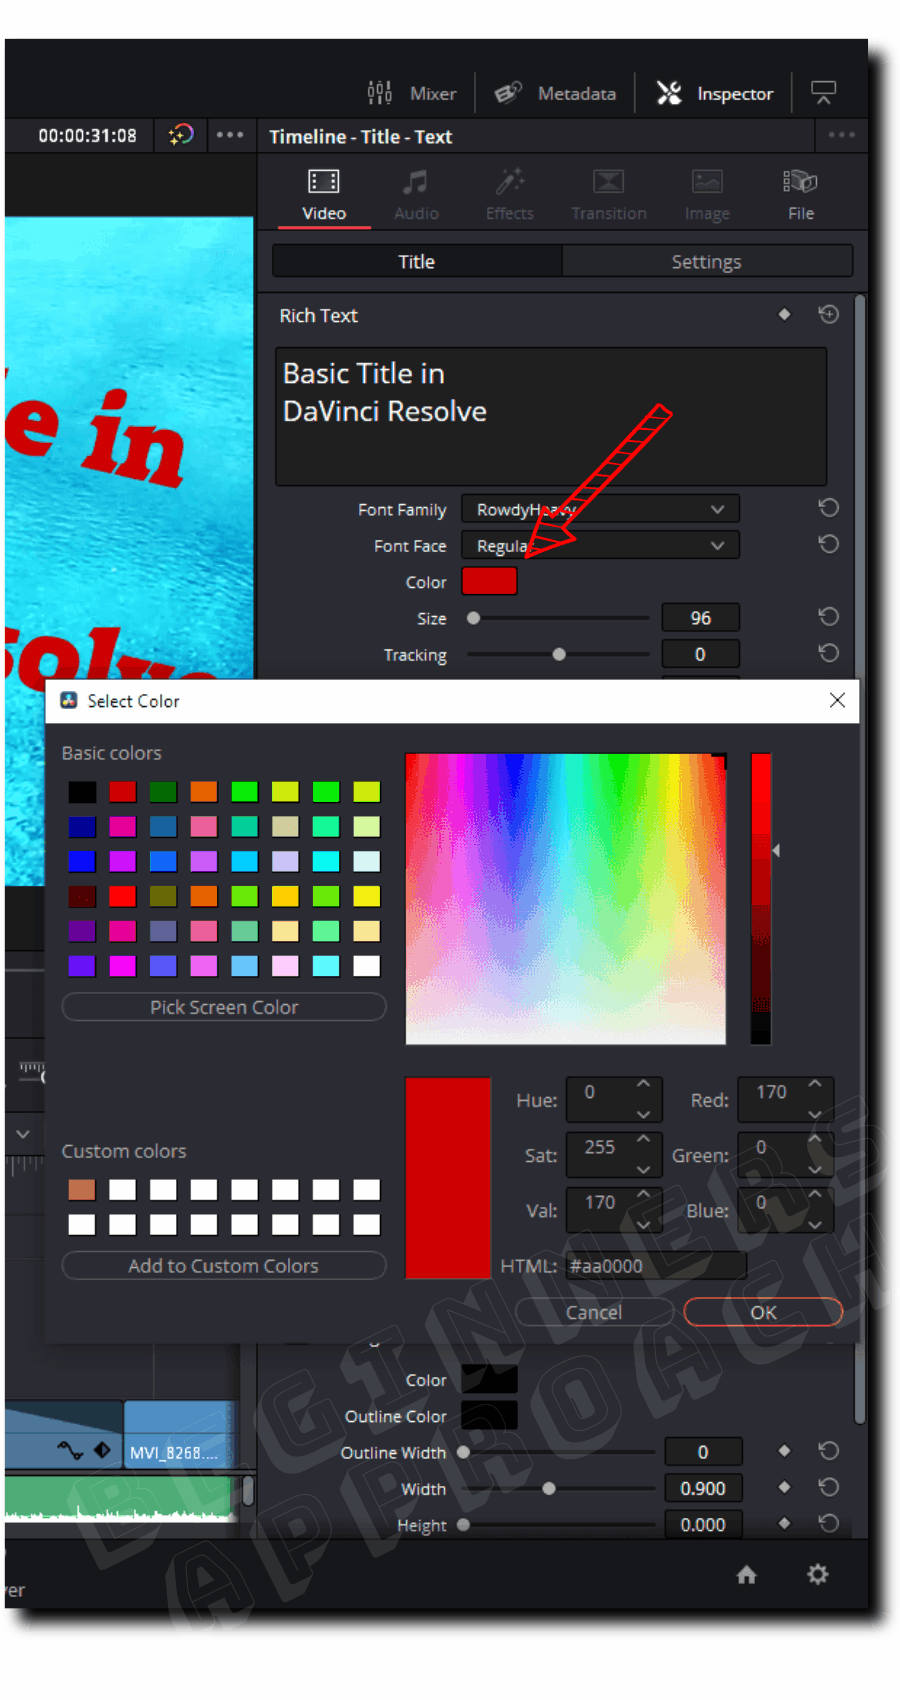
- Click on “Color” to change the color for the selected line.
- Play with the different options till you get the desired result.
Related Articles:
7+ Cool DaVinci Resolve Text Effects You Can Use Right Away
Animate Text in DaVinci Resolve Edit Page (Do This ONE Thing)
How to Change Text Color in DaVinci Resolve?
- Under the “Edit” page, click on the “Effects” tab from the upper left corner.
- Click on the “Titles” link under the “Toolbox”.
- Under the “Titles” section, drag and drop the “Text” on top of your clip in the timeline.
- Select the “Text” from the timeline.
- Go to the upper right corner and click on the “Inspector” tab to reveal the settings for modification.
- Under the “Title” tab, click on the “Color” icon.
- Select your desired color and click ok.
Issues While Editing or Animating Text in DaVinci Resolve
Even though adding and editing text is simple in Resolve, as a beginner you might face issues while doing the same.
Issues like the below can consume a lot of time to figure out:
- Text Media Offline
- Text cut off
- Title is missing
- Only black background – no text is displayed.
- The performance of your computer is choppy
- And more!
Click on the below helpful post to solve the text issues and save a ton of time and energy: