
If you’re a beginner or newcomer to DaVinci Resolve (versions 18.5, 18, 17, etc.), today’s guide will show you how to create outline for your image or video in the free version of Resolve (without Fusion!).
(Today’s post is part of the DaVinci Resolve Effects series.)
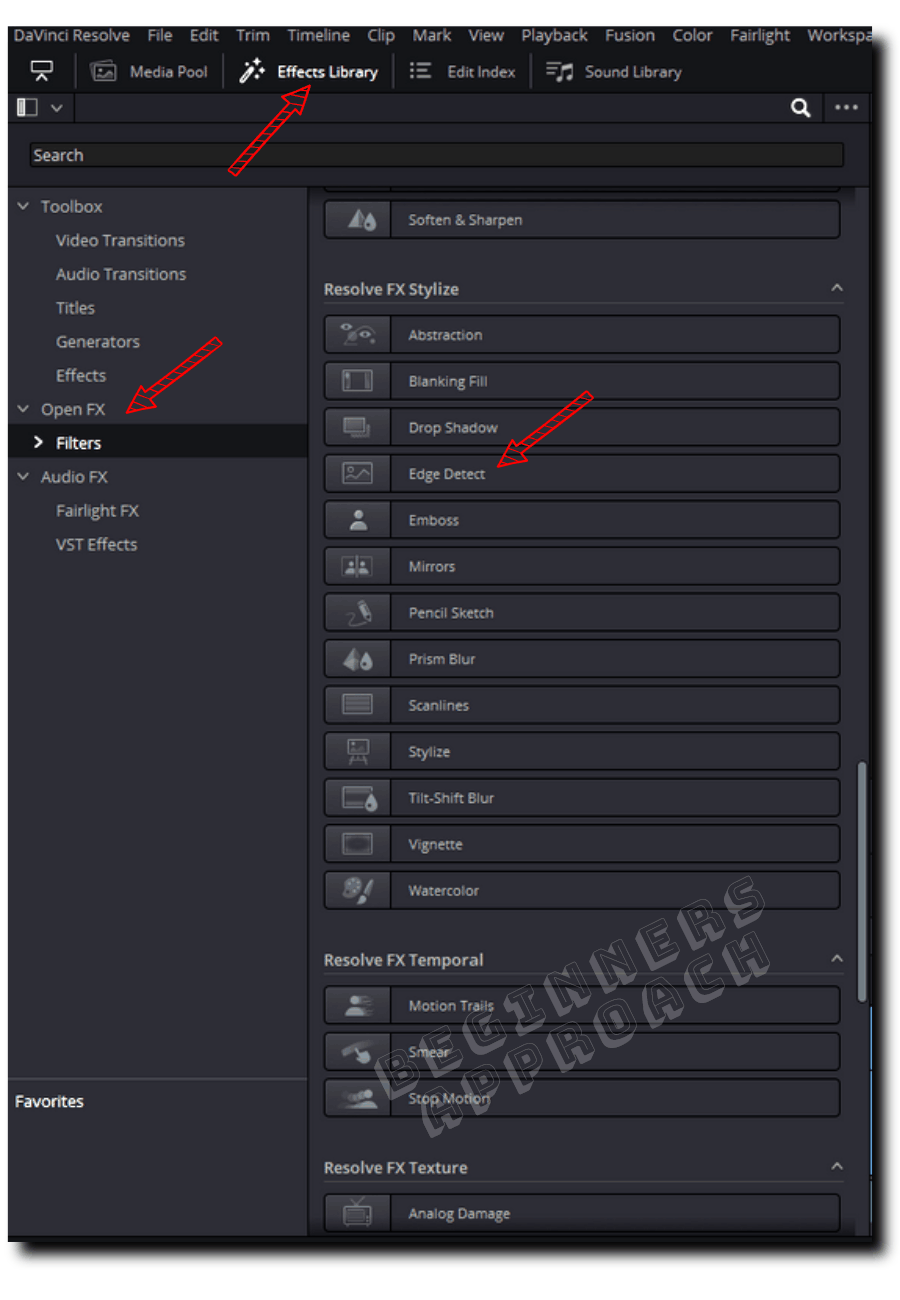
To make a video or image outline in DaVinci Resolve, go to the “Edit” page, then click on the “Effects ” tab. Click on “Open FX” > “Filters” > “Resolve FX Stylize” > “Edge Detect”. Drag and drop the “Edge Detect” on top of your video to achieve the outline effect.
This is how the outline effect would look like – for videos and images in Resolve. (In the video, first – only the outlines, then an actual video with the outline effect, then an image with the same effect).
How to Convert a Normal looking Video into Outlines and Edges in DaVinci Resolve?
- Create a new project (or open an already existing one).
- Under the “Edit” page, click on the “Media Pool” tab and import your footages by pressing “Ctrl + i” (or “Cmd + i”).
- Create a timeline and drop your video clips on it.
- Click your desired video clip in the timeline.
- Now click on the “Effects ” tab (next to the “Media Pool”).
- Click on “Open FX” > “Filters” > scroll down till you see “Resolve FX Stylize” > “Edge Detect”.
- (Alternatively, you can also click on the search bar and search for “Edge Detect”. If there are no results displayed, then make sure you click on the “Effects” button to see the effect listed in the search.)
- Now drag and drop this effect onto the video clip.
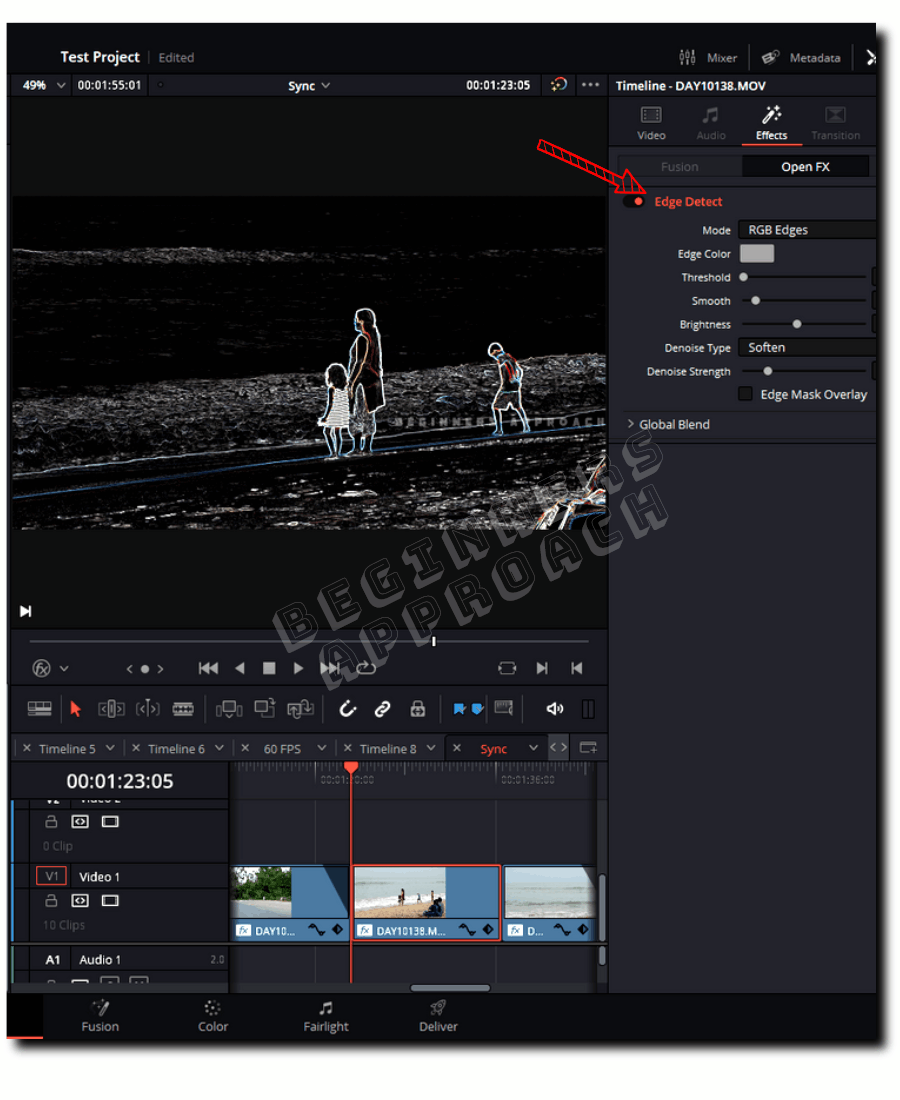
- The video is now instantly converted into an outline.
For further tweaking, click on the clip in the timeline and then click on the “Inspector” tab > “Effects” > “Open FX” > “Edge Detect”.
Click on the “Edge Detect” to reveal the settings.
You can change the mode to “RGB Edges” or “Grayscale Edges”. “Grayscale Edges” will display only the white and black information in your video.
“Edge Color” lets you select the color of the edge – change it to your taste. (“Edge color” will be enabled only for “Grayscale Edges” mode. It will be disabled for “RGB Edges” mode).
Change the “Threshold” value to increase or decrease the lightness levels or details of the outline in your video.
Change the “Smooth” values to soften your outlines or edges.
Change the “Brightness” to your taste.
Also, play with the “Denoise Type” and “Denoise Strength” till you get the desired look.
Keep in mind that the above steps were for converting your video into an outline-only look.
If you want to have the normal video but also need an outline, then the below steps will help you achieve that.
How to Create an Outline for Video in DaVinci Resolve Quickly?
- Under the “Edit” page, drop your video clip in to the timeline from the “Media Pool” .
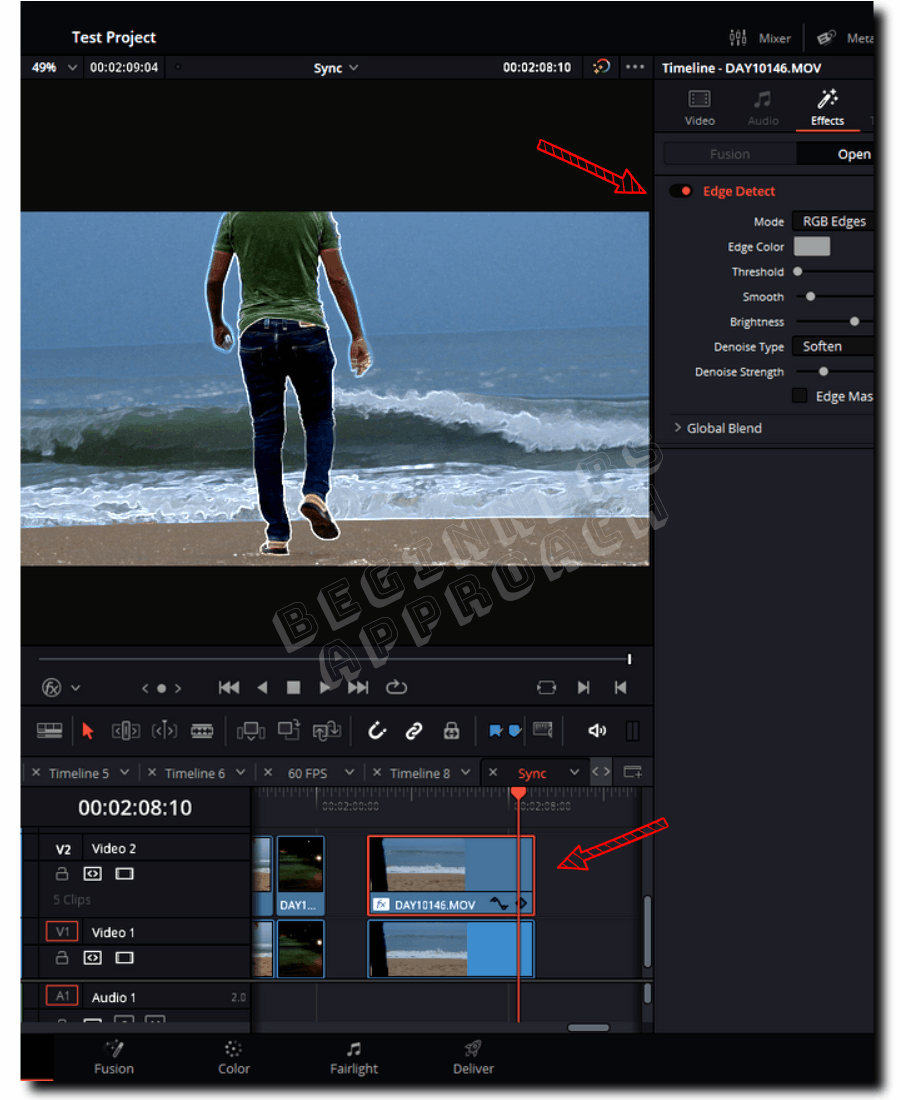
- Duplicate your clip by pressing “Alt” and then drag and drop the video on top of the same video (which results in a new video track being created).
- Select the duplicate clip (the top one).
- Go to the “Effects ” > “Open FX” > “Filters” > scroll down till you see “Resolve FX Stylize” > “Edge Detect”.
- Drop “Edge Detect” onto the duplicate clip in the timeline.
- Go to the “Inspector” tab > “Video” > scroll odwn to see the “Composite” mode.
- Select “Add” or “Screen” based on your taste.
- Now you should see outlines in your video.
To make the outlines bigger, you can alter the “Zoom” values. For a more trendy style, change the values of “Position X and Y” for a cool outline effect.
You can also further tweak the settings of the “Edge Detect” by going to the “Inspector” > “Effects” > “Open FX” > “Edge Detect”.
Change the values of the “Brightness” and “Softness” to see the difference.
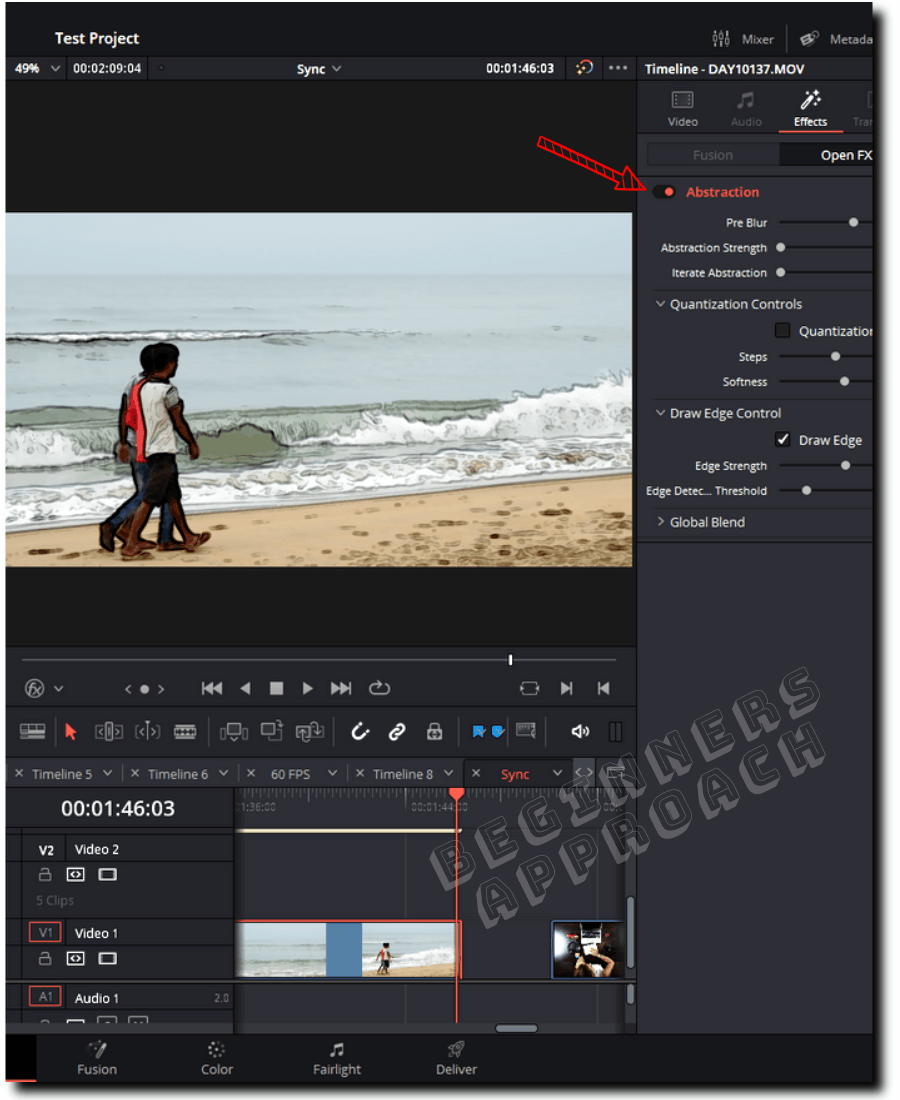
You can also use the “Abstraction” effect to create an outline but the effect is more geared towards mimicking a cartoon or comic look. The below is the look I am talking about.
How to Create an Outline for an Image in DaVinci Resolve?
- Under the “Edit” page, drop your image from the “Media Pool” in to the timeline.
- Duplicate your image by pressing “Alt” and then drag and drop the image on top of the same image while still holding the “Alt” key (which results in a new video track).
- Select the duplicate clip (the top one).
- Go to the “Effects” > “Open FX” > “Filters” > scroll down till you see “Resolve FX Stylize” > “Edge Detect”.
- Drop the “Edge Detect” onto the duplicate image in the timeline.
- Click on the duplicate image in the timeline and then go to the “Inspector” tab > “Video” > “Composite”.
- Select “Add” or “Screen” based on your taste.
- Now you should see outlines in your image.
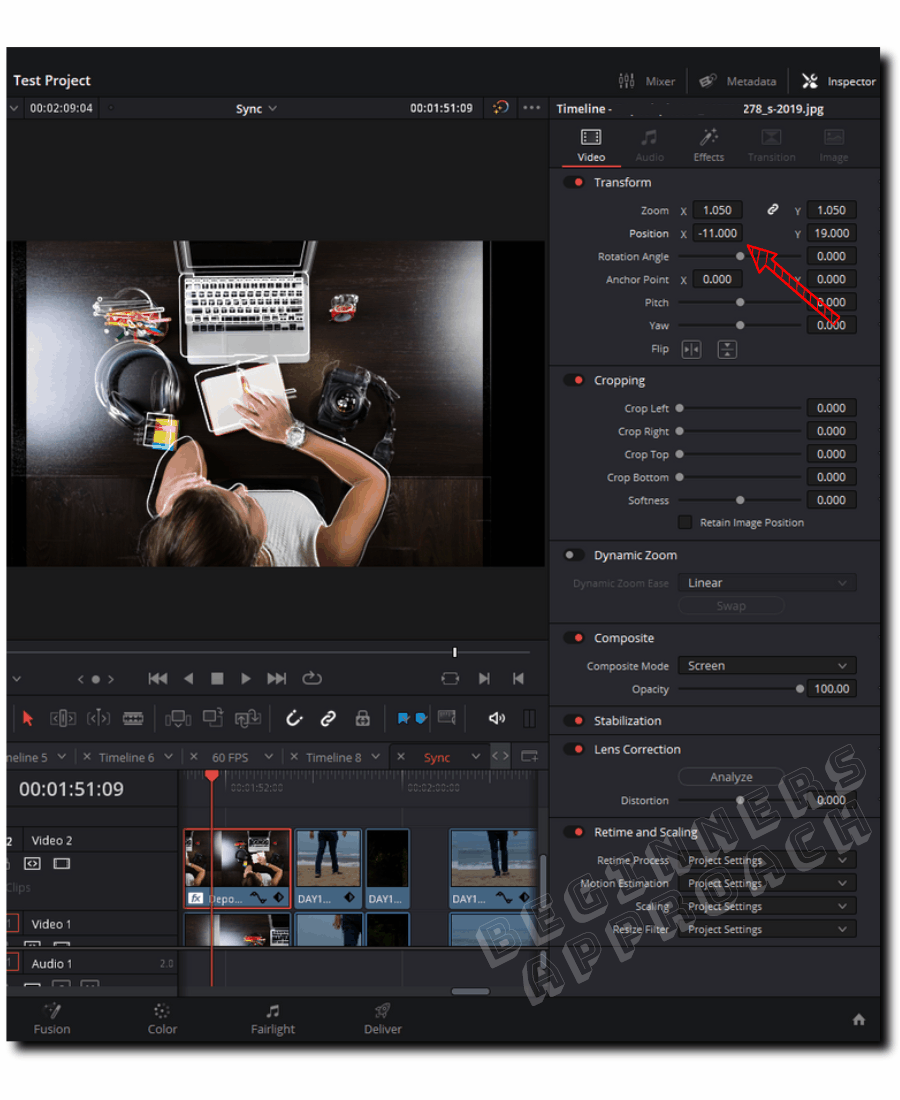
From the above image, you can see that I have altered the zoom values and Position X and Y to get the desired look.
You can also get your hands dirty and go crazy with the outline effect.
If you are interested in effects like these, which increase your production value, then you should also check out: