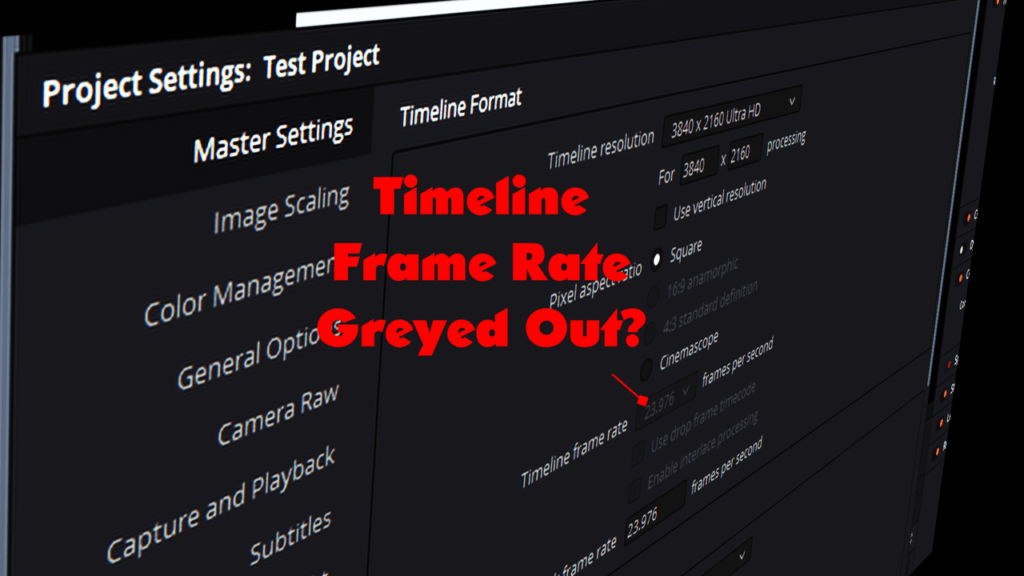
The timeline frame rate is greyed out (locked) once you import media into the media pool in a brand new project in DaVinci Resolve. Resolve will not let you change the frame rate directly once the clips are imported.
But you can change it indirectly.
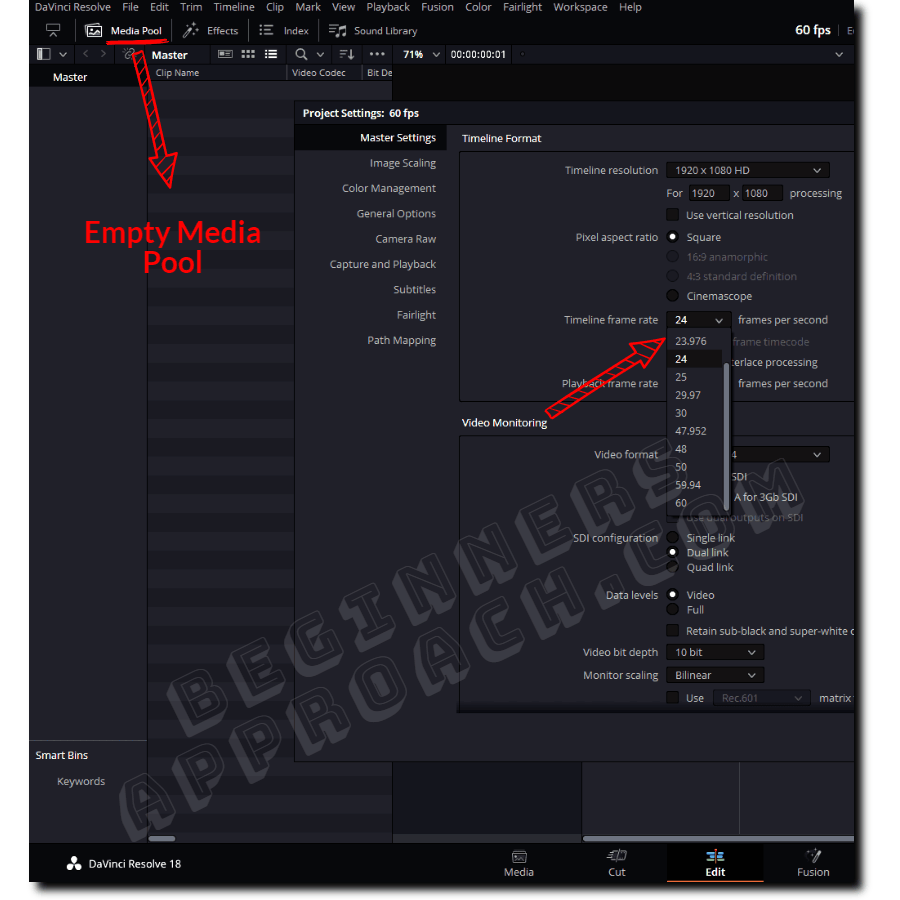
To fix the timeline frame rate greyed out issue, delete all the imported clips from the “Media Pool” under the “Edit” page. Then go to “Project Settings” > “Master Settings” > and set your desired “Timeline Frame Rate”. You can then import all the clips back into Resolve.
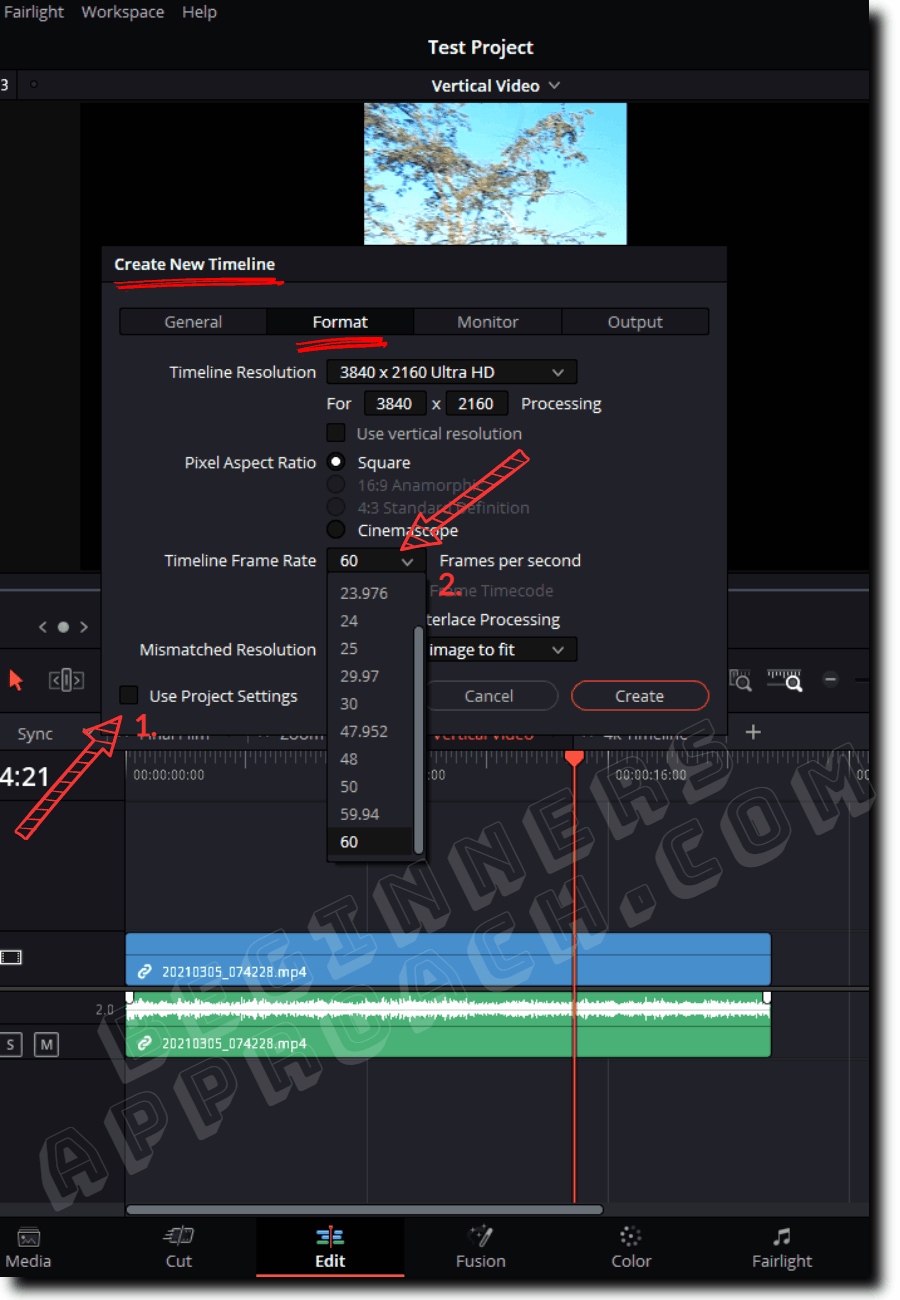
To fix the timeline frame rate locked out issue in the middle of editing, create a new timeline. Then, uncheck “Use Project Settings”. Click on the “Format” tab. Select your desired fps from the “Timeline Frame Rate” dropdown. Click on “Create”. A new timeline is created.
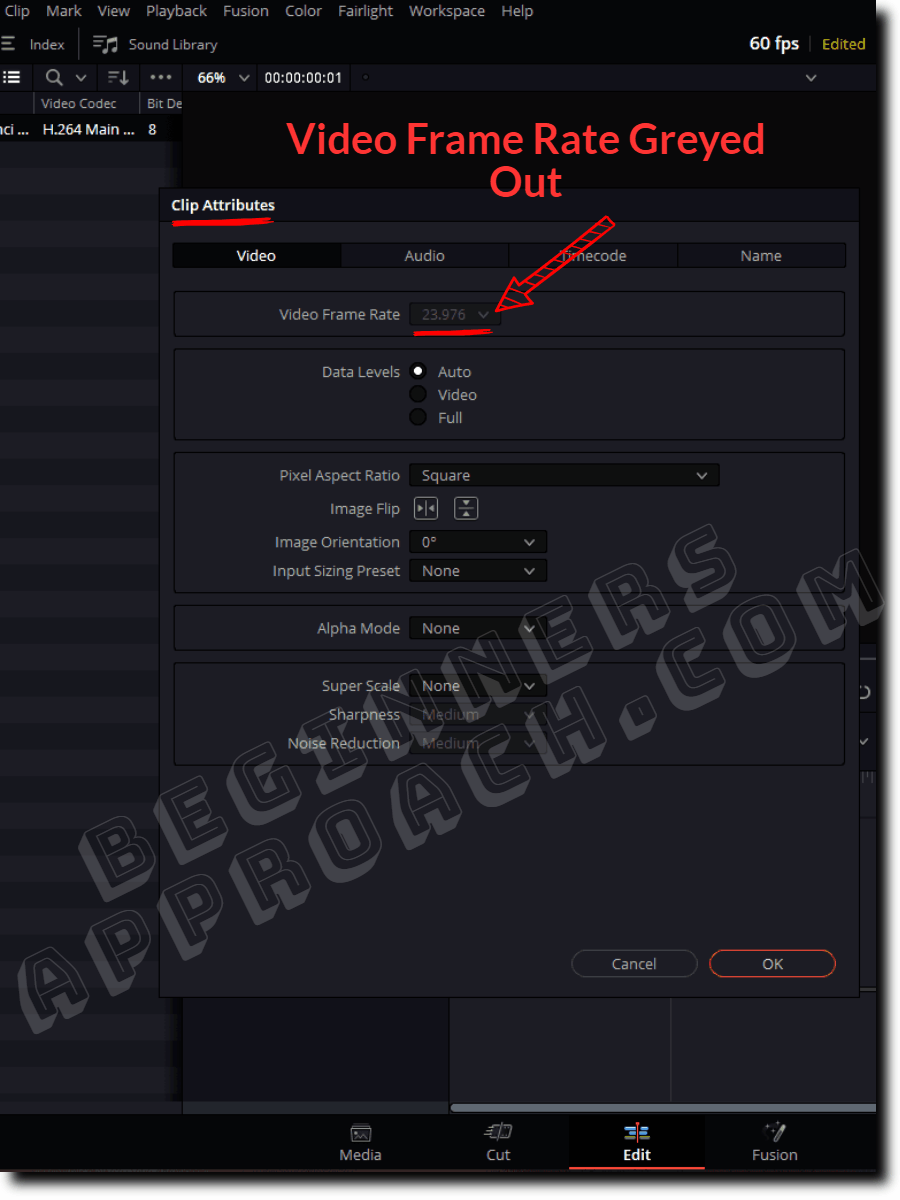
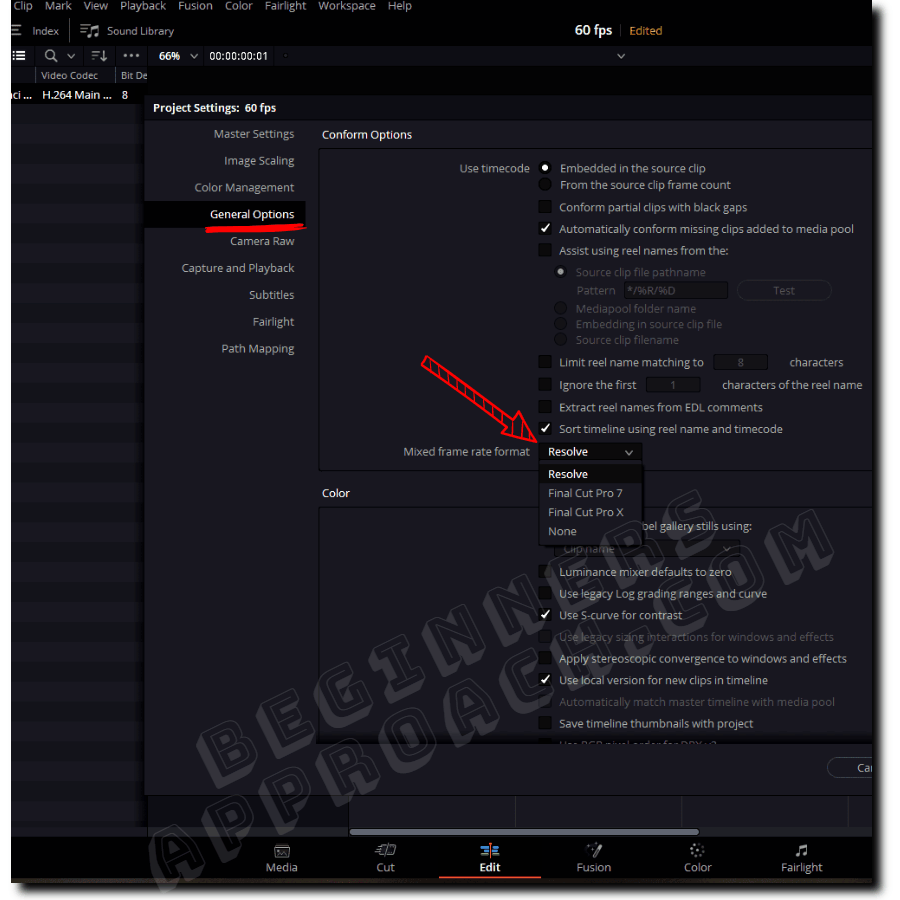
To fix the video frame rate greyed out issue in DaVinci Resolve, delete all the timelines from the “Media Pool”. Now go to the “Project Settings” > “General Options”. Choose “Resolve” from the “Mixed frame rate format”. Right-click on the clip. Select “Clip Attributes”. “Video Frame Rate” is now enabled.
To solve the “the selected clips have a different frame rate to the project” issue, clicking on “Change” updates the project timeline frame rate with the clip’s frame rate. Clicking on “Don’t change” doesn’t affect the project timeline frame rate. This is based on your requirements.
To fix the mixed frame rates issue in DaVinci Resolve, set the project timeline frame rate to a fps value based on the majority of the clips’ frame rate. If the majority of clips are shot in 24 fps and few in 60 and 120 fps. Then convert the 60 and 120 fps clips to 24 fps from the “Clip Attributes” settings.
To fix the variable frame rate issue in DaVinci Resolve, convert them to constant frame rate clips because Resolve doesn’t recognize variable frame rate clips. (More on that below).
Click here to learn in detail about changing frame rates in DaVinci Resolve.
- How to Fix Timeline Frame Rate Greyed Out Issue in Resolve?
- Fix for Timeline Frame Rate Locked Out Issue in the Middle of Editing in Resolve
- How to Fix Video Frame Rate Locked Out Issue in Resolve?
- Incoming Clips' Frame Rate Doesn't Match with the Project Timeline Frame Rate
- Mixed Frame Rates in DaVinci Resolve
- Variable Frame Rates in DaVinci Resolve

It’s very important that you know your target frame rate beforehand and set it accordingly.
How to Fix Timeline Frame Rate Greyed Out Issue in Resolve?
- First, go to the “Edit” page > “Media Pool” tab.
- Delete all the imported clips from the “Media Pool”.
- Go to “Project Settings” > “Master Settings”.
- Set your desired “Timeline Frame Rate” fps value.
- Then, import all the clips back into DaVinci Resolve. See the below image, which shows the timeline frame rate is no longer greyed out.
But if you’re in the middle of editing and would like to fix the frame rate locked out issue, then there is a workaround.
Create a new timeline, uncheck “Use Project Settings”, then set your required frame rate, and copy all the clips from your existing timeline to the new one.
Here’s the step-by-step way to do with pictures:
Fix for Timeline Frame Rate Locked Out Issue in the Middle of Editing in Resolve
- Under the “Edit” page, click on the “Media Pool” tab.
- Go to the menu “File” > “New Timeline” (the shortcut for the new timeline is “Ctrl + n” or “Cmd + n”).
- Uncheck “Use Project Settings“. This will reveal different tabs like “General”, “Format”, “Monitor”, “Output”, etc.
- Click on “Format“.
- Select your desired fps from the “Timeline Frame Rate” dropdown.
- Click on “Create“.
- An empty timeline is created.
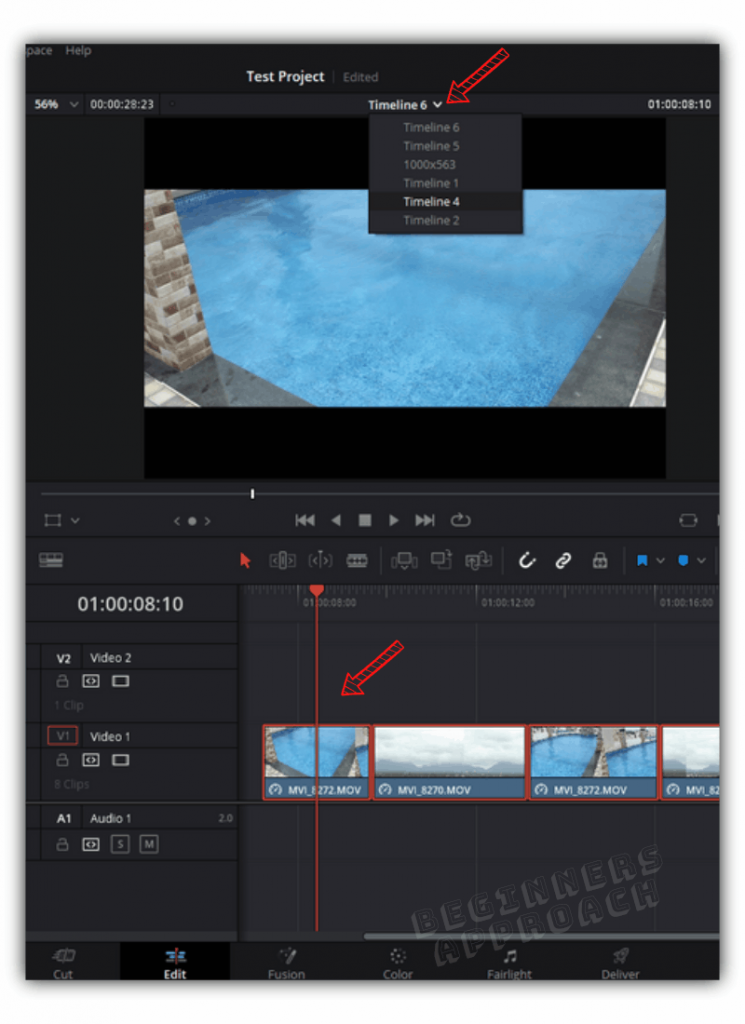
- Now go back to your timeline with all the edits using the dropdown from the top of the timeline viewer.
- Copy all the clips by pressing “Ctrl + a” or “Cmd + a”.
- Go to the new timeline by selecting it from the timeline viewer dropdown.
- Press “Ctrl + v” or “Cmd + v”.
- All the clips will now be copied with your new frame rate to the new timeline!
The above image shows the timeline frame rate being enabled after creating a new timeline.
Keep in mind that the new frame rate is only applicable to this particular timeline.
Any new timeline created will still follow the project timeline frame rate unless you uncheck the project settings manually, as discussed above.
Related Article:
How to Fix Video Frame Rate Locked Out Issue in Resolve?
- Go to the “Edit” page > “Media Pool”.
- Delete all the timelines. (There should be no timeline).
- Now go to the “Project Settings” (click on the bottom right corner gear icon).
- Click on “General Options”.
- Choose “Resolve” from the “Mixed frame rate format”.
- Click “Save”.
- Then right-click on the clip.
- Select “Clip Attributes”.
- “Video Frame Rate” is now enabled, as shown in the below image.
The “Clip Attributes” reveal the properties of a clip.
Once you update the frame rate, Resolve will re-interpret the clip with the new frame rate.
When you change the frame rate of a clip, keep in mind:
- The duration of the clip might change.
- The audio of the clip will not be affected. This means that if you change the frame rate, the duration of the video may change, but the audio duration remains the same (which might cause out-of-sync issues).
Incoming Clips’ Frame Rate Doesn’t Match with the Project Timeline Frame Rate
After creating a new project, when you import a clip with a different frame rate (other than the one defined in the project timeline frame rate from “Master Settings” under “Project Settings”) into Resolve, you’ll get a warning:
“The selected clips have a different frame rate to the project. Would you like to change your timeline frame rate to match? You can’t undo this action.”, as shown in the below image.
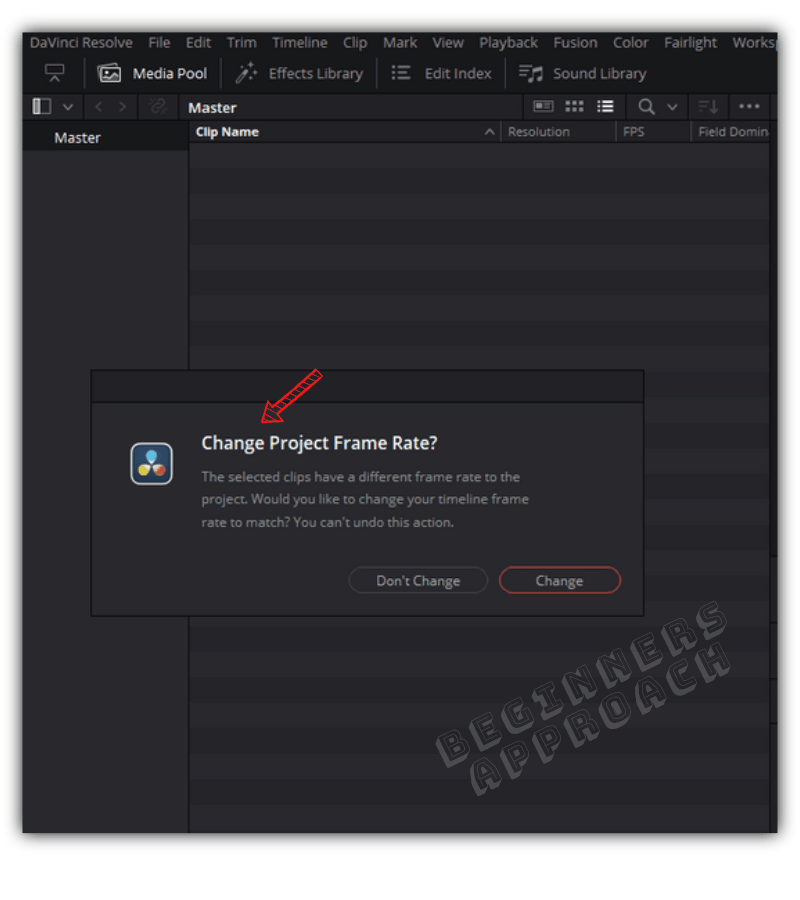
Clicking on “Change” will update the project timeline frame rate with the clip’s frame rate.
Clicking on “Don’t change” will not affect the project timeline frame rate.
If you are sure and would like to have the clip’s frame rate for your final delivery, then click on “Change”. Once done, your frame rate will be locked and greyed out.
Even if you import clips with different frame rates, you won’t get this warning again. These clips will be conformed to the frame rate chosen earlier.
Mixed Frame Rates in DaVinci Resolve
When you have footage shot at different frame rates like 24 fps, 60 fps, 120 fps, etc, there are many questions that need to be answered, like which frame rate to choose for the timeline, which frame rates need to be converted, etc.
Which Timeline Frame Rate to Choose When There Are Mixed Frame Rates in DaVinci Resolve?
- Go to the “Media Pool“. Import all of your clips.
- Click the “List View“. Scroll to the right till you see the “FPS” column.
- Click on the “FPS” header to sort the column in ascending or descending order.
If the majority of your clips are in 24 fps, and you want the final render to be in 24 fps, then you should set the project timeline frame rate to 24 fps.
Import all the clips with different frame rates into the media pool.
Now you need to make a decision about what to do with 60 and 120 fps footage.
If you place them in the timeline, they might not play back the way you intended.
Most probably, you shot them in higher frame rates (60 and 120) for a stylistic slow-motion effect.
If this is the case, then you’ll have to change the 60 and 120 fps clips to 24 fps through the “Clip Attribute” settings (as discussed above).
Now when you place them in the timeline, they play back in 24 fps which will result in buttery smooth slow motion!
Variable Frame Rates in DaVinci Resolve
DaVinci Resolve doesn’t support variable frame rate footage.
Variable frame rate footage is shot by smartphones and screen recording software like OBS Studio.
When you try to import these clips, either Resolve will show a media offline error or cause audio sync issues.
Read this post, “6 Ways to Fix DaVinci Resolve Media Offline Issue“, on how to convert variable frame rate footage into constant frame rate.