Beginners and newcomers to DaVinci Resolve (versions 18.5, 18, 17, etc.), often find it challenging during blurring a face. Actually, it’s simple in Resolve.
To blur the face in DaVinci Resolve, first, go to the “Color” page. Create a window (or mask) to isolate the face from the rest of the video. Then track it. Drag and drop the Mosaic blur effect on the node containing the power window. The face is blurred.
Let’s explore the blurring of the face in DaVinci Resolve in detail – step-by-step with pictures.
How to Blur Face in DaVinci Resolve?
#1. Isolate the Face using the Window Tool
- Import the desired video into the “Media Pool” on the “Edit” page and place it on the timeline.
- Go to the “Color” page.
- Add a serial node (Under “Nodes“, right-click on the first node and select “Add Node” > “Add Serial“). This step is optional.
- Click on the “Window” button beneath the viewer.
- Click on the “Square” tool (see screenshot below).
- Draw it around the face. Do some minor changes to fit the face correctly.
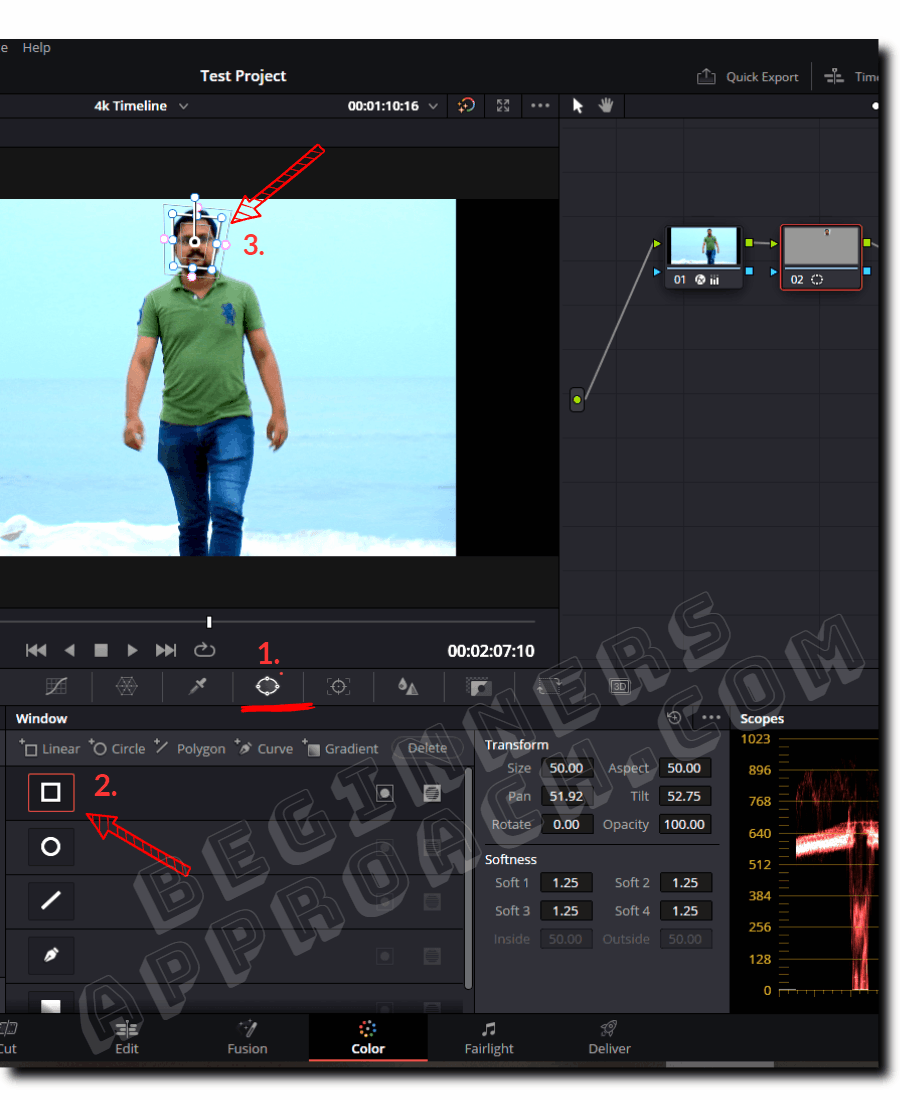
- Please note that you must touch the start and endpoint to close the drawing.
- Click on the “Highlight” button (which looks like a wand) to clearly see the isolated areas.
- For further fine-tuning, adjust the settings under “Softness” within the “Window” section, like “Inside”, or “Outside”.
- Make sure, you get the isolation right here.
If needed, click on the “Qualifier” tool to isolate using hue, saturation, and luminance (also called HSL qualification).
HSL qualification is usually applied to isolate the sky, ocean, green pasture, etc. Use this tool, if necessary.
Related Articles:
#2. Track the Moving Face
- Click on the “Tracker” button next to the “Window” button.
- Make sure “Window” is selected from the dropdown.
- Click on the “Track Forward and Reverse” button to track the face in the entire video clip. See the screenshot below.
- After tracking, make sure the face is properly covered using the window from start to finish.
- If the automatic tracking doesn’t properly do the job, then click on “Frame” (next to the “Clip” tab), and use the left/right arrow keys to move frame by frame and re-adjust the window manually.
- Every time you re-adjust the window in “Frame” mode, Resolve will place a keyframe to record your change.
- Re-adjust manually till you feel the window covers the face properly from the start of the clip to the end.
#3. Drop the Mosaic Blur Effect on the Node
- Click on the “Effects” tab next to the “Nodes” (known as “OpenFX” in the earlier versions of Resolve).
- Under “Resolve FX Blur“, click on the “Mosaic Blur”, then drag & drop it on the node containing the face window (or mask).
- The face is now blurred.
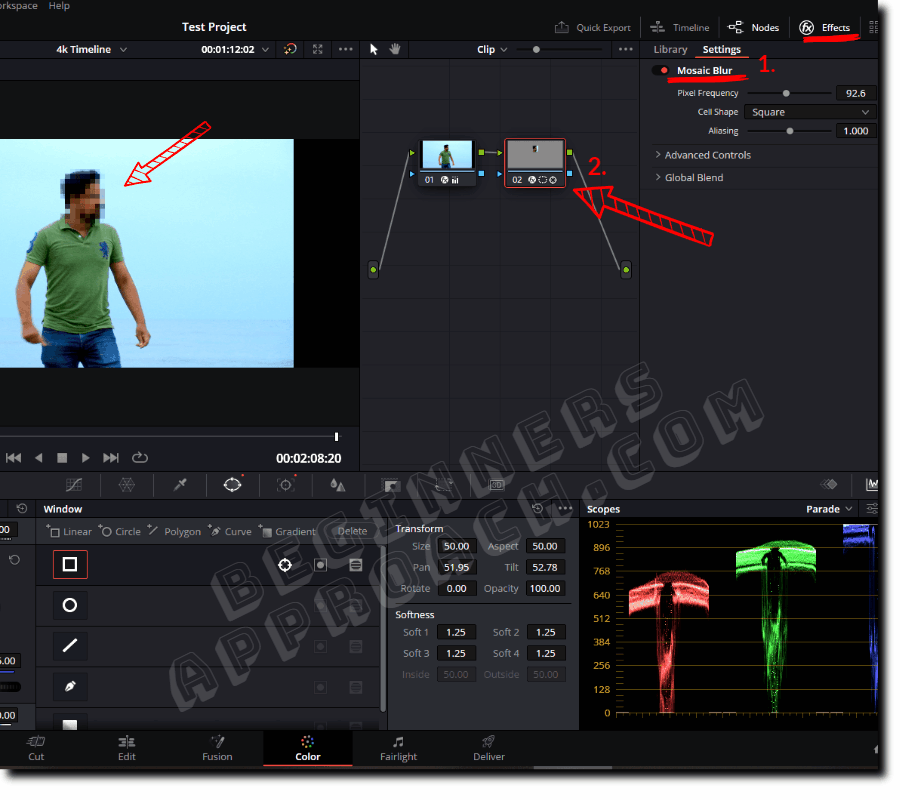
- Under the “Settings” tab of the Mosaic blur, adjust the “Pixel Frequency“‘ till you get the desired blur.
- You can also select different options for the border under “Advanced Controls“.
- Play with all the settings till your background is blurred to your taste.
Few Things to note:
- If you feel that the face is not as blurred as expected, you need to make sure the window isolation is accurately done. As already discussed, you need to fine-tune the “Softness” settings to cleanly isolate face from the rest of the video.
- (If you used a “Qualifier” selection like HSL or 3d to isolate, make sure you fine-tune the selection under the “Matte Finesse” section.)
- Also, make sure, the tracking is done perfectly. Use “Frame” if needed, to manually re-adjust the window so that it accurately covers the face and isolates it perfectly.
- With a little bit of trial and error, you should get better at it.