If you’re a beginner or a newcomer to DaVinci Resolve, adding motion blur is definitely one of your editing requirements (in versions 18.5, 18, 17, etc.).
DaVinci Resolve free version doesn’t support the motion blur feature available on the “Color” page. This is only for the paid version (Studio). But you can still do motion blurring for free on the “Fusion” page.
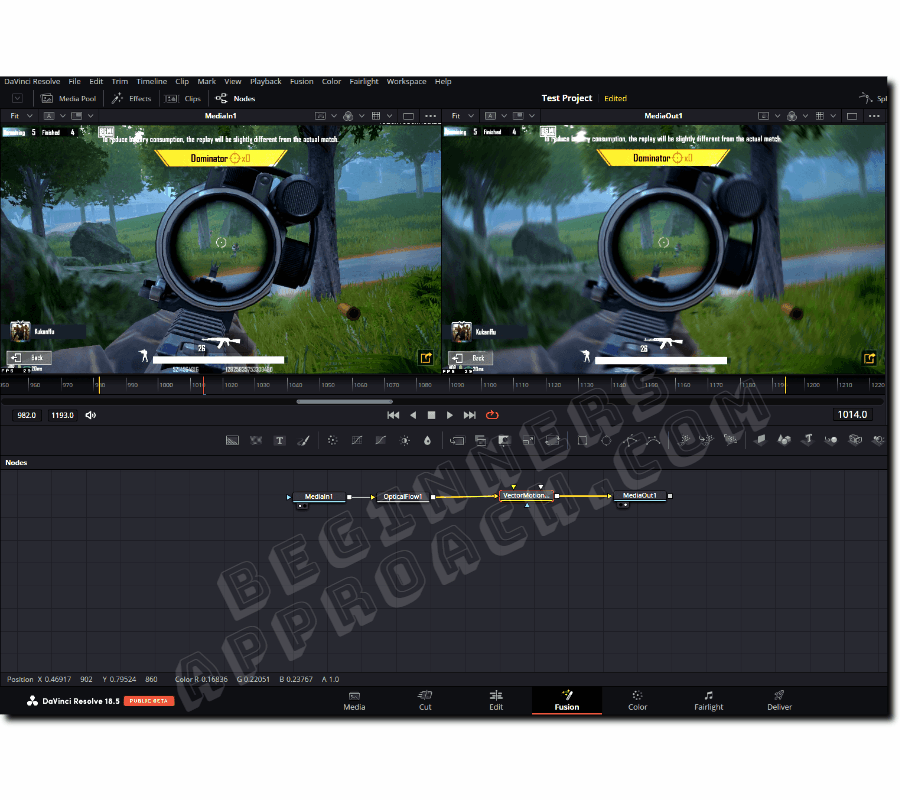
To add motion blur in DaVinci Resolve free version, go to the “Fusion” page. First, add the “Optical Flow” node and then add the “Vector Motion Blur” node between the “MediaIn” and “MediaOut” nodes. Adjust the scale in “Vector Motion Blur” to get the desired motion blur.
The 2 extra steps are = going to the “Fusion” page and adding 2 nodes to achieve the motion blur.
Motion blur is a natural blurring of the video based on the movement of the subject or the camera. The motion trailing effect adds natural blur to videos mimicking the motion of a camera or the movement of a subject.
This motion effect is added during the post to enhance – games that are screen recorded or for videos to give them a natural blend of a blur.
Let’s explore the motion blur in the free version of Resolve in detail – step-by-step with pictures.
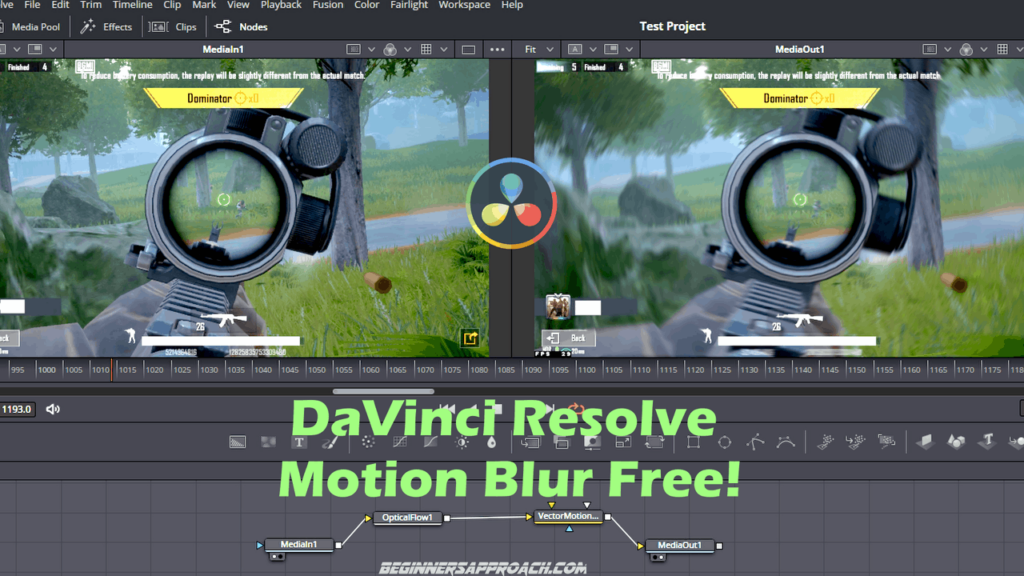
How to Add Motion Blur in DaVinci Resolve Free Version?
- Under the “Edit” page, select and place the playhead on your desired footage that needs a motion blur effect.
- Click on the “Fusion” page.
- The “Nodes” area will have only 2 default nodes – “MediaIn1″ and “MediaOut1“.
- Press the “Shift + Space” shortcut key to bring up the “Select tool” pop-up.
- Type “Optical Flow” in the search box, select “Optical Flow” from the result, and click on “Add”.
- Press the “Shift + Space” shortcut key to bring up the “Select tool” pop-up.
- Type “Vector motion” in the search box, select “Vector Motion Blur” from the result and click on “Add“.
- “Optical Flow” and “Vector Motion Blur” will automatically connect themselves end to end. If not, try to connect them as shown in the image.

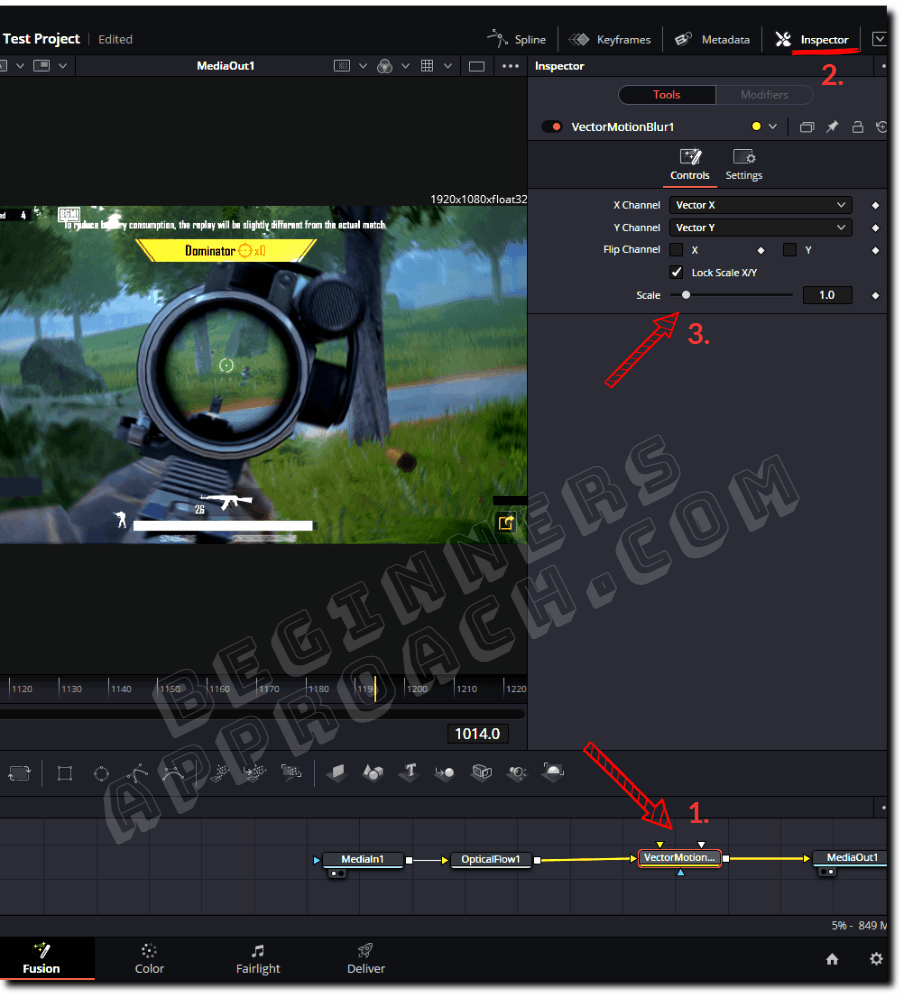
- Click on the “VectorMotionBlur1” node, then click on the “Inspector” tab to reveal the settings of vector motion blur.
- Adjust the “Scale” value to say 3 or 4 (or any value you like) to see the motion blur of your taste.
- Play with other settings till you get the desired motion blur.
- Similarly, click on the “OpticalFlow1” node to reveal its settings under “Inspector”.
- Play with “Advanced Control” like “smoothness”, and “iteration count” till you get a good motion blur.
- There you go!
DaVinci Resolve Motion Blur Free Version Features Explained
- The “Optical Flow” node calculates the motion of a clip and stores the data in a vector channel.
- This vector channel can be used along with the “Vector Motion Blur” and “Vector Distort” tools.
- The “Vector Motion Blur” tool applies “blur” in the direction of the velocity inside the clip.
- When you use “Optical Flow” and the “Vector Motion blur” (or “Optical Flow” and the “Vector Distort”) it results in a motion blur effect.
Optical Flow and Vector Motion Blur – Strains Your Computer
Motion blur involves a lot of complex computations and calculations. The motion blur fusion effects put a red line on top of the clip on the “Edit” page (if you’re rende caching).
So the real-time playback will take a hit. You’ll have to wait till the red line turns blue (render process) – for smooth playback. I highly recommend the below detailed guide for achieving smooth playback when you throw computationally intensive effects:
Motion Blur Render/Export Takes a Lot Of Time
When you do a final render or export of the motion blur, it takes a long time because of the complex computation involved. But once it’s rendered out, you’ll get a smooth motion blur in your video.
How to Add Motion Blur in DaVinci Resolve Studio?
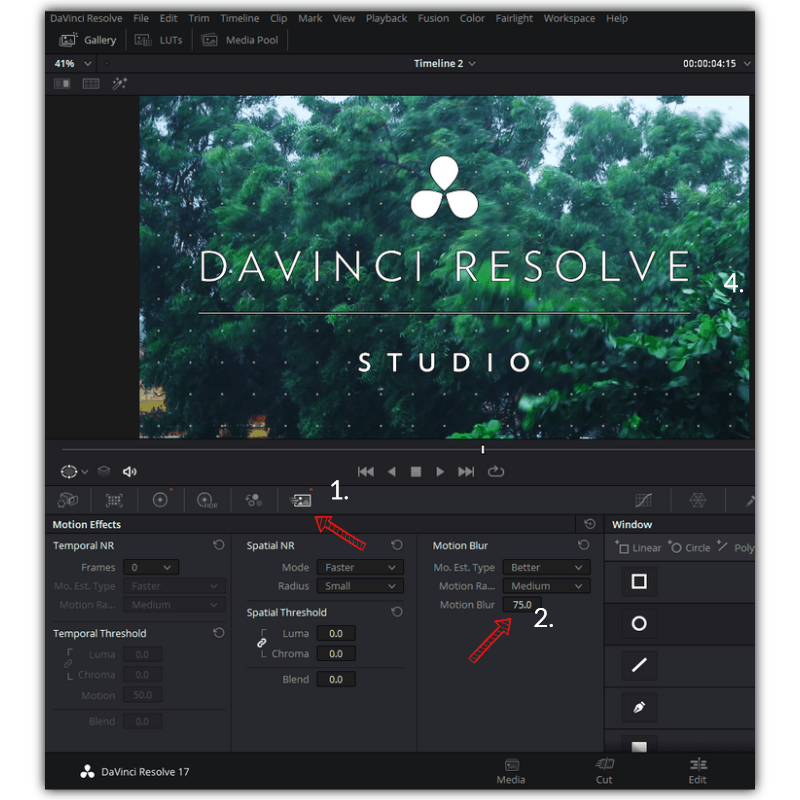
- Go to the “Color” page.
- Click on the “Motion Effects” button below the viewer.
- Under the “Motion Blur” section, there are 3 settings – “Motion Est. Type”, “Motion Range”, “Motion Blur”.
- Try to increase the value of “Motion Blur” whose range is 0 to 100, to see the actual blur.
- Choose “Better” for “Motion Est. Type” which gives accurate blur but is processor intensive. Or choose “Faster” for approximate blur which is not processor intensive.
- Play with other settings till you get the desired motion blur.
Note: If you have the Studio version, you won’t get a watermark.
Motion Blur Effect Under the “Effect” Tab
Though exclusive motion blur controls are part of the Studio version, you can still add motion blur by using Resolve FX “Transform” effect (available in versions 18.5, 18, 17, etc.).
(But it is not a substitute for the actual motion blur achieved in the “Fusion” page or the controls available On the “Color” page of the paid version).
The Resolve FX Transform effect has an in-built “Motion Blur” setting.
Changing the motion blur value to the maximum will not have any effect on your footage unless you keyframe the transform options like zoom, rotate, etc.
Yes, this is an additional step, and you will have to try it for yourself before making a call (if this Resolve FX Transform would fit your needs or not).
This is how you add motion blur to your footage using Resolve FX Transform:
- Under the “Edit” page, Import your footage inside Resolve and place it on the timeline.
- Click on “Effects Library“.
- Click on “Open FX“.
- Scroll down and select “Transform” under “Resolve FX Transform“.
- Drag & drop it onto the desired clip.
After adding the “Transform” effect, you need to keyframe the transform options to make use of the motion blur effect.
Increasing the value of motion blur from zero to the maximum won’t have any effect on the footage (if you don’t keyframe).
Don’t worry, we’ll see how to create keyframes – step by step.
BlackMagic says that in order to create a blurring effect, the frame should move rapidly.
Let me explain.
- Enable the zoom keyframe by clicking on the small diamond shape to the right so that it turns red.
- Insert a keyframe at the start of the clip by setting a zoom value, say, 1.5 (changing the zoom value will automatically place a keyframe).
- Then after a few frames, insert another keyframe by rapidly increasing the zoom value to the maximum value, say, 3.
- Now go to the “Advanced Options” and increase the “Motion blur” value to the maximum, say 1.
- Now when you play the clip, you will see motion blur during the zoom-in.
Similarly, you can get the blurring effect by keyframing other transform options like rotate, width, Position X, Y, etc.
One thing to keep in mind – make sure the frames move rapidly, that is, rapid zoom in / zoom out, rapid rotate, and rapid changing of Position X/Y – so that the blurring effect is prominent.
Related Article:
How to Add Motion Blur Transitions in DaVinci Resolve?
There are a few transitions in Resolve that have the “Motion Blur” parameter:
- Push
- Slide
- Barn Door
- Split Transitions
Let’s see how to add these transitions, which have motion blur parameters.
- Under the “Edit” page, import your clips.
- Place your clips end to end for a transition.
- Click on the “OpenFX” tab > “Transition” tab.
- Under “Motion“, select a transition like “Barn Door“. (Alternatively, you can also search the name in the search box at the top).
- Drag & drop it onto the boundaries of the clips.
- Click on the transition in the timeline.
- Now click on the “Inspector” tab -> “Transition” tab to reveal the settings.
- Increase the “Motion Blur” value till you get the desired motion blur look.
Simulate Motion Blur Effects in DaVinci Resolve
There are certain effects like “Radial Blur”, and “Zoom Blur” that simulate the look of motion blur.
Both “Radial Blur”, “Zoom Blur” can be accessed from the “Effects Library” under “Open FX” > “Resolve FX Blur”.
All you have to do is, drag and drop these blur effects onto the clip in the timeline.
Then go to the “Inspector” > “Effects” > “Open FX” tab and play with different settings like “Zoom Amount”, “Smooth Strength”, etc., to get your desired look.
DaVinci Resolve Motion Blur Plugin
One of the best 3rd party motion blur plugins is “Continuum Filter – Motion Blur” by Boris FX, which costs around $99. However, you can try the “Free Trial” and see if it is a good fit for you.
You can also check their YouTube videos to see the various settings inside this OFX plugin.