This is part of the DaVinci Resolve Export Audio series.
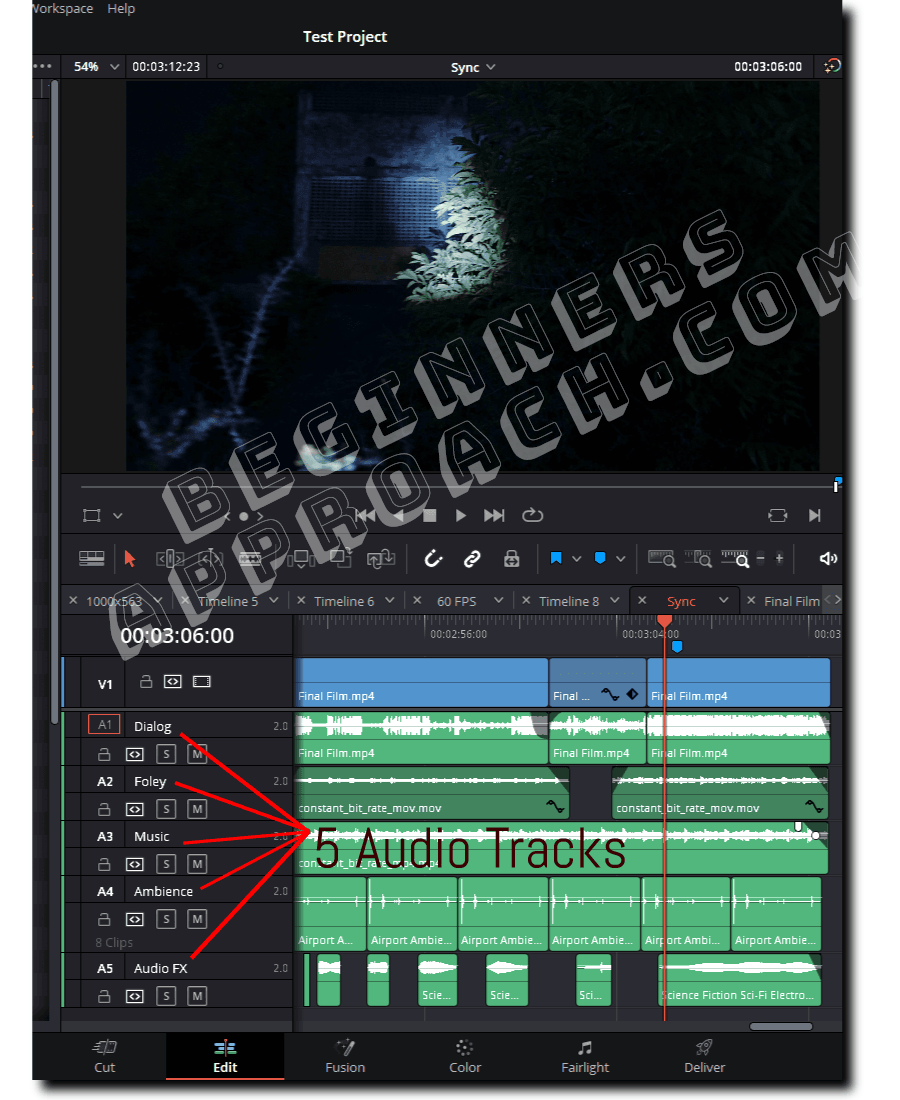
As a YouTuber or filmmaker, you might have multiple audio tracks in your timeline for:
- Voice Over / Dialog
- Foley sounds
- Music for background
- Ambiance
- Audio FX, etc.
So the next natural question is how to export the audio tracks individually, or only the selected ones, or all of them together.
Without wasting time, let’s dive right in!
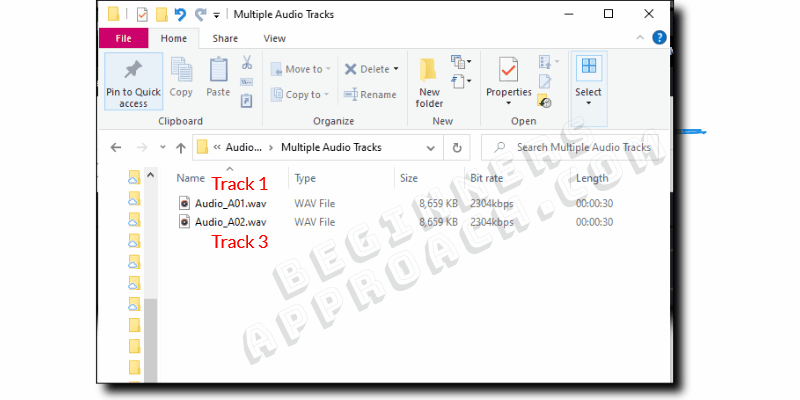
Suppose you need to export a select number of tracks, say track 1 – voice over/dialog, and track 3 – background music, for further processing.
You can do so in Resolve with this setting – “Output Track” on the “Deliver” page.
How to Export Multiple Audio Tracks in DaVinci Resolve Quickly?
- Go to the “Deliver” page after completing your audio editing and finishing.
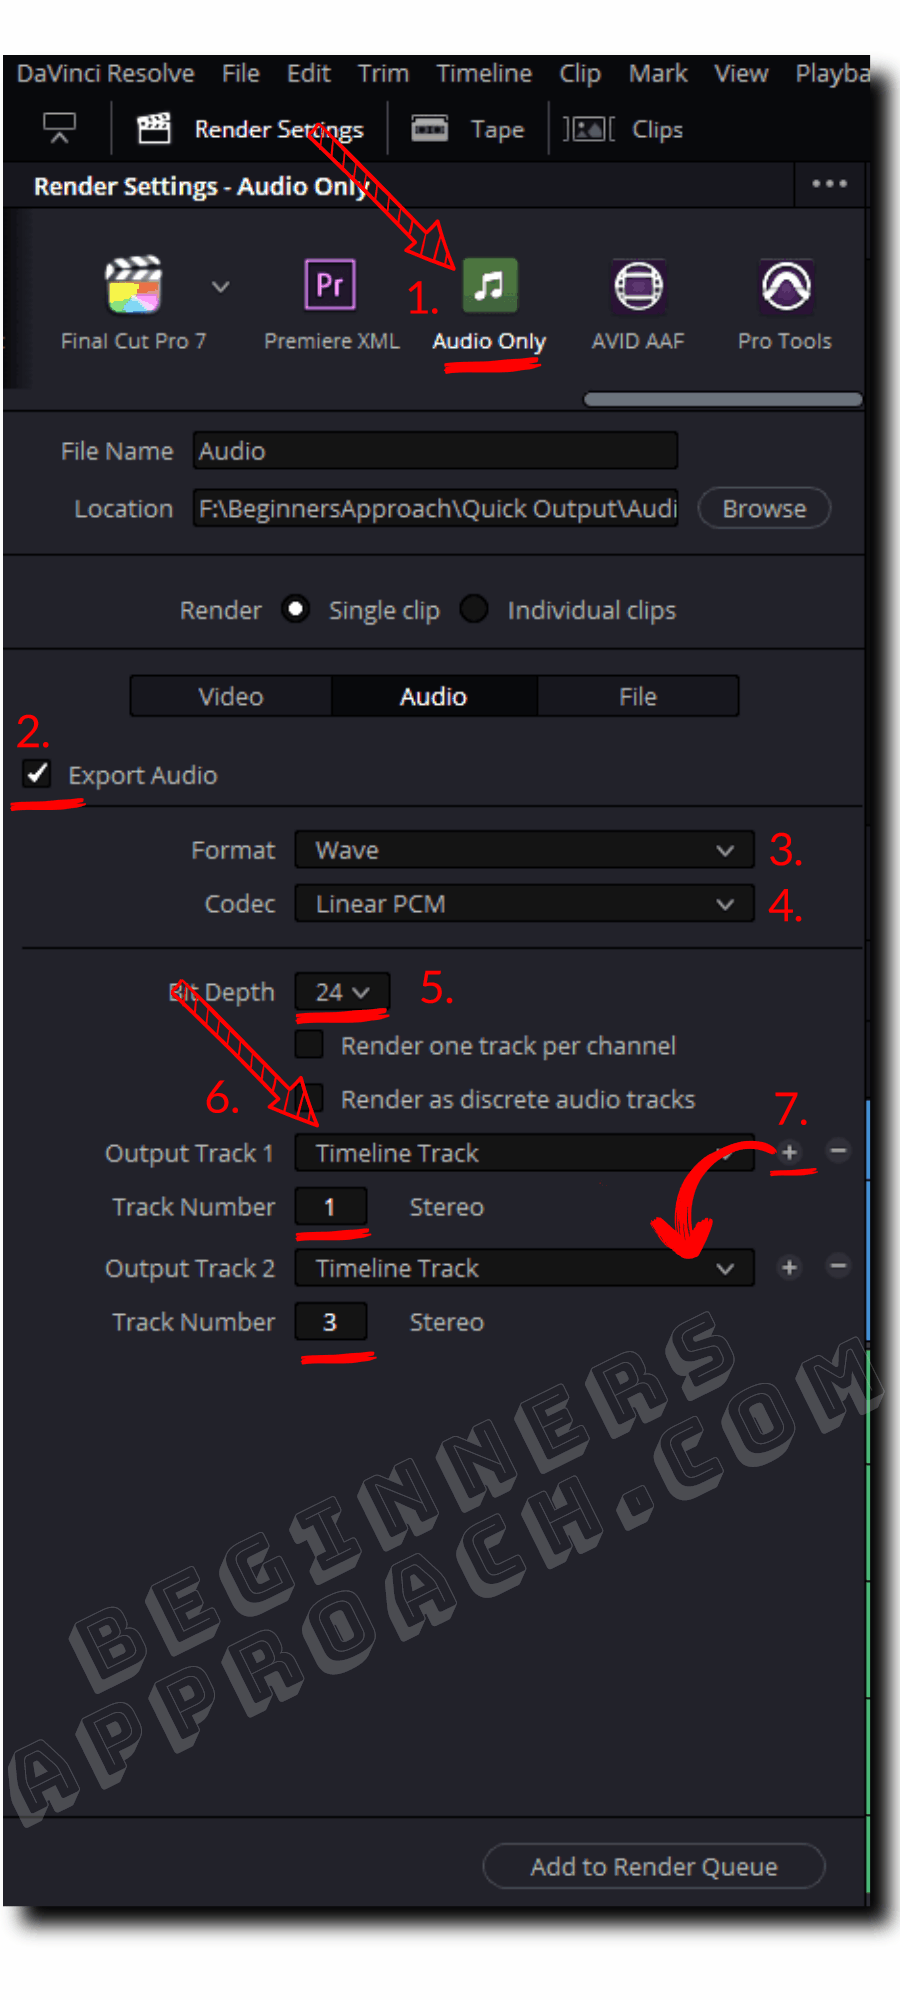
- Click on the “Audio Only” option under the “Render Settings“, after scrolling to the right.
- Click on the “Audio” tab and ensure the “Export Audio” checkbox is checked. (Click on the “Video” tab to make sure the “Export Video” checkbox is unchecked.)
- Choose “Wave” or “Mp3” under the “Format” dropdown. Let the codec be “Linear PCM” for “Wave“, and let the “Bit Depth” be “24” (even “16” is fine). (For Mp3, you can select only 32 bit).
- Set the “Output Track 1” to the “Timeline Track” from the dropdown.
- Enter your desired timeline track number, say, 1, that you want to be exported.
- Click on the “+” (plus) button to the right of “Output Track 1”, to add another output track for export.
- Set the “Output Track 2” to the “Timeline Track” and enter your next timeline track number, say, 3.
- Click on the “Add to Render Queue” button at the bottom.
- Then click on the “Render All” button on the right-hand side under the “Render Queue” section.
- The render will start, and two audio wav files will be exported.
- Similarly, you can add more timeline tracks by clicking on the plus button and getting them exported.
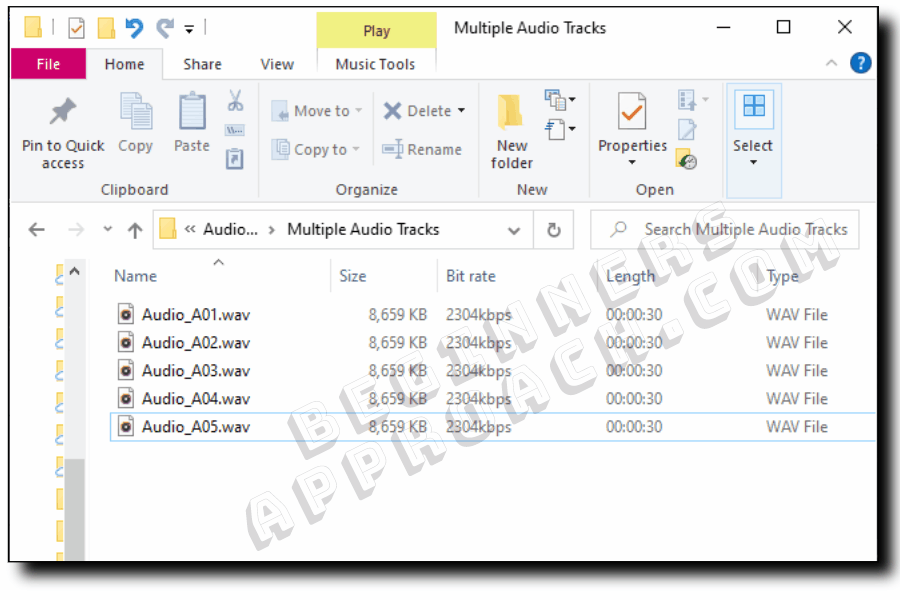
This is how the files look after I exported multiple audio tracks – track numbers 1 and 3:
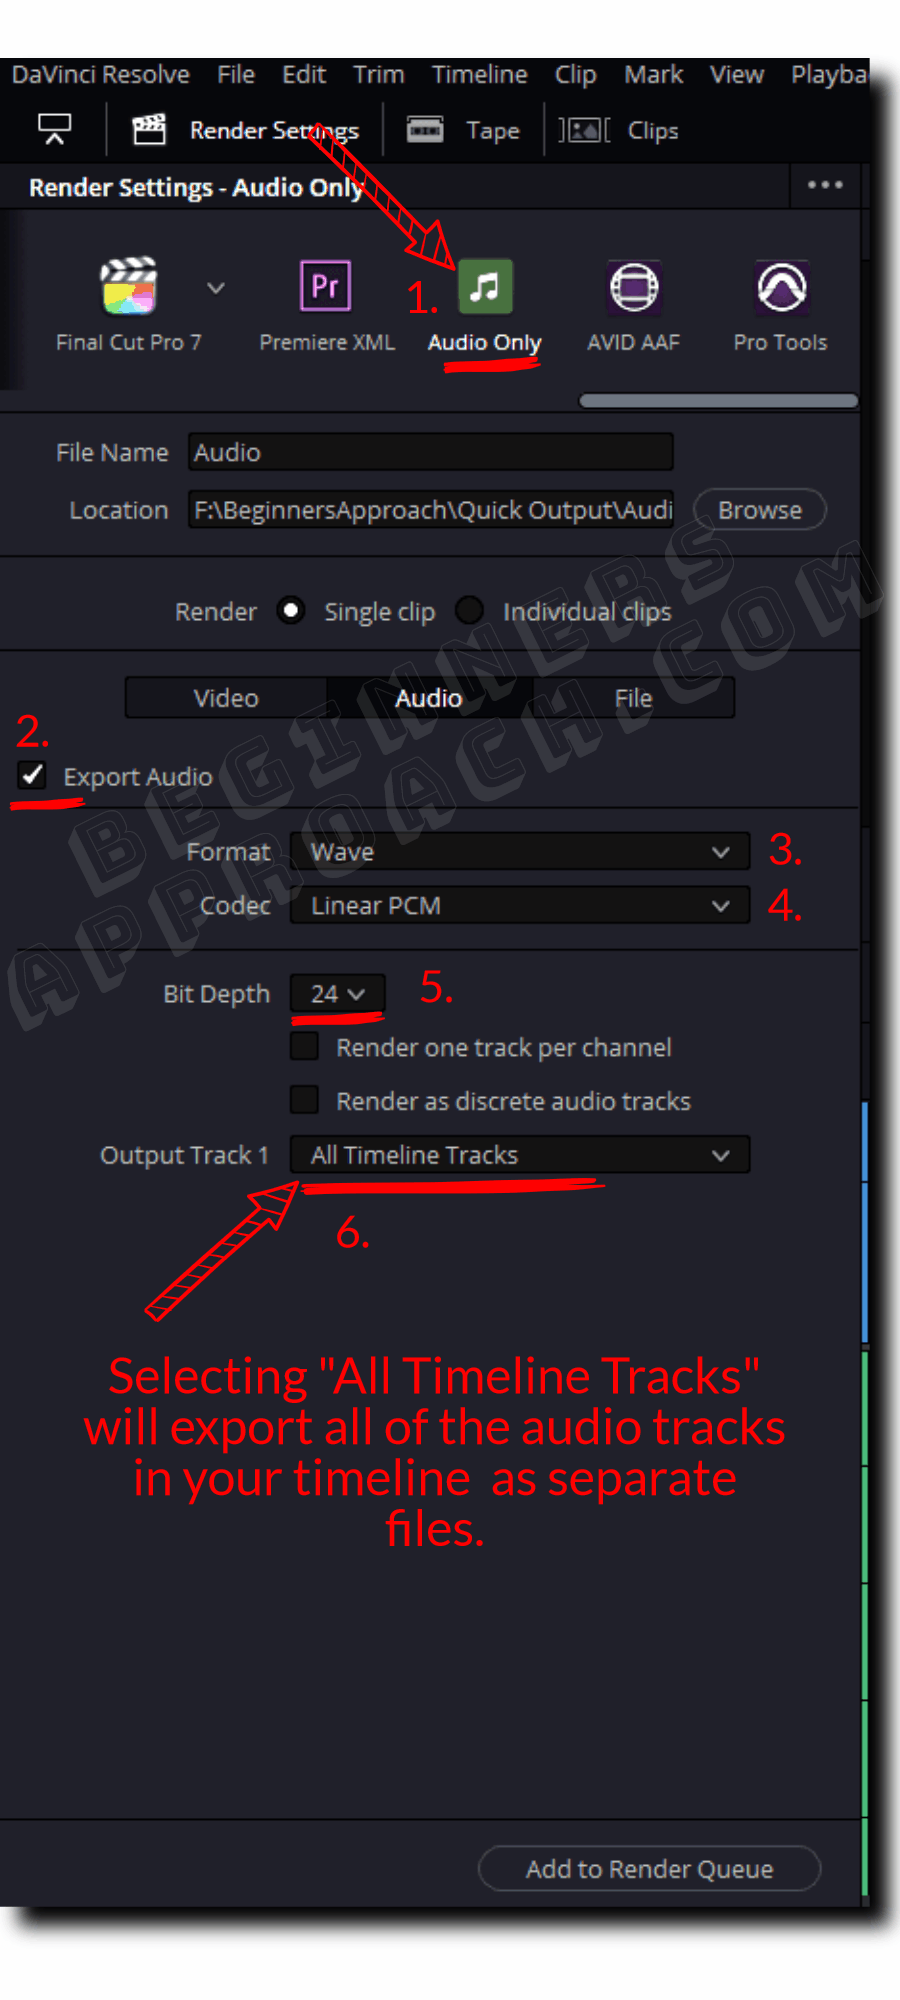
Sometimes you might need to export all of the audio tracks in your timeline as individual audio files – in one go.
Your work might require you to hand over all the timeline audio tracks to your client for further fine-tuning or processing.
Setting the “Output Track 1” to “All Timeline Tracks” will do your job.
Here’s the step-by-step way to do it:
How to Export All Timeline Tracks in DaVinci Resolve Quickly?
- First, go to the “Deliver” page after completing your audio editing and finishing.
- Next, click on the “Audio Only” option under the “Render Settings” (scroll to the right.)
- Click on the “Audio” tab and ensure the “Export Audio” checkbox is checked. (Click on the “Video” tab to make sure the “Export Video” checkbox is unchecked.)
- Choose “Wave” or “Mp3” under the “Format” dropdown. Let the codec be “Linear PCM” for “Wave” and let the “Bit Depth” be “24” (even “16” is fine). (For Mp3, you can select only 32 bit).
- Set the “Output Track 1” to the “All Timeline Tracks” from the dropdown.
- Click on the “Add to Render Queue” button at the bottom.
- Then click on the “Render All” button on the right-hand side under the “Render Queue” section.
- The render will start, and all timeline audio tracks will be exported as separate files.
I had totally 5 audio tracks in my timeline, and all of them were exported using “All Timeline Tracks”:
Export Only One Audio Track in DaVinci Resolve
To export only one track (among multiple tracks in the timeline), go to the “Deliver” page and select “Timeline Track” against “Output Track 1”. Then enter the exact audio track number. Next, click “Add to Render Queue” and “Render All”. Your single track will be exported.
Of course, you will have to set the audio format (say, Mp3), bit depth, etc., before starting the render. Refer to the above section for more details.
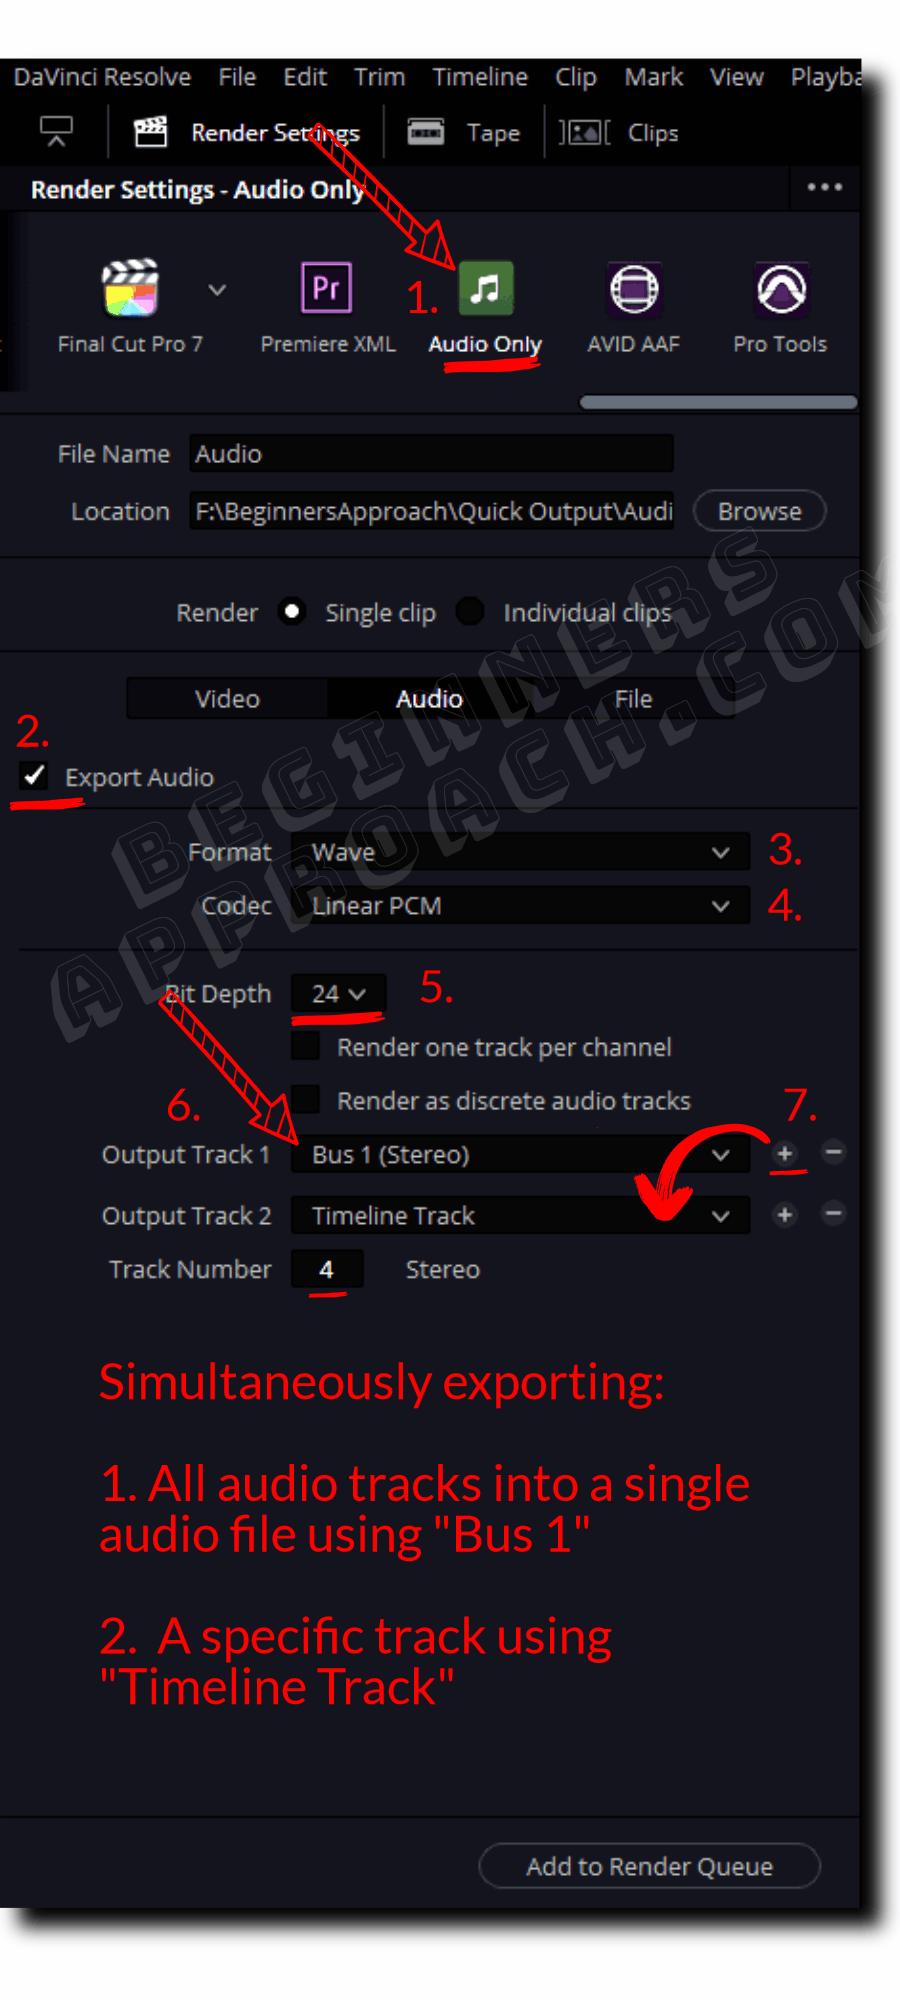
Exporting Multiple Audio Files in Resolve & Save Time!
When you choose either “Bus 1” or “Timeline Track” against “Output Track 1”, you get the option to add more output tracks using the “+” plus button.
You can do the following with this feature:
- “Output Track 1” – Set this to “Bus 1 (Stereo)” = This will export all of the multiple audio tracks into a single audio file. This is your master file.
- “Output Track 2” – Set this to “Timeline Track” and enter your desired track number to export.
- And so on…
You can see for yourself – this is a huge time saver!
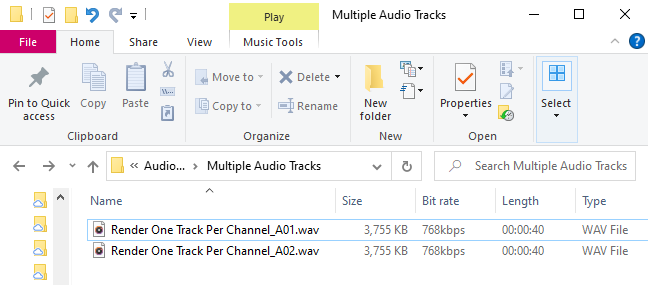
DaVinci Resolve – Render One Track per Channel
When you enable “Render One Track per Channel” in the “Deliver” page for audio-only export and then add to the render queue and start the render, you will get separate audio files for each channel. So, for example, if you export single stereo audio (having 2 channels), you will get 2 different audio files exported out (corresponding to each channel).