If you’re a beginner or newcomer to DaVinci Resolve (versions 18.5, 18, 17, etc.), today’s post will show you how to apply light rays effect (spotlight) in Resolve.
(This post is part of the DaVinci Resolve Effects series.)
To add lighting effects like light ray or spotlight, go to the “Edit” page. Then click on the “Effects ” tab. Click on “Open FX” > “Filters” > “Resolve FX Light” > “Light Rays”. Drag and drop this effect onto your video clip or image for a lighting effect.
You can make your light sources (like sun, artificial lights, etc.) throw their rays – thereby making your footage look cool and believable.
Let’s explore the lighting effects in DaVinci Resolve free version, in detail – step-by-step with pictures.
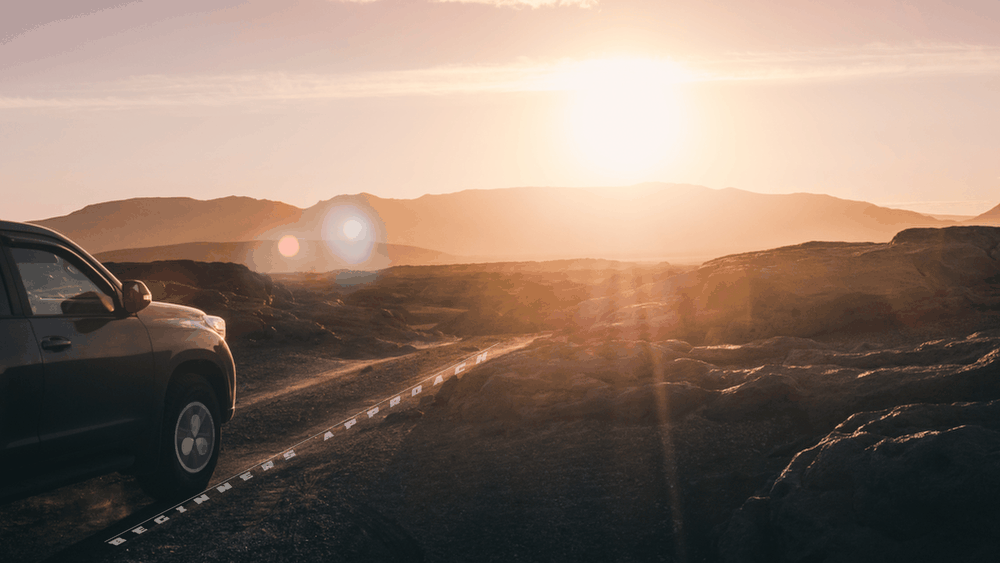
This is how the video will look with the light rays effect applied, followed by a short tutorial to achieve the look!
You will see three types of shots – static shot, moving shot without tracking, and another moving shot with tracking in the video.
How to Make Light Rays Effect in DaVinci Resolve Quickly?
- Create a new project (or open an already existing one).
- Under the “Edit” page, click on the “Media Pool” tab from the top left corner.
- Then import your footages by pressing “Ctrl + i” (or “Cmd + i”). Or alternatively go to the “File” > “Import” > “Media”
- Create a timeline (if not already) and drop your video clips on it.
- Click your desired video clip in the timeline. (This step is crucial because, while adding effects the right clip needs to be selected, or accidentally you might end up adding effects to the wrong clip)
- Now click on the “Effects ” tab (next to the “Media Pool”).
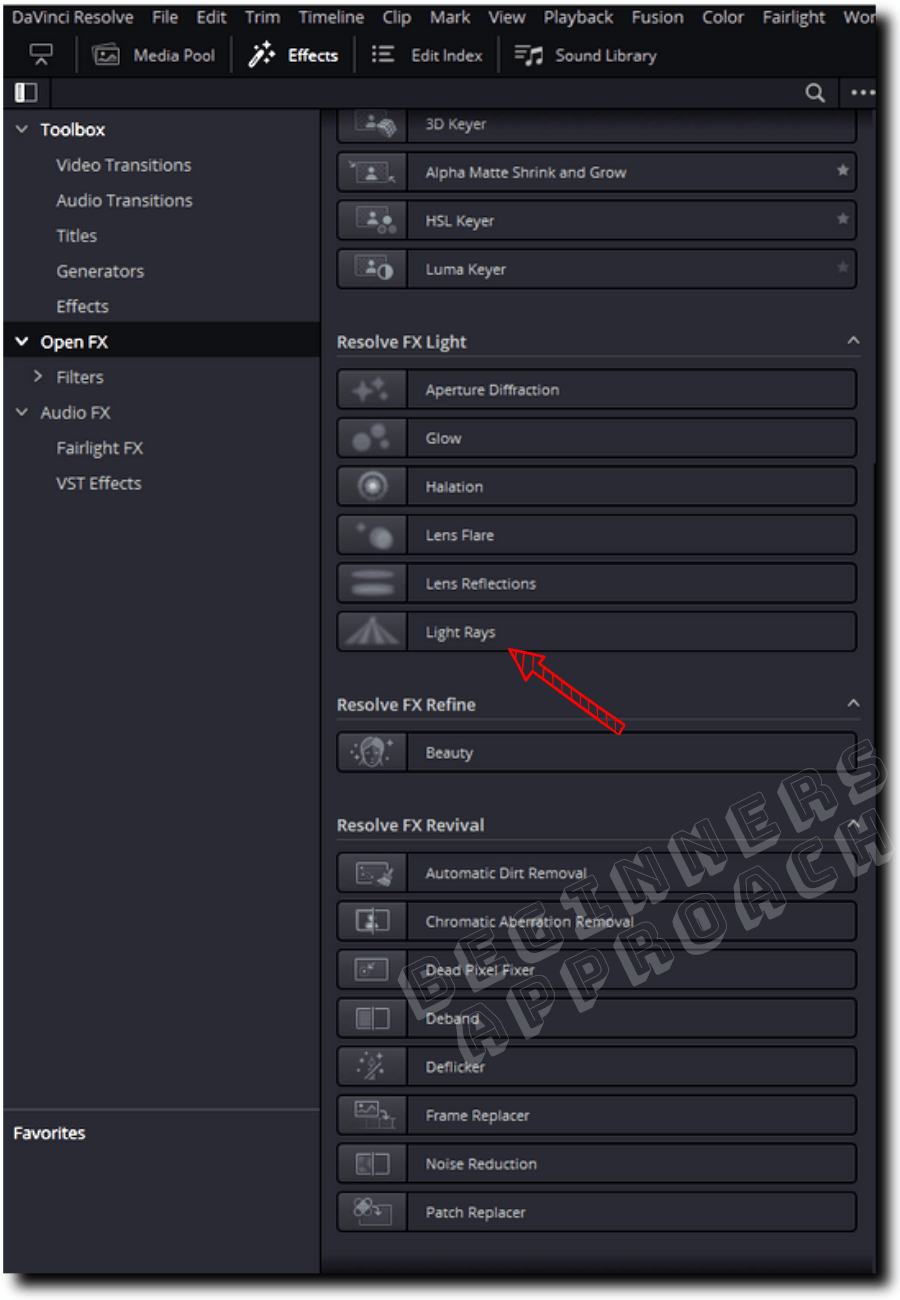
- Click on “Open FX” > “Filters” > scroll down till you see “Resolve FX Light” > “Light Rays”.
- (Alternatively, you can also click on the search bar and search for “light rays”. If there are no results displayed, then make sure you click on the “Effects” button to see your effect listed in the search.)
- Now drag and drop this effect onto your video clip or image.
This should instantly add a light rays effect into your footage.
You can see that the light sources in your videos will now throw light rays (lighting effects).
You can effectively control the amount of throw, the length, and the brightness of this effect to your taste.
For further fine-tuning…
… click on the clip in the timeline and then click on the “Inspector” tab > “Effects” > “Open FX” > “Light Rays”.
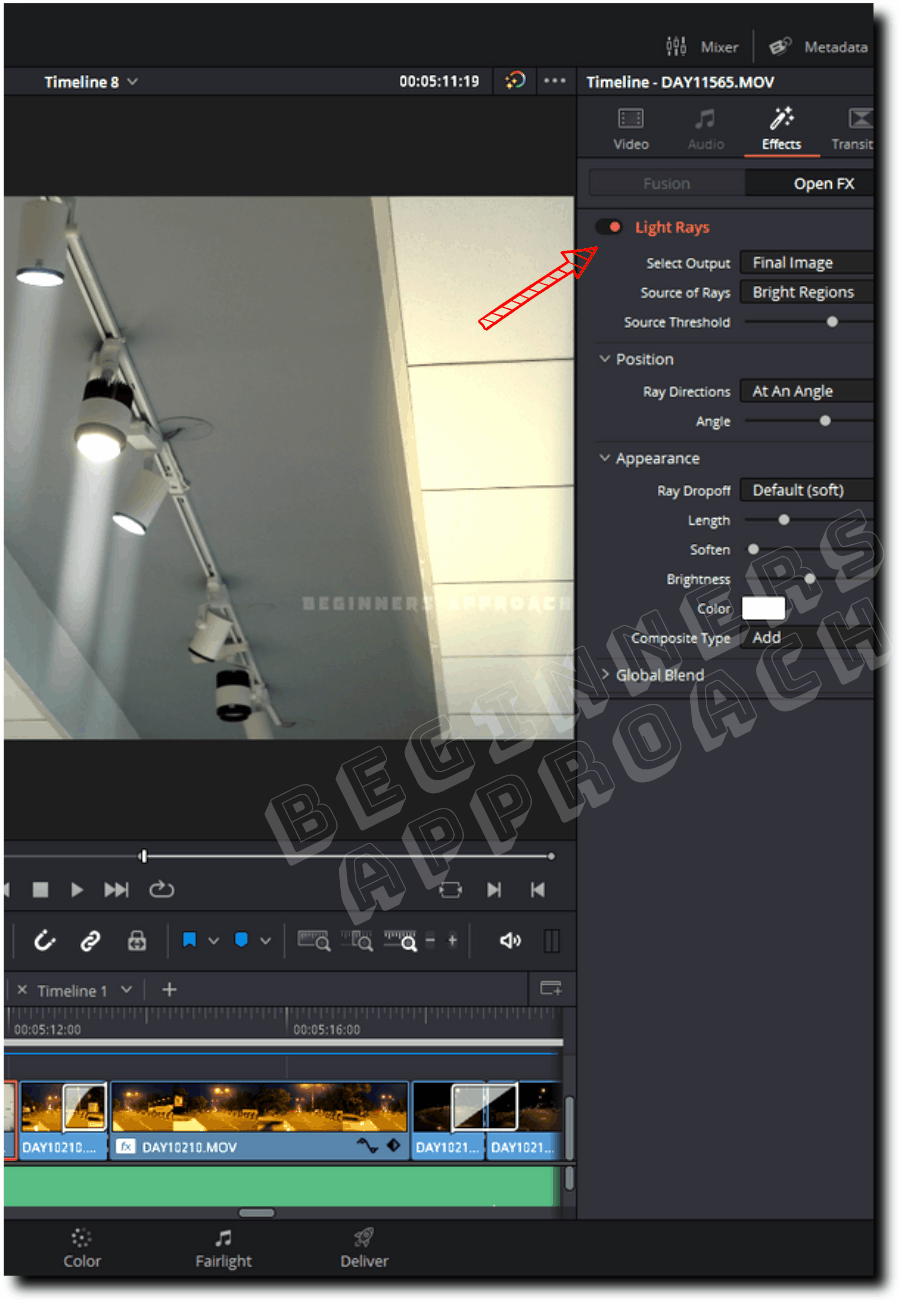
Light Rays Effect Inspector Settings in DaVinci Resolve
In the Inspector Settings, play with different options to achieve a unique look to your footage.
For example…
Change the value of “Select output” – which is defaulted to “Final Image” – and see the effects in your image.
Change the value of “Source of Rays” to “Bright Regions” or “Edges” and verify the effect it has on your video.
Similarly, get your hands dirty with the “Ray Directions” – this will be the most used setting, in my opinion. The “At an angle” setting helps you set your light rays at a specific angle; to look natural.
The “From a Location” setting helps you change the overall rays emanating from a source. With this setting, you alter the source of the light rays. Play with it to see the effect in action.
And then you can change the “Appearance” of your light rays by:
- Increasing or decreasing the length of the light ray using the “Length” setting.
- Softening the light rays using the “Soften” setting.
- Changing the “Brightness” setting.
But, more importantly, you get the “Composite” mode. The option “Add” gives you the desired effect, but you can always select different values like “Screen”, “Overlay”, “Luminosity”, etc, and get the desired look!
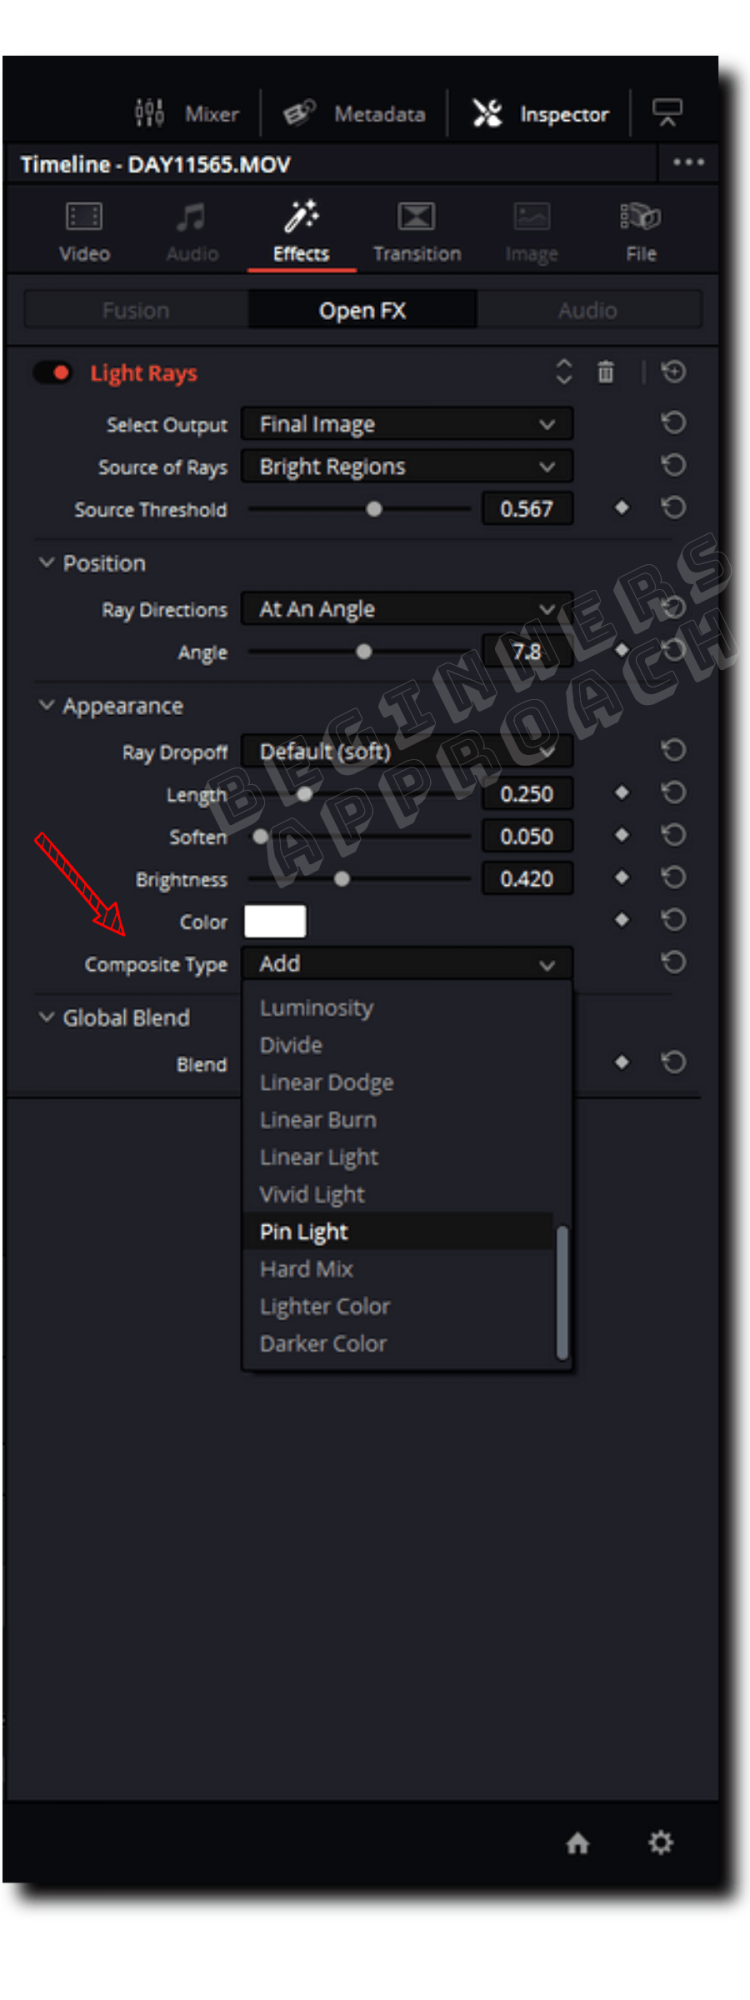
Finally, the “Global Blend” option lets you decrease the overall light rays effect so that you can blend your light rays effect with the original footage. If at any point you feel that you overdid the light rays effect, “Global Blend” comes to your rescue and helps you tame the effect to your taste.
The above is a good way to get the spotlight effect.
Exclude Light Rays Effect in DaVinci Resolve
For a static shot, the work is easier – simply drag and drop the light rays effect and tweak the “Inspector” settings.
Whereas for a moving shot, this simple tweaking might not work.
More importantly, you might want to exclude specific light sources from the ones that need the effect of light rays.
So how do we exclude or isolate the light rays effect in a video or image?
Use the “Window” feature from the “Color” page to isolate the required light sources from the unnecessary ones.
In the “Edit” page, delete the “Light Rays” effect from the “Inspector” tab, then…
Go to the “Color” page.
Add a serial node (or you can use the existing node).
Click on the “Effects” tab and search for the “Light rays“. Then, drag and drop the “Light Rays” effect on the node.
(Refer to the video above for a visual workflow if you are lost.)
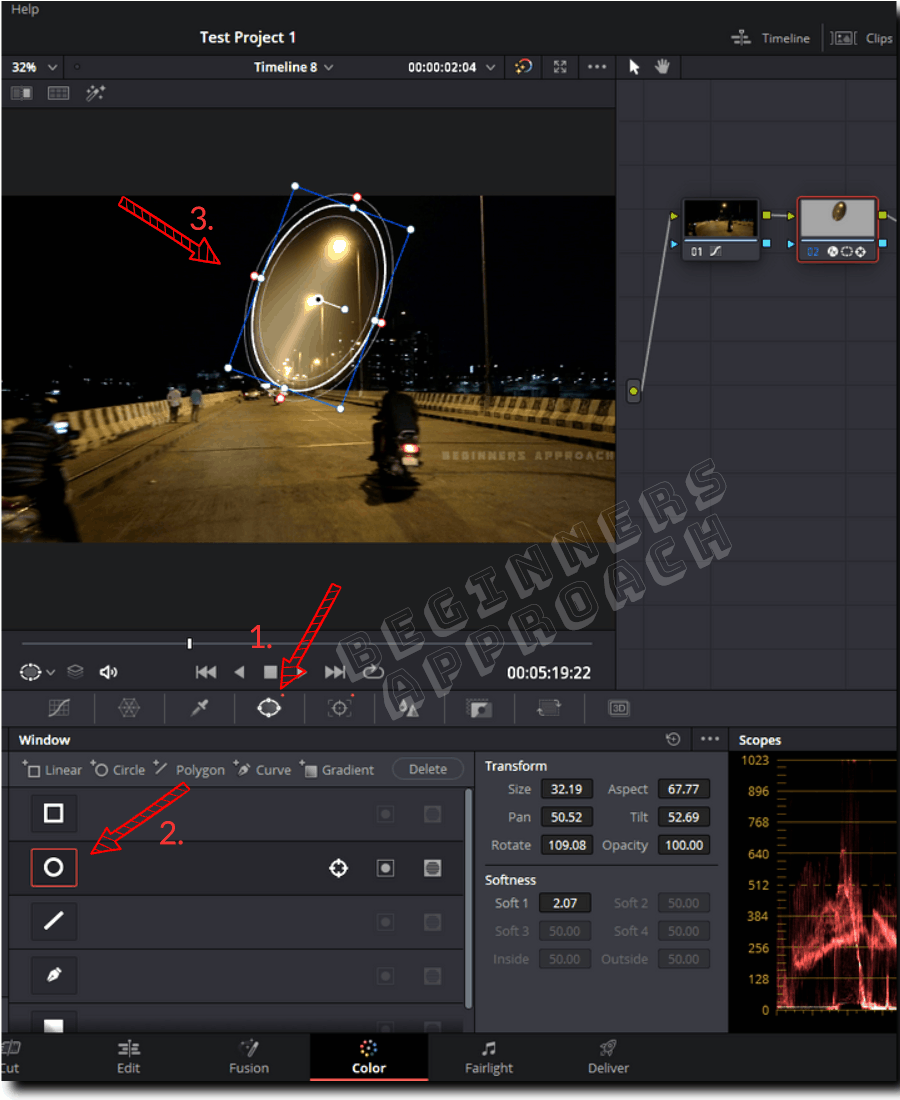
Click on the “Window” icon.
Then click on circle or square or any other tools based on your requirement.
Then resize the circle window inside the viewer so that it includes or excludes the required light sources.
In my case, I resized the circle window to include the light posts; thereby excluding the lights from the two-wheelers and distant buildings.
You can also click on the invert icon (a circle inside a square) against the circle window to do the same job of including or excluding.
That’s it.
You can see the video (displayed at the top of the post) to see how I did visually.
Naturally, the next big question is…
How to Track the Light Rays Effect in DaVinci Resolve?
To track the light rays effect, first, you need to define or isolate the area containing your desired lights with the help of a “Window” and then use the “Tracker” option to track the window successfully. This ensures the “Window” sticks to the moving lights inside your video.
Step-by-Step:
- Click on the “Window” icon and then click on the “Circle” or other tools to isolate the desired lights. (Refer the above section).
- Then click on the “Tracker” icon.
- Then click on the double arrow – the “Track Forward and Reverse” setting.
- DaVinci Resolve will now automatically track the window for you.
- If you need any manual adjustment, you can click on the “Frame” tab (from the right top inside the Tracker section), then move your playhead to the spot where it needs adjustment.
- Then manually adjust the window. This will place a keyframe.
- You can do this till you are satisfied with the placement of the window.
- That’s it!
If you are interested in effects like these to increase your production value, then you should also check out: