
If you’re a beginner or newcomer to DaVinci Resolve (versions 18.5, 18, 17, etc.), today’s guide will show you how to add glow effect in the free version of Resolve.
(Today’s post is part of the DaVinci Resolve Effects series.)
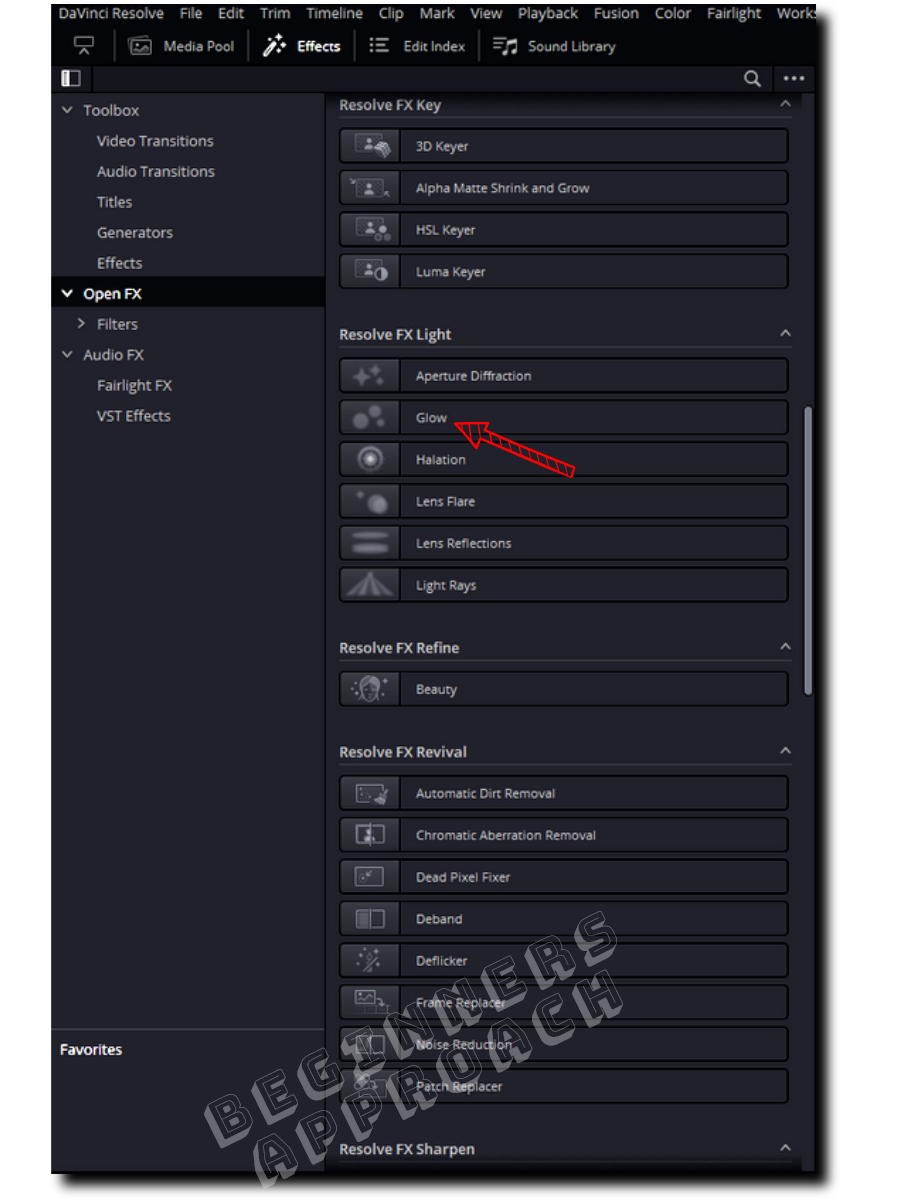
To add a glow effect in DaVinci Resolve, click on the “Effects ” tab on the “Edit” page. Then click on “Open FX” > “Filters” > “Resolve FX Light” > “Glow”. Drag and drop this glow effect on top of your video. Your video or text should now glow.
For more details on how to make your object shine and sparkle with this built-in “Glow” effect in Resolve, read on!
This is how the video will look with the glow effect applied, followed by a short tutorial to achieve the look!
The next section will show you how to make an object glow in DaVinci Resolve.
How to Add Glow Effect in DaVinci Resolve Quickly?
- Create a new project (or open an already existing one).
- Under the “Edit” page, click on the “Media Pool” tab from the top left corner.
- Then import your footages by pressing “Ctrl + i” (or “Cmd + i”).
- Create a timeline (if not already) and drop your video clips on it.
- Click your desired video clip in the timeline. (This step is crucial because, while adding effects the right clip needs to be selected, or accidentally you might end up adding effects to the wrong clip)
- Now click on the “Effects ” tab (next to the “Media Pool”).
- Click on “Open FX” > “Filters” > scroll down till you see “Resolve FX Light” > “Glow”.
- (Alternatively, you can also click on the search bar and search for “glow”. If there are no results displayed, then make sure you click on the “Effects” button to see the effect listed in the search.)
- Now drag and drop this effect onto your video clip or image.
This should instantly introduce a glow effect into your footage.
You can see that the brighter parts will now glow .
For further fine-tuning, click on the clip in the timeline and then click on the “Inspector” tab > “Effects” > “Open FX” > “Glow”.
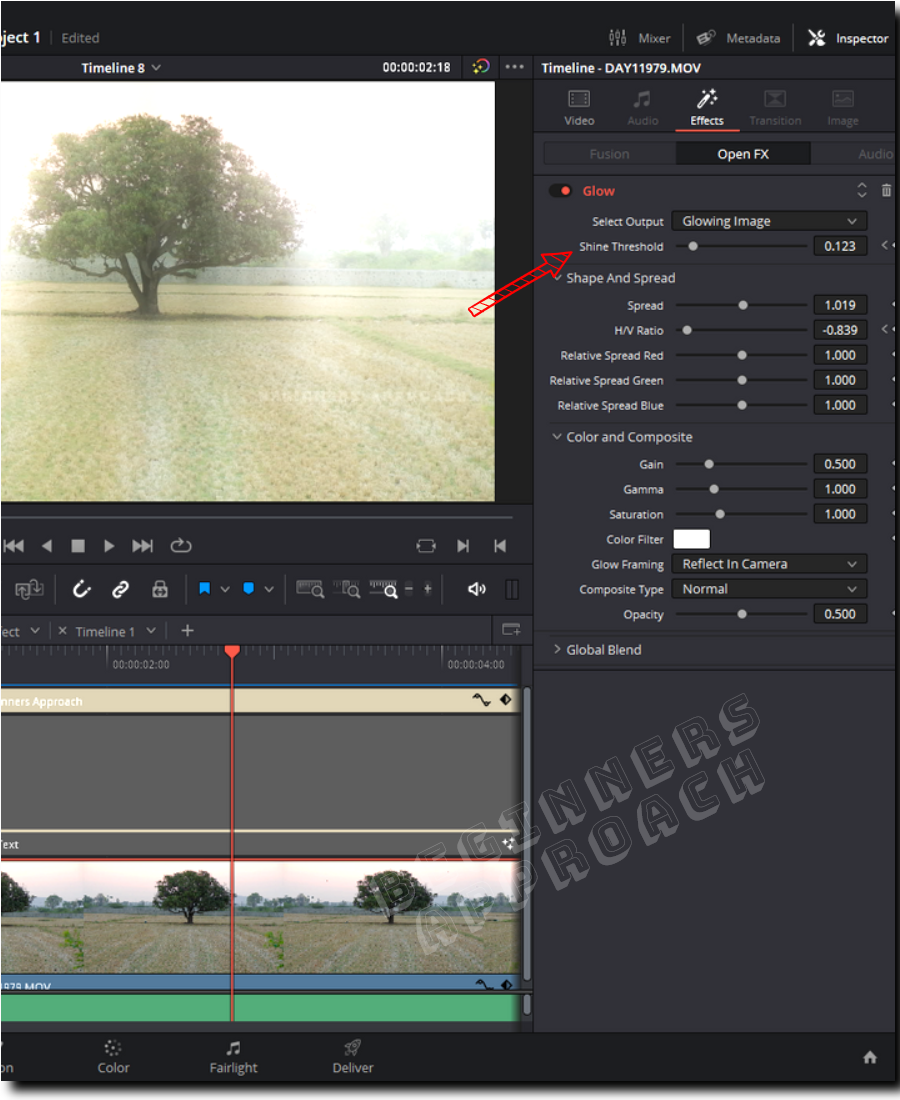
Glow Effect Inspector Settings in DaVinci Resolve
Play with the “Shine Threshold,” which will increase or decrease the glow in your video.
Then, under “Shape and Spread“, change the values of “Spread” and “H/V Ratio” till you get the desired output.
You can also get your hands dirty with the “Relative Spread Red”, “Relative Spread Green” and “Relative Spread Blue” to change the look and feel of your footage.
Under “Color and Composite“:
- Changing the “Gain” value affects the highlight part of your image.
- Changing the “Gamma” value affects the midtone of your image.
- “Saturation” affects the intensity of the color of your image.
You can also change the color of the glow from white to the one you want using the “Color Filter” color picker.
Composite Type in Glow Effect
The most important setting is the “Composite Type” in the “Glow” effect. It drastically changes the look and feel of your glow effect. Click on the “Composite Type” dropdown and play with different values like “Normal”, “Add”, “Subtract”, “Multiply”, “Overlay”, etc. – till you get the desired look.
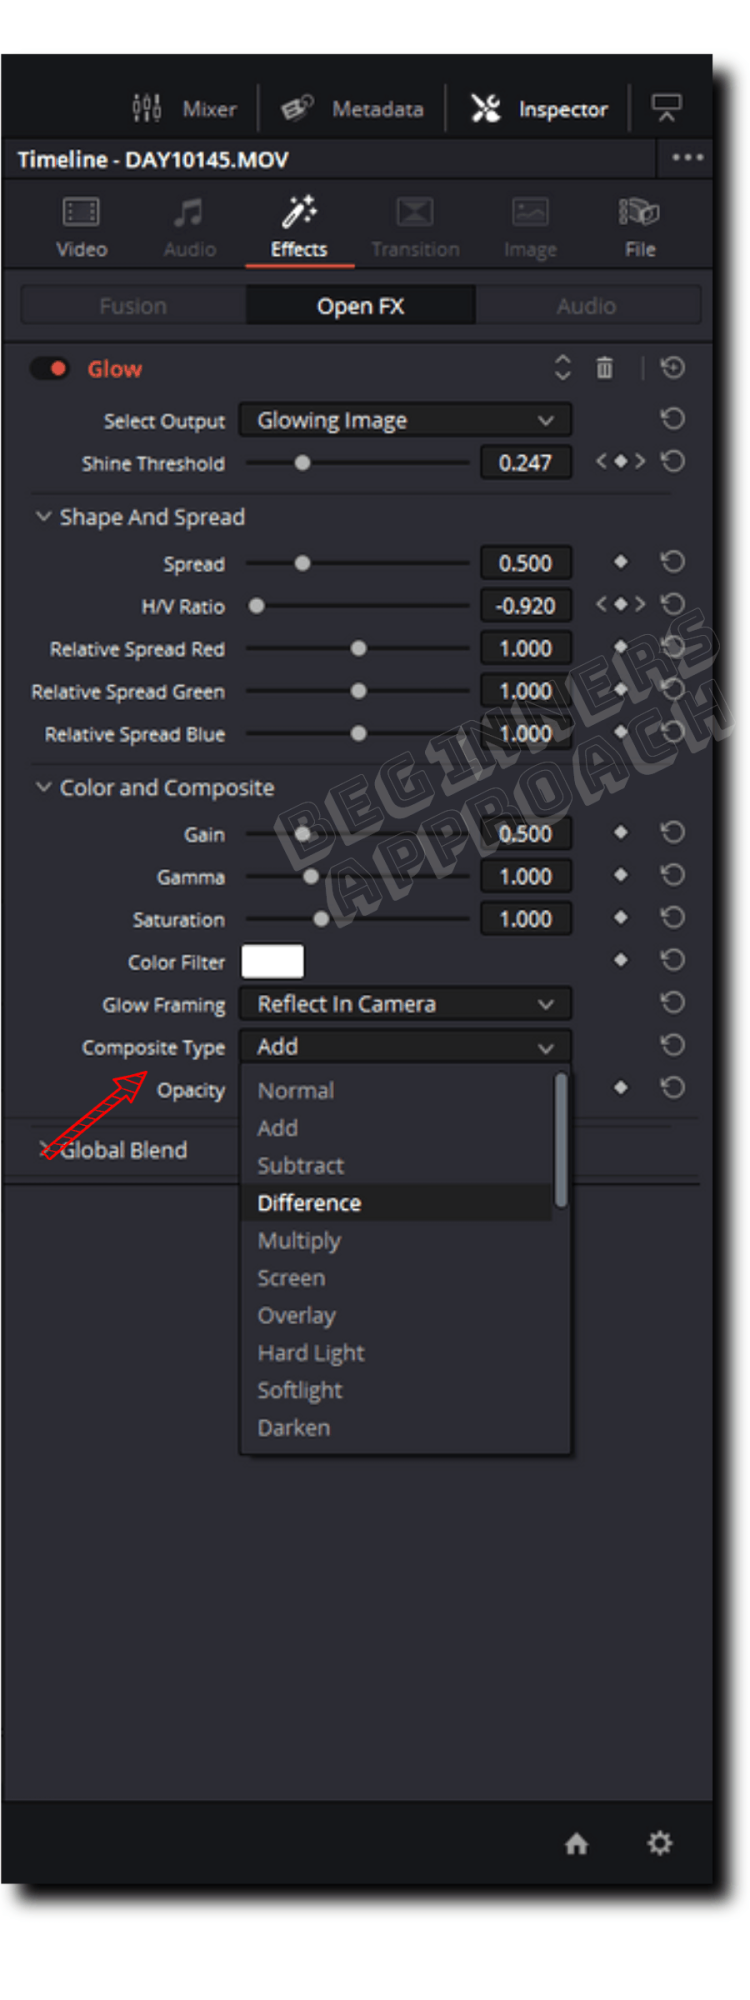
(At the end of the above video, you can see me playing with the different composite types – to get the look I want. I ended up with “Add” – the most suitable composite type for my footage).
The above was a quick and dirty approach to adding a glow effect.
However, you might need to control the starting and ending of the glow effect – occurring at a particular point in your video.
This is where the keyframing comes into the picture. (In the video above, I do the keyframing to get the desired effect.)
Keyframing Glow Effect in DaVinci Resolve
- Add the “Glow” effect from the “Effects” onto your video clip.
- Click on the video clip to select it in the timeline.
- Determine where you would like to have glow effect in your video.
- Then place the timeline playhead there.
- Go to the “Inspector” > “Effects” > “Open FX” tab > “Glow”.
- Click on the small diamond icon at the end of the “Shine Threshold” to place a keyframe. It turns red (which means it’s activated).
- Let the default value be “0.750” (you change it to whatever value based on your taste).
- Determine the starting point of your glow by pressing your right key arrow a few times – the timeline playhead will move a few frames to the right.
- Now enter a value, let’s say, “0.247” and press enter. This will place another key frame automatically.
- Determine the ending point of your glow by pressing your right key arrow a few more times – the timeline playhead will move further few frames to the right.
- Don’t enter any value (the value entered in the previous step “0.247” is enough.)
- Now again move a few frames from the ending point to the right – to end your glow effect.
- Enter the original value “0.750” (or any value to your taste.) This will place the fourth keyframe automatically.
- Now you have got a dynamic glow effect which starts and then ends at required points in the timeline.
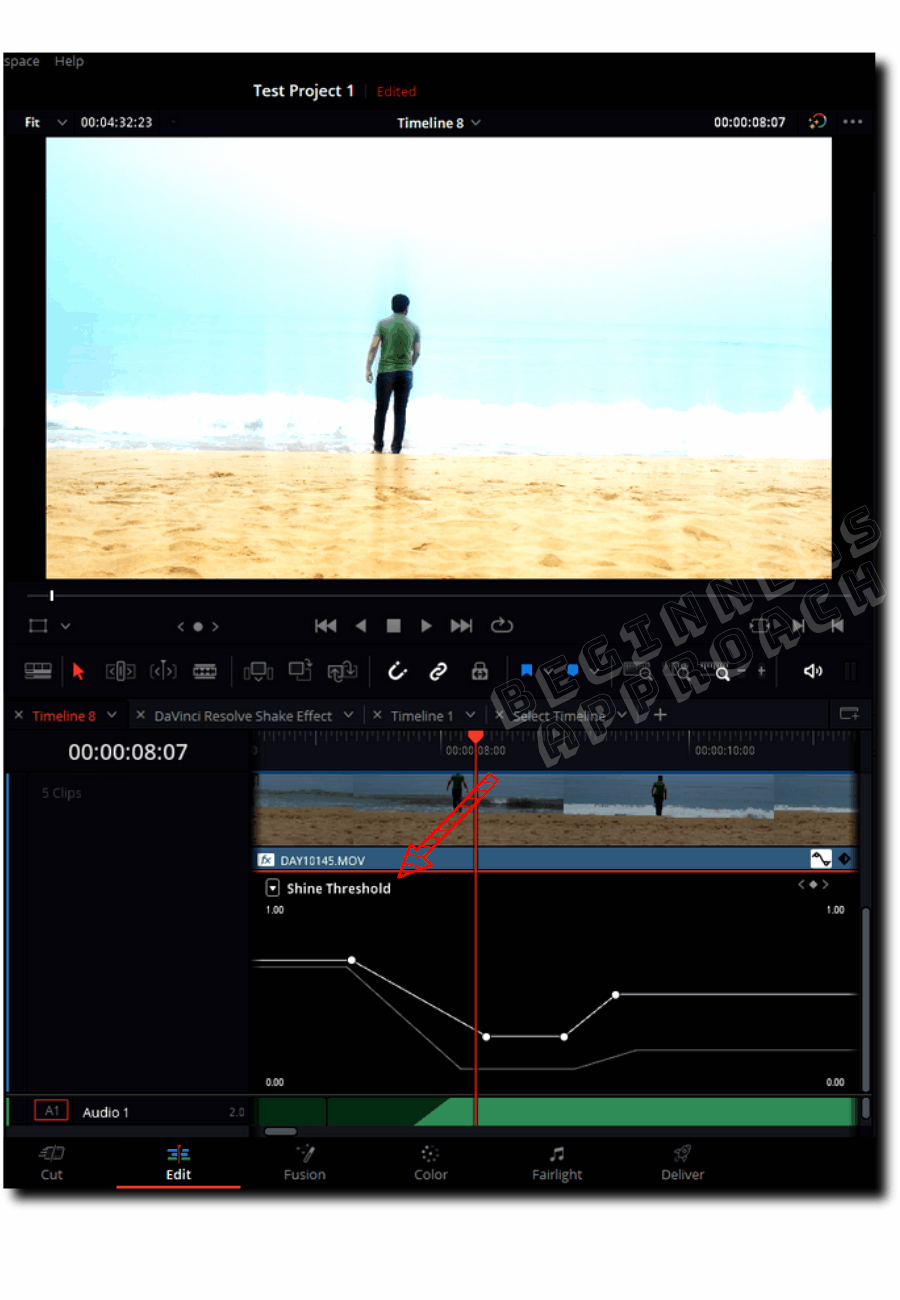
For a more visual representation and fine adjustments of the keyframes, click on the wave icon on the bottom right corner of the clip.
Then click on the dropdown from the upper left corner to select “Shine Threshold” under the “Glow” section.
You can see all of your keyframes. You can click and drag any keyframe – to get the desired result.
(To see the keyframes in action, see my video at the top of the post).
You can also keyframe different settings like “H/V Ratio”, “Spread”, etc., to your taste.
If you are interested in effects like these to increase your production value, then you should also check out: