To install DaVinci Resolve 19 free version, first download the official DaVinci Resolve setup from the BlackMagic Design website. Fill in your details, click on “Register and Download”. Then extract the file and follow on-screen instruction to install DaVinci Resolve.
Follow this step-by-step guide to quickly get started on how to download and install DaVinci Resolve on Windows.
The process for installing DaVinci Resolve versions 19, 18.5, 18 and 17 is the same.
The following are also covered in this guide:
- How Long Does DaVinci Resolve Take to Install?
- Do I Need to Install DaVinci Resolve Panels?
- DaVinci Resolve 19/18.5 won’t install on Windows.
Take a backup of your project library (database), if this is your update from a previous version to a new version (from 18.5 to 19).
Read about updating DaVinci Resolve to latest version here.
Before installing you must first download the official DaVinci Resolve.
I highly recommend the below detailed guide which covers the download process and the download issues that you might face:
How to Install DaVinci Resolve 19/18.5/18/17 on Windows 10?
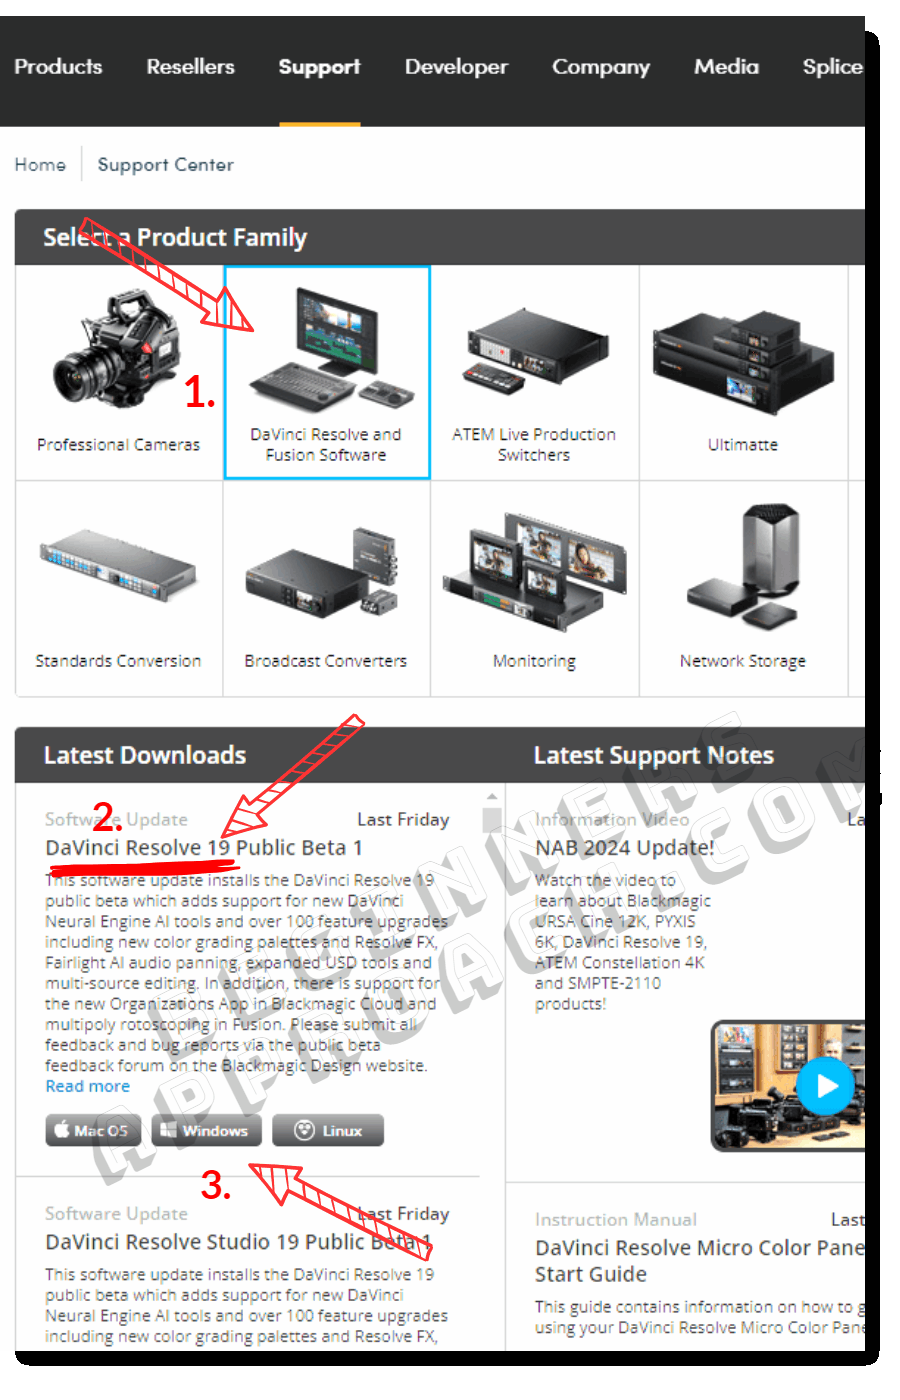
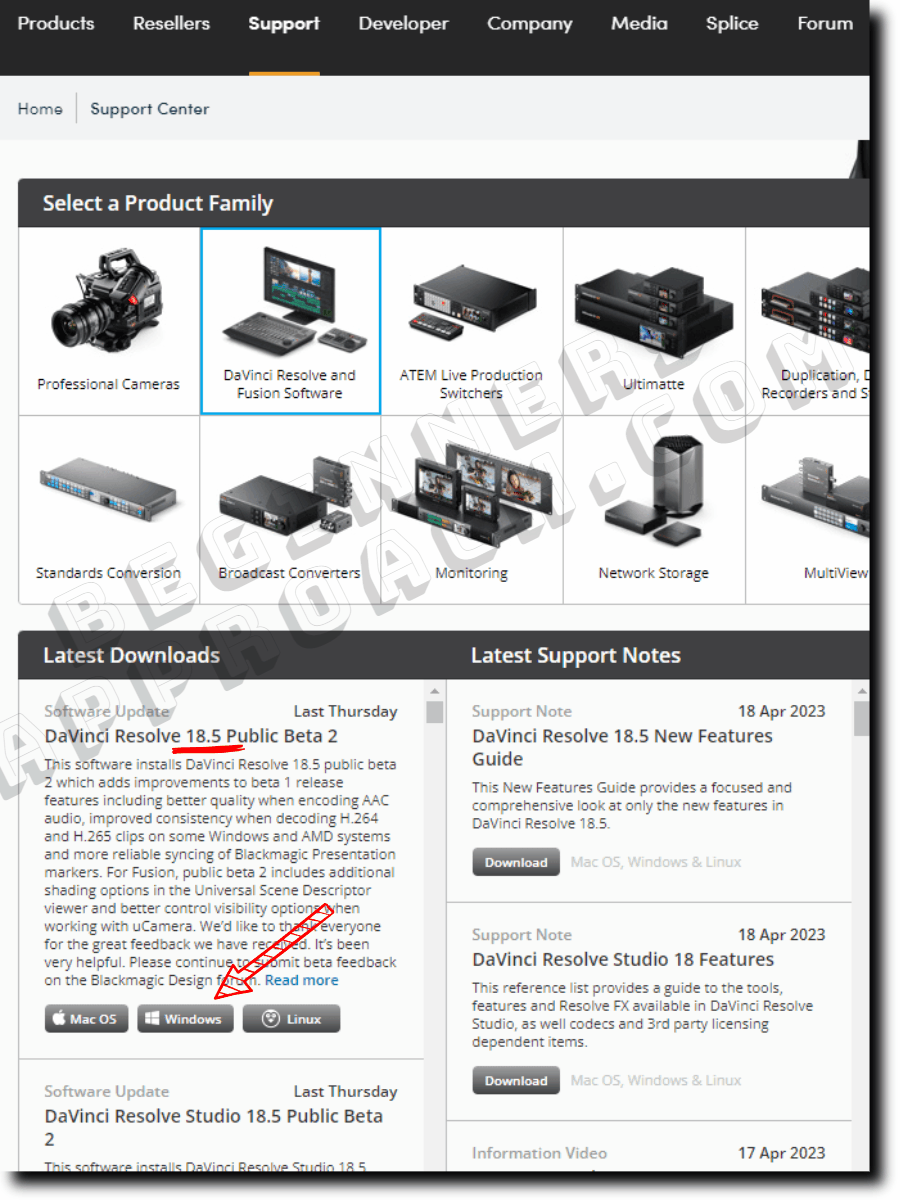
- Navigate to the BlackMagic Design Support Center website.
- Click on the “DaVinci Resolve and Fusion Software” section under “Select a Product Family”.
- Under the “Latest Downloads“, download the latest free version based on your OS – Windows, Mac, Linux.
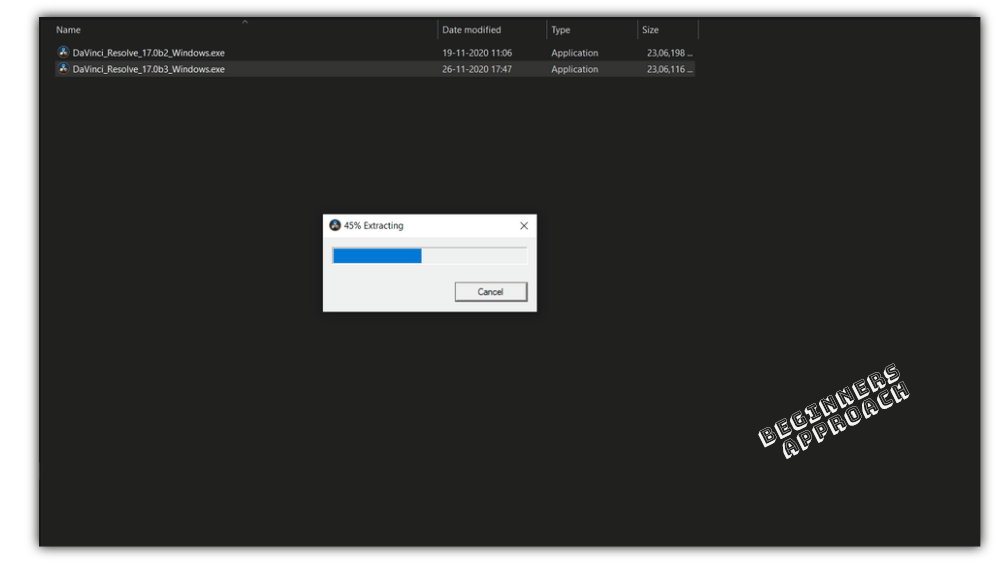
- Extract the downloaded zip file.
- Double click on the .exe file.
- The process will start with the installation of “Microsoft Visual C++ Redistributable” (if you don’t have already in your computer, which is a pre-requisite)
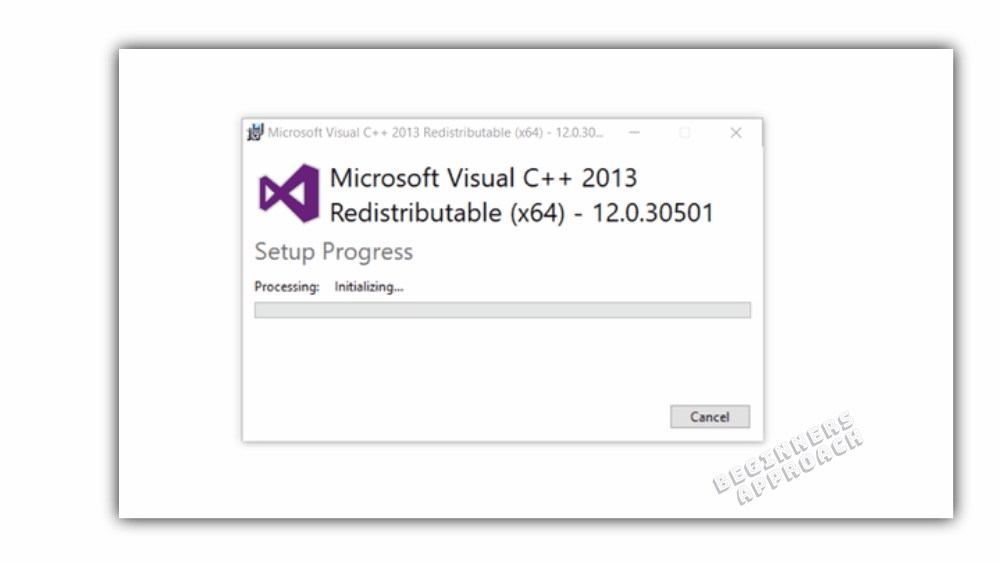
- Make sure to install all the necessary pre-requisite steps.
- In the “DaVinci Resolve Installer” window, uncheck all the options except “DaVinci Resolve 19.0…”.
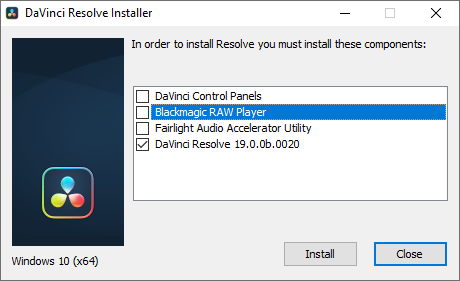
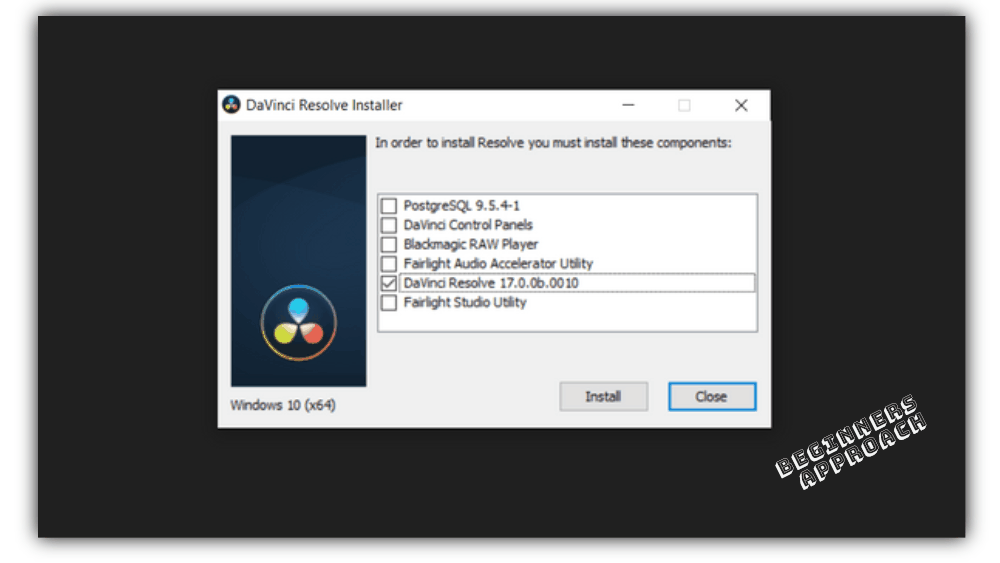
- Click on “Install“.
- Click on “Next” in the “Welcome to the DaVinci Resolve Setup Wizard“.
- Read and then Accept the license agreement.
- Click on “Install“.
- The installation will start.
- Then you will get the below screen:
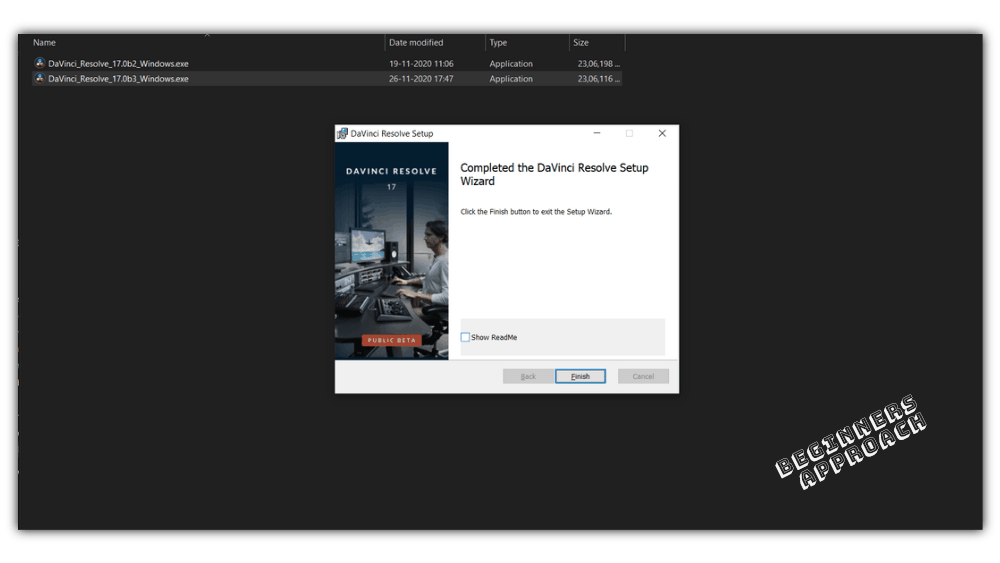
- Click on “Finish“.
- Click on “Ok” for “Installation Complete”.
- Done!
- Launch your DaVinci Resolve and start playing with it.
If this your first Resolve installation, you’ll get the “Welcome tour” screen:

- You can skip the tour.
- In the next step, you might get a “Quick Setup” window. You can click on it or skip.
- If you click, then Resolve will do a quick system check – operating system and graphics card – to see if your computer is good enough to run it.
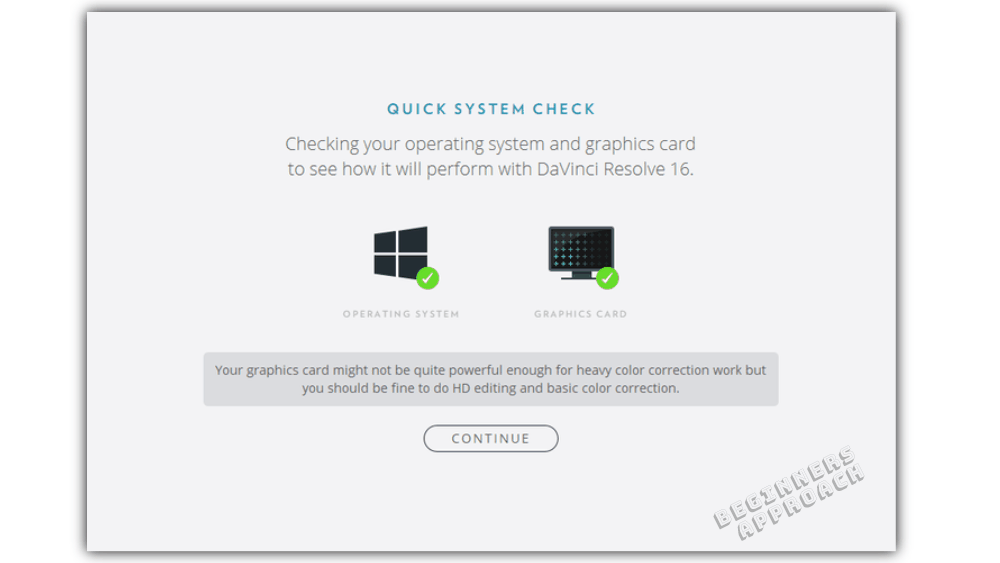
- Click on “Continue“. In the next window, Resolve will ask to set up your project.
- Choose the relevant resolution. (You could always change later.)
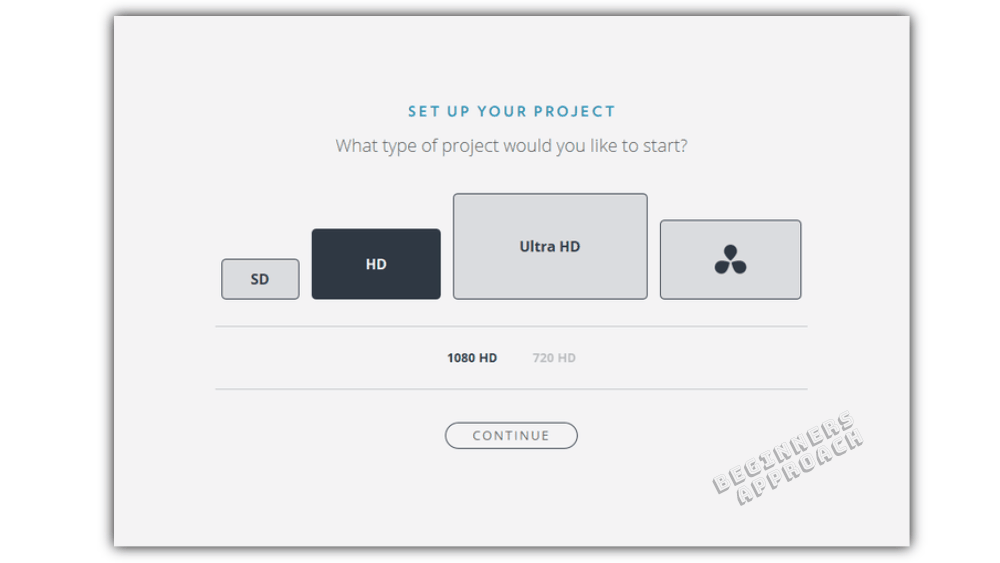
- Click on “Continue“.
- In the next window, Resolve will ask you to select your media storage folder.
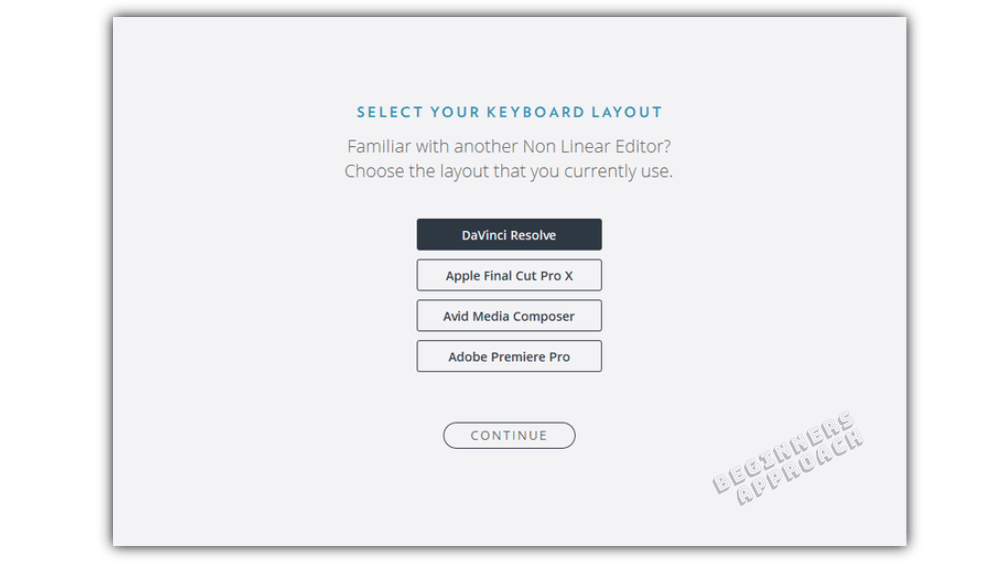
- After that, Resolve will ask you to select keyboard layout. Select whichever applies to you. If you’re a beginner, select DaVinci Resolve layout.
- Click on “Continue” and you’re all set.
- DaVinci Resolve should successfully launch.
If DaVinci Resolve doesn’t launch or start, then check this out – “14 Ways to Fix DaVinci Resolve Not Opening Issue“, where I discuss in depth on various fixes like doing a clean un-install, updating graphics drivers, etc.
Related Articles:
DaVinci Resolve & Free Stuff (Important Things You Should Know!)
How to Make DaVinci Resolve Use GPU (Helpful Tips!)
Is DaVinci Resolve Good for YouTube? (Things You Should Know)
Is DaVinci Resolve Good for Gaming Videos? (From a Gamer!)
How Long Does DaVinci Resolve Take to Install?
A first time brand new DaVinci Resolve installation will take around 5 to 10 minutes. Installation involving updates to latest build will be within 5 minutes.
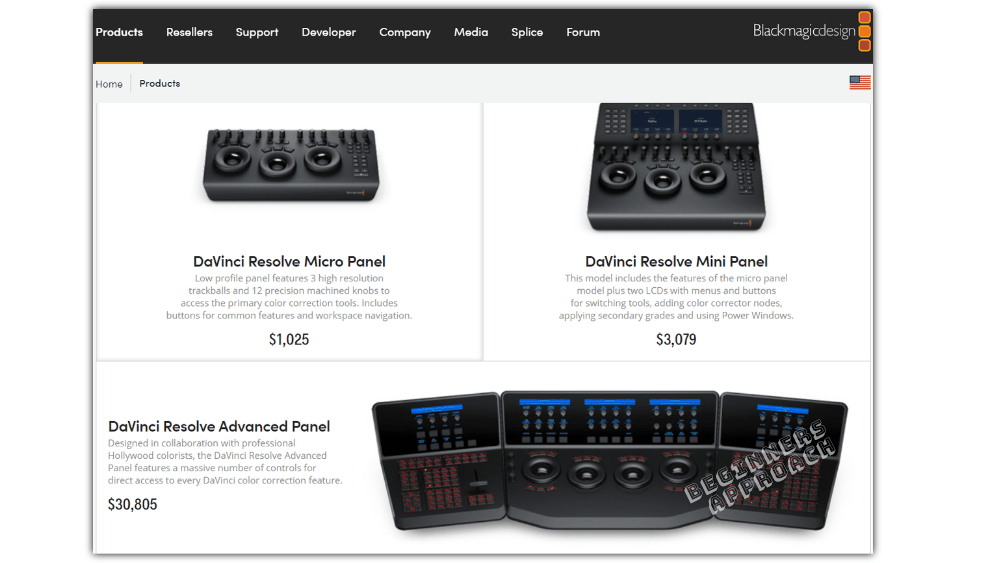
Do I Need to Install DaVinci Resolve Panels?
No need to install DaVinci Control Panels during the installation process unless you have hardware panels like DaVinci Resolve Micro, Mini, or Advanced panels.
DaVinci Resolve 19/18.5 Won’t Install on Windows
If you get any error messages while installing Resolve:
- Make sure to restart your computer and then try installing again. Sometimes a Windows update could interfere with the installation.
- Make sure you have installed the pre-requisite files like “Microsoft Visual C++ Redistributables“.
- If the issue still persists, try to download and install the previous version from the BlackMagic Design Support Center.
After successfully installing and launching DaVinci Resolve, you might face the below issues:
- Resolve can crash during startup, importing, editing or exporting. Click on (How to Troubleshoot): DaVinci Resolve Keeps Crashing!, to solve the issue.
- Recover your lost projects which could be due to a crash, accidental deleting or hard-disk failure. Click on How To Recover DaVinci Resolve Lost Projects (Crash Recovery!)
- Importing smart phones’ footage or highly compressed h.265 videos can cause “Media Offline” issues. Here are 6 Ways to Fix DaVinci Resolve Media Offline Issue [NEW].
- If you face any issues related to GPU, then read “Most Common DaVinci Resolve GPU Issues (& How to Fix Them)“
- If you would like to know where does Resolve store your project files. Then click on 3 Quick Steps to Find DaVinci Resolve Project Files in Your System.