Zoom is an important and one of the basic techniques during editing in a post-production workflow.
A basic zoom in on a clip or a zoom out in DaVinci Resolve 18/17, which when coupled with panning and tracking can elevate your video.
And a slow zoom – a powerful cinematic technique – can hook your audience to your video.
Without wasting time, let’s get started!
- How to Zoom In On a Clip in DaVinci Resolve?
- Zoom In / Out a Video Using Onscreen Control
- How to Zoom Timeline in DaVinci Resolve?
- How to Zoom Out DaVinci Resolve Timeline?
- How to Zoom In / Out Picture in DaVinci Resolve?
- How to Do a Slow Zoom in DaVinci Resolve?
- How to Copy Paste Zoom Settings to Other Clips in Resolve?
- DaVinci Resolve Dynamic Zoom
- DaVinci Resolve Pan and Zoom Effect
How to Zoom In On a Clip in DaVinci Resolve?
- Under the “Edit” page, select your required clip in the timeline.
- Go to the “Inspector” tab in the upper right corner.
- Under “Transform” > “Zoom”, increase the value of “X” or “Y” greater than 1. That’s it!
- Increase the value to zoom your video in.
- Adjust the “X” or “Y” values against the “Position” to maintain the required framing.
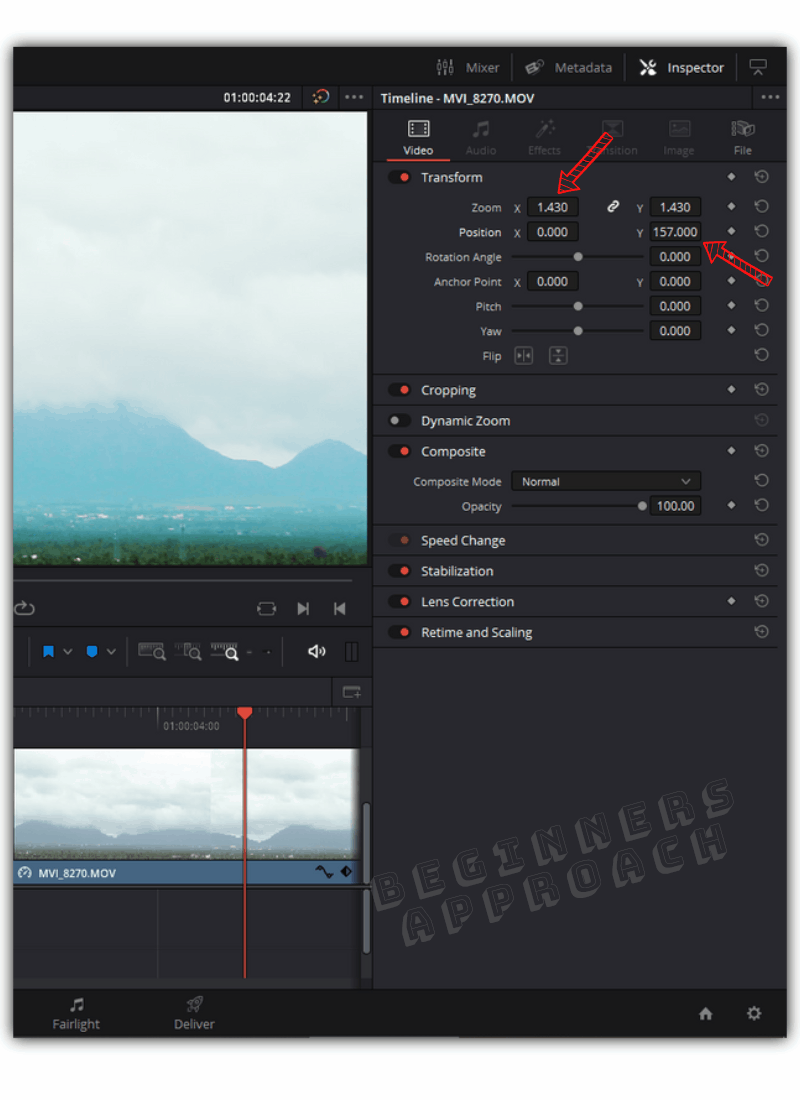
Against “Position“…
The “X” refers to the panning of a clip (horizontal).
The “Y” refers to the tilting of a clip (vertical).
How to Zoom Out a Video Clip in DaVinci Resolve?
Under the “Edit” page, click on the required clip in the timeline. Go to the “Inspector” tab. Under “Transform” -> “Zoom”, reduce the value of “X” or “Y” (a value lesser than “1” will zoom out). You need to adjust the framing of the video using “X” or “Y” values of “Position”.
While zooming keep in mind that you’ll have to adjust the “Position” values to pan or tilt to maintain your framing.
Zoom In / Out a Video Using Onscreen Control
The best way to zoom in / out part of the video is by using the onscreen control. Located on the bottom left corner of the timeline viewer is an icon called “Transform” (rectangle shaped). Click on it. An outline is displayed with handles in the corner. Drag the corner out to zoom in.
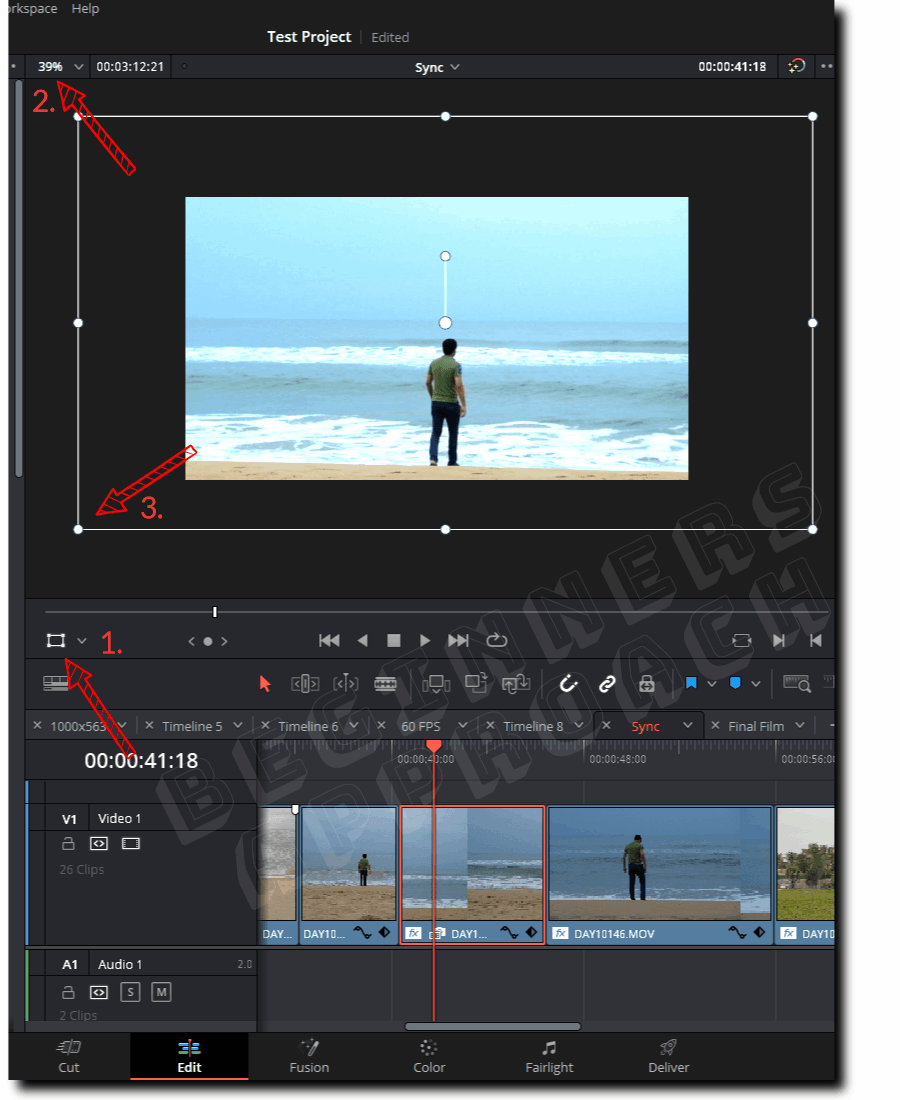
If you would like to have more room to work with the zoom, then point your mouse inside the timeline viewer screen and using your middle mouse button, scroll up or down to zoom out the screen.
Or you can go to the upper left corner of the timeline viewer and select a zoom percentage value from the dropdown (choose less than 50% if you don’t know where to start).
Now you can grab any of the corner handles and drag your video in or out to zoom in or out.
To reframe, simply click anywhere inside the box and drag it to left, right, up, or down, as per your requirement!
After you are done with the adjustment, click on the upper left dropdown and select “Fit” to correctly fit your video in the viewer. Then click on the “Transform” icon again to deselect the outline box.
Now let’s see a nice little productivity tip related to working with the timeline.
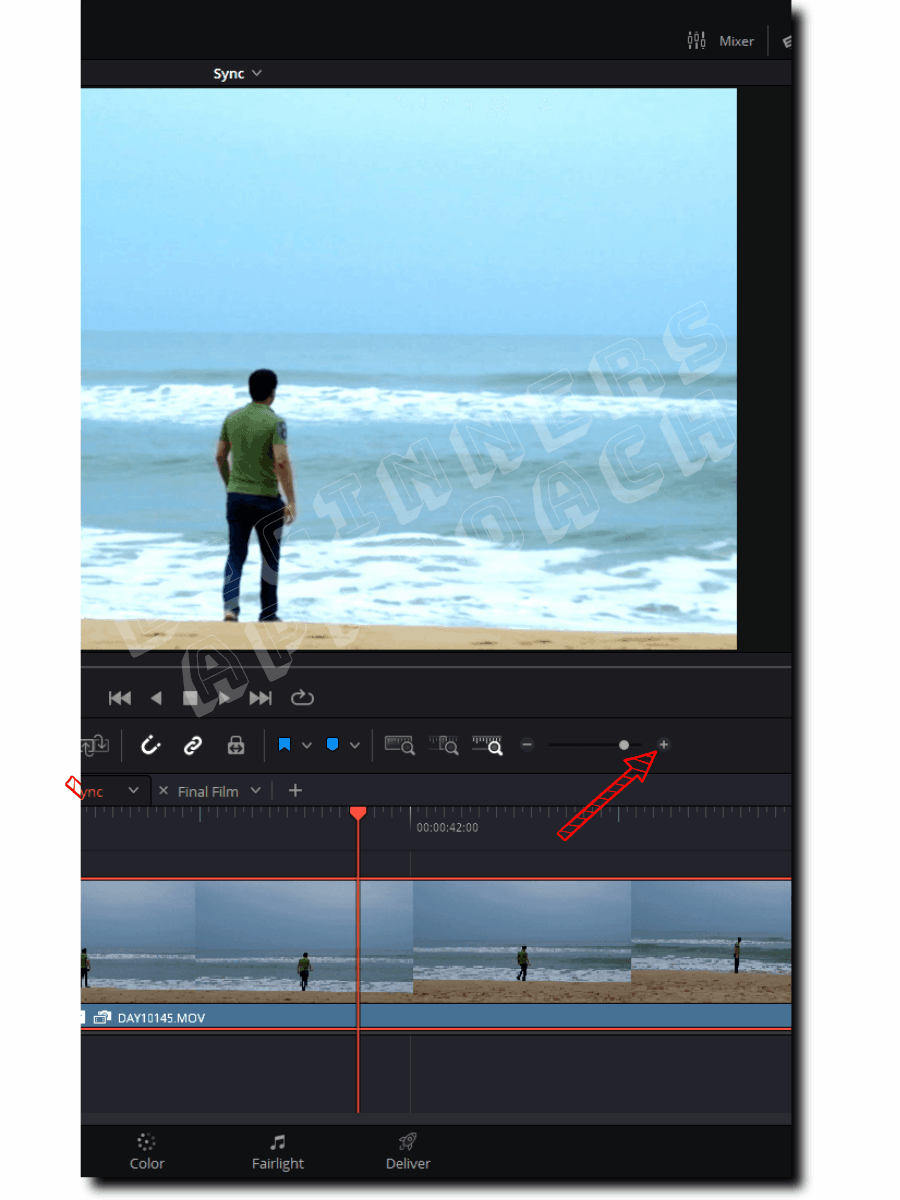
Sometimes expanding or zooming in the timeline and zooming out can become cumbersome when you use the mouse to click on the plus and minus buttons below the timeline viewer.
How to Zoom Timeline in DaVinci Resolve?
DaVinci Resolve timeline can be zoomed in with the shortcut “Ctrl” and “+” (or “Cmd” and “+”). Press and hold “Ctrl” or “Cmd” and then press the “+” (plus) button to zoom in on the timeline. Press “+” multiple times to zoom further into the timeline.
How to Zoom Out DaVinci Resolve Timeline?
DaVinci Resolve timeline can be zoomed out with the shortcut “Ctrl” and “-” (or “Cmd” and “-“). Press and hold “Ctrl” or “Cmd” and then press the “-” (minus) button to zoom out of the timeline. This will compress your timeline.
How to Zoom In / Out Picture in DaVinci Resolve?
Under the “Edit” page, click on the required picture in the timeline. Go to the “Inspector” tab. Under “Transform” > “Zoom”, increase or decrease the value of “X” or “Y” to zoom in or out. You need to adjust the framing of the video using “X” or “Y” values of “Position”.
Alternatively, you can click on the “Transform” icon located in the bottom left corner of the timeline viewer and drag the box to zoom in or out the required picture (or image).
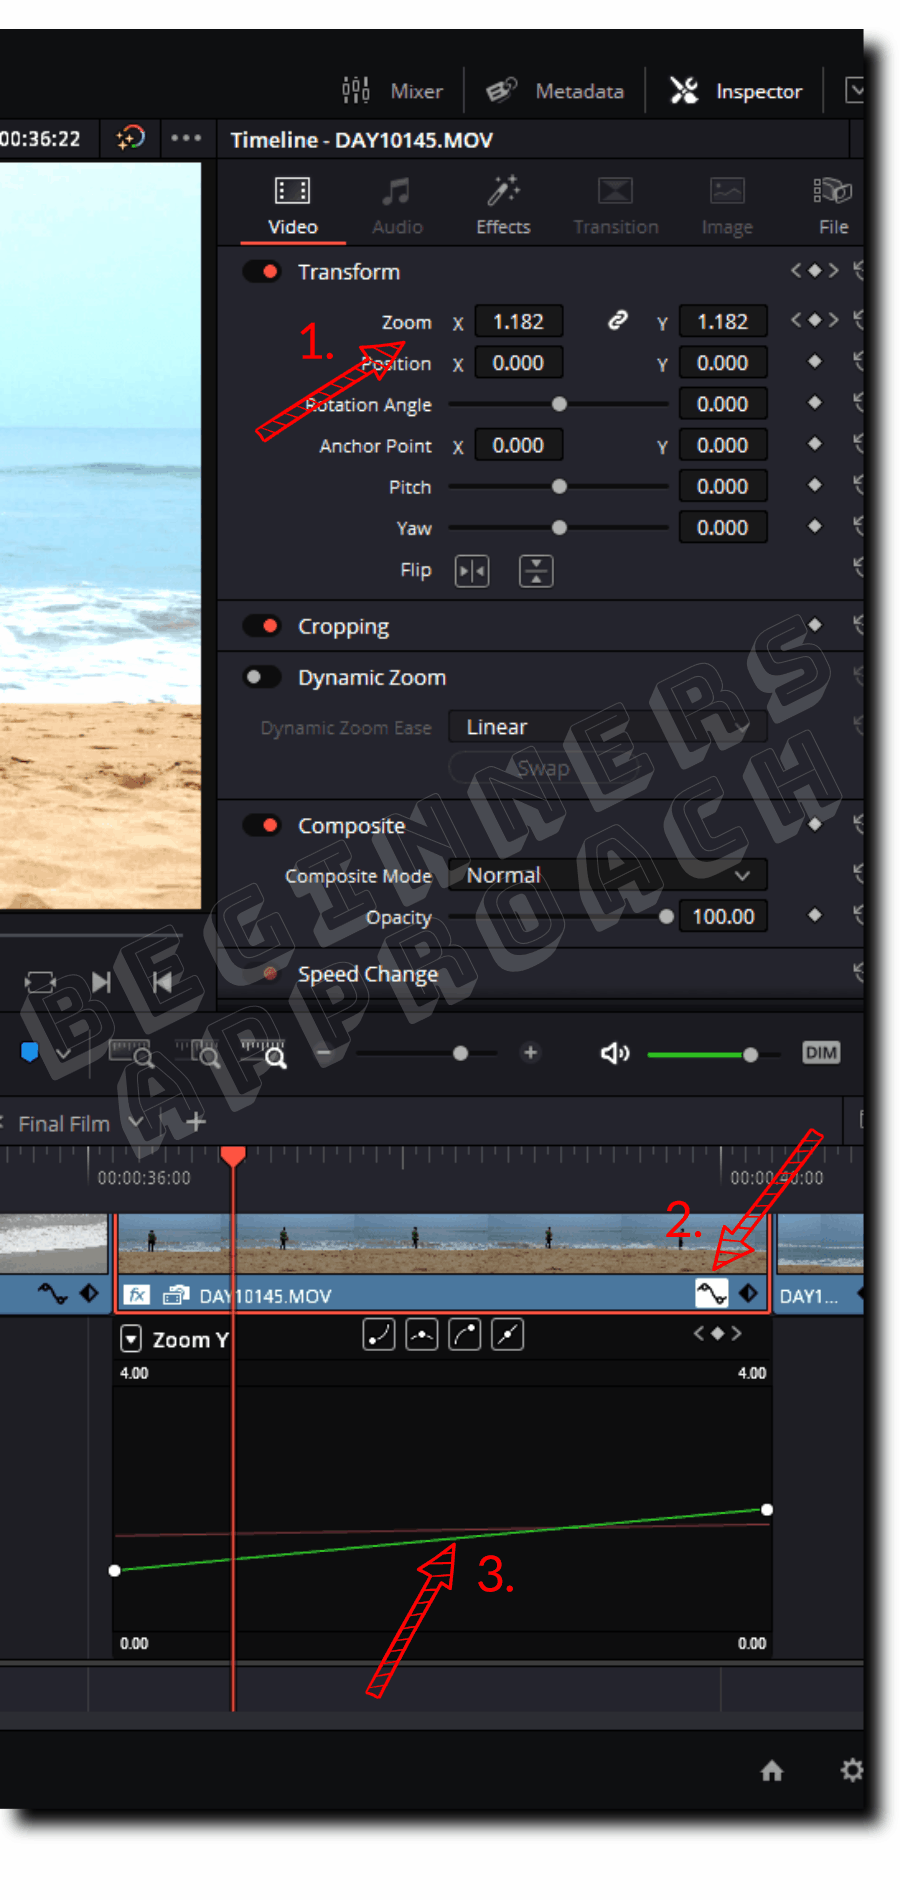
How to Do a Slow Zoom in DaVinci Resolve?
- Click on the clip in the timeline. Then go to “Inspector” -> “Transform”.
- Click on the small diamond symbol (on the right hand side) of “Zoom” to turn on the keyframe (which turns red).
- Go to the last frame of the clip and place your playhead there.
- Enter a “Zoom” value of say, “2” in “X” – this is to make sure a keyframe is placed with your clip fully zoomed in.
- Now go to the starting of the clip and place your playhead, then zoom out the clip, by entering “1” against “X” value.
- A second keyframe is placed automatically.
- Now when you play the clip back, you will see the video will slowly zoom in over time.
- You can change the zoom values to suit your taste.
- Play with the positioning of the keyframes till you get the desired result.
- You can click on the wave icon found in the right bottom corner of the clip for a visual overview of your zoom.
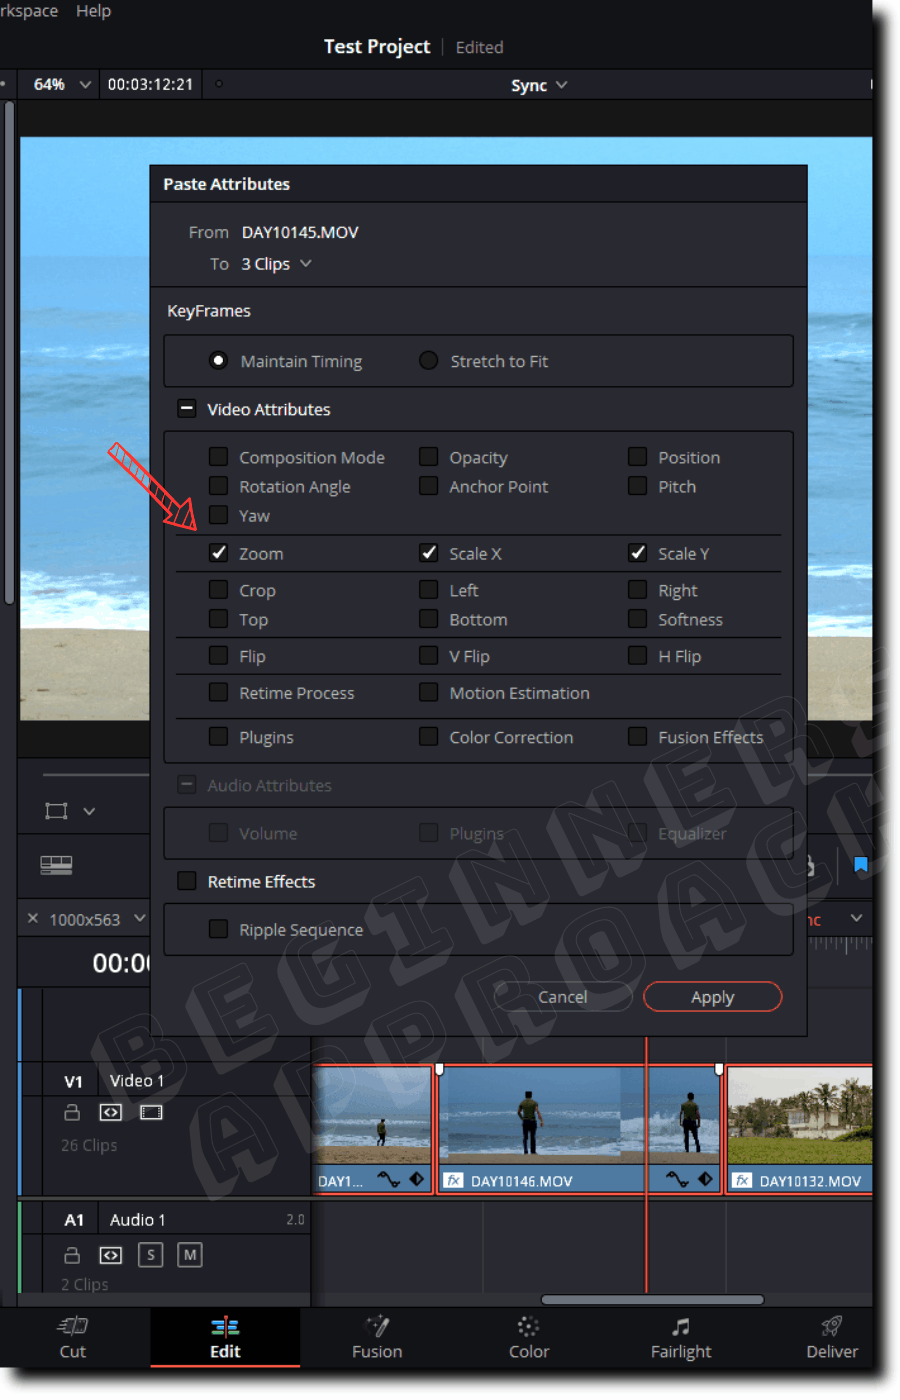
How to Copy Paste Zoom Settings to Other Clips in Resolve?
- Right-click on the clip which contains the zoom applied.
- Click on “Copy” (shortcut is “Ctrl + c” or “Cmd + c”).
- Now select all the clips (or pictures) that need zoom settings applied to them. (Shift-click or Ctrl-click all the clips.)
- Right-click and click on “Paste Attributes” (shortcut is “Alt + v”)
- Check the “Zoom” checkbox under the “Video Attributes”.
- The “Scale X” and “Scale Y” checkboxes are also automatically selected. (You can choose to uncheck either of them according to your needs.)
- Click on “Apply”. Done!
DaVinci Resolve Dynamic Zoom
If you want to implement a quick zoom effect without doing any animation (or keyframes) on your part, then Resolve’s “Dynamic Zoom” feature will save you a ton of time.
You should definitely check out the below post which contains a clear step-by-step tutorial to quickly get you started:
DaVinci Resolve Pan and Zoom Effect
You can achieve the ken burns like effect using the pan and zoom feature in Resolve.
That is…
You have your camera fixed, but you’d like to zoom in to frame a key subject, say, a moving person, and pan or track the subject. This creates a visual scene as if the camera was physically tracking the subject during shooting.
For a detailed step-by-step guide, check out the below post:
DaVinci Resolve Pan & Zoom Effect (Do THIS On The Edit Page)