
By default, the start timecode in DaVinci Resolve timeline starts at 1 hour (01:00:00:00). It can be a bit confusing when you are getting started, to see your timeline starting from 1 hour.
You can start the timecode of the timeline at 0 hours 00:00:00:00 in DaVinci Resolve and make it default for all the projects. More on that below.
Actually, there are reasons for the timeline to start at 1 hour. Today we’ll see why it is so and how to change it according to your needs.
Let’s get started!
- Why Does DaVinci Resolve Timeline Start at 1 Hour?
- What is a Timecode in a Video Editor Timeline?
- How to Start DaVinci Resolve Timeline at 0 Hour?
- How to Change Timecode in DaVinci Resolve?
- Timecode Explained in DaVinci Resolve
- What is the Floating Timecode Window in DaVinci Resolve?
- How to Enable DaVinci Resolve Floating Timecode Window?
- Before You Go
Why Does DaVinci Resolve Timeline Start at 1 Hour?
DaVinci Resolve timeline starts at 1 hour because it gives headroom (a bit of a lead time) to include any test signals, bars, tones, etc., before the actual start of your edit at the starting timecode of 1 hour (01:00:00:00).
A few seconds of lead time might be required if you are planning to screen in Film Festivals or other platforms that demand it.
What is a Timecode in a Video Editor Timeline?
A timecode is an 8-digit number that represents the hours, minutes, seconds, and frames from left to right.
Looking at the timecode will tell you where exactly one is in the media (video, audio, image, etc,) or sequence in a timeline.
In short, each frame of the video clip has a number in the form of a timecode.
Timecode is very important in making sure everything is in perfect sync.
How to Start DaVinci Resolve Timeline at 0 Hour?
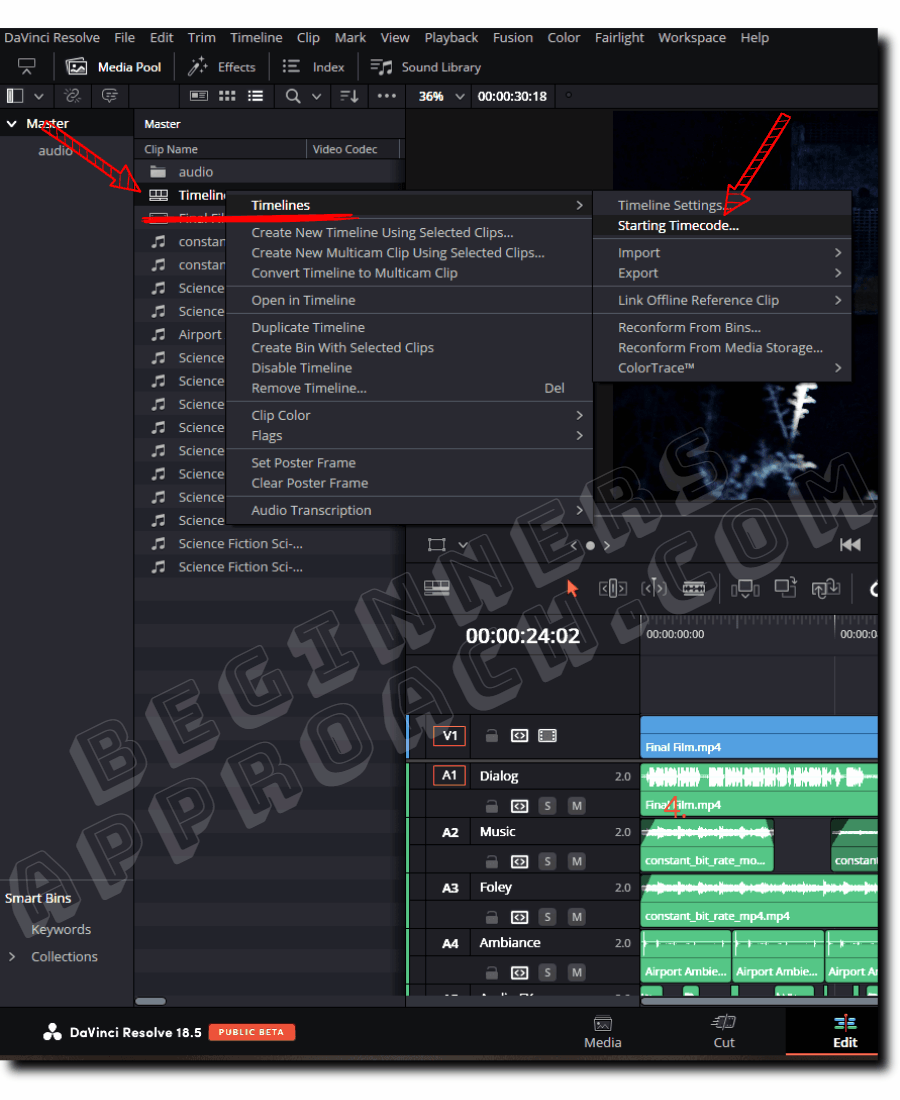
To start the DaVinci Resolve timeline at 0 hour, go to the “Edit Page”, click on the “Media Pool”, select your timeline > right-click > click on “Timelines” > select “Starting Timecode”. Set it to 0 hour “00:00:00:00”. The timeline timecode will start at 0 hour.
You can save time by changing the default timecode to start at 0 hour all the time without having to change it for all the timelines. This is how you do:
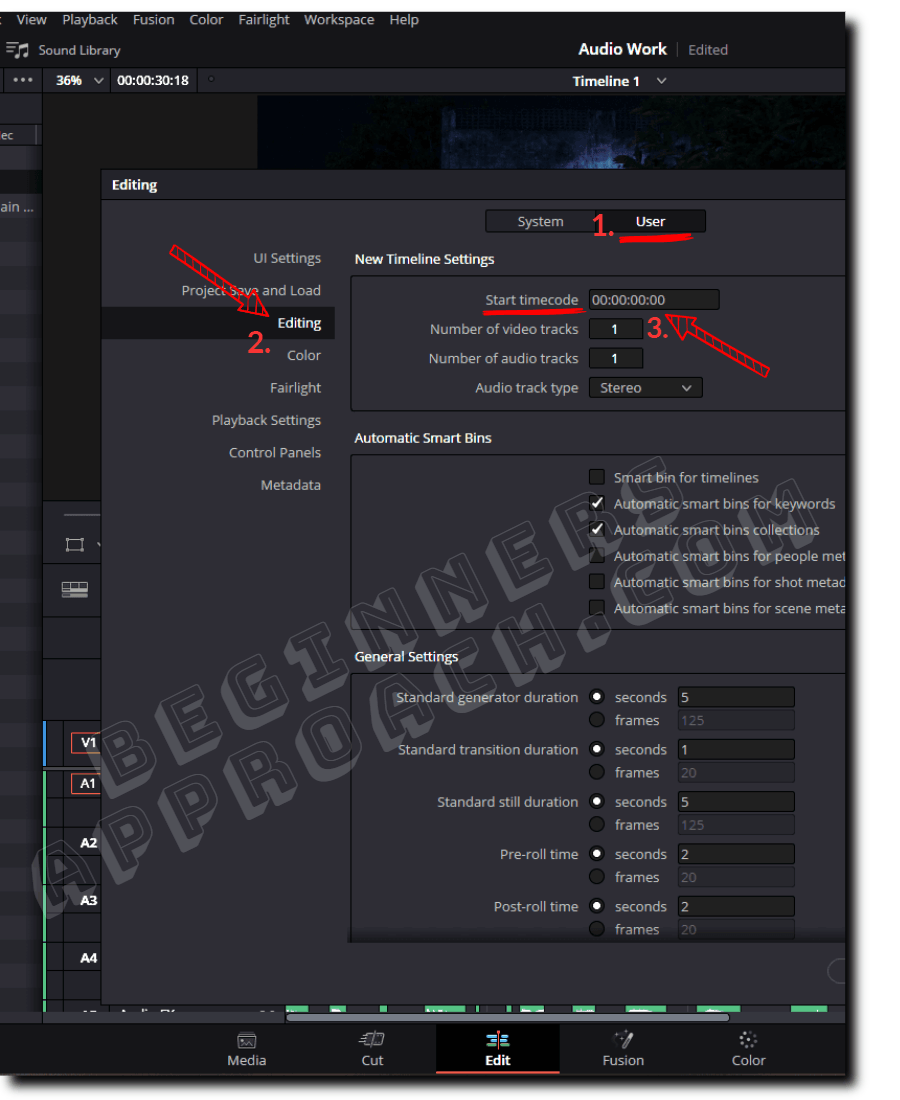
How to Change Timecode in DaVinci Resolve?
- Go to the menu “DaVinci Resolve” > “Preferences“.
- Click on the “User” tab.
- Click on the “Editing” section.
- Under “New Timeline Settings“, enter “00:00:00:00” against the “Start Timecode” field.
- Click on “Save” to change the timecode.
Note: When you create a new timeline, before dropping any clip, the timecode will display “01:00:00:00“. As soon as you drop a clip on it, the timecode will change to reflect “00:00:00:00“.
Timecode Explained in DaVinci Resolve
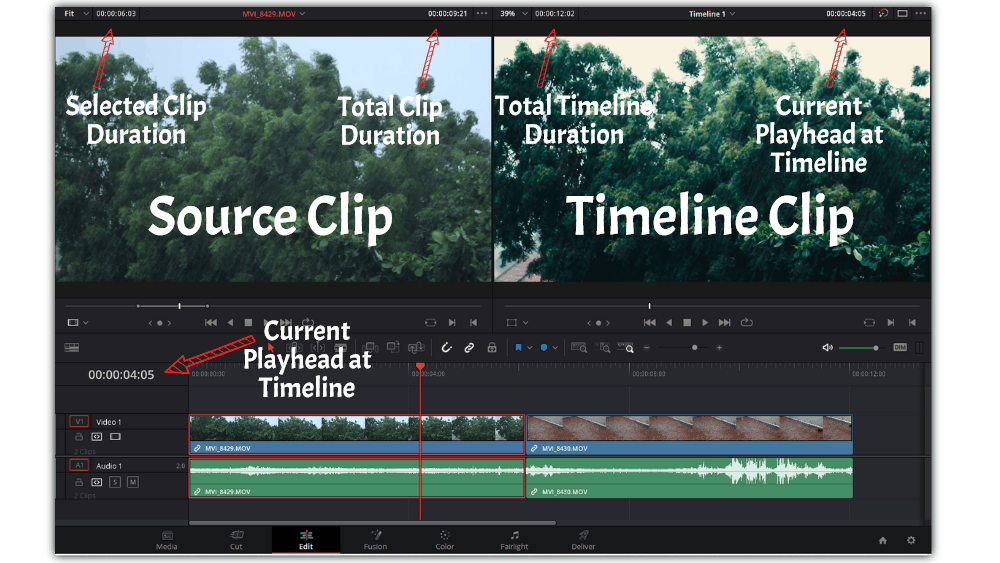
The Source clip’s timecodes denote:
- Selected Clip Duration (the selected in and out point only)
- Total clip duration.
The Timeline viewer’s timecodes denote:
- Total Timeline Duration
- Current Playhead at the Timeline.
The Timeline has a timecode, which displays the time of playhead at the timeline.
All these timecodes (clip timecode, timeline timecode) start at the value specified in the “Preferences” > “User” > “Editing” > “Start Timecode” (as discussed in the above section).
For 24 frames per second video, let’s say, the timeline playhead is at 1 minute, 10 seconds, and 23 frames (00:01:10:23). Now when you press the right arrow in the keyboard, that is, moving to the next frame, then the timecode will read “00:01:11:00” – 1 minute, 11 seconds.
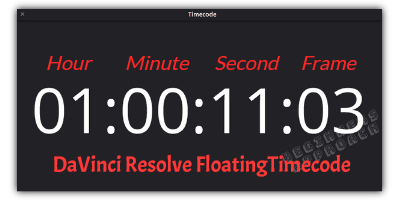
What is the Floating Timecode Window in DaVinci Resolve?
This is a timecode window that displays the timecode of the playhead at the timeline, which can float anywhere in DaVinci Resolve workspace, across all the tabs like Edit, Fusion, Fairlight, Color, etc.
How to Enable DaVinci Resolve Floating Timecode Window?
- Click on the menu “Workspace”.
- Click on “Timecode Window“.
- A floating timecode window is displayed with the timecode of the playhead in the timeline.
You can resize this window to your taste.
Before You Go
Now that you know how to start the timecode at 0 hours in Resolve, it is time to move on to changing the aspect ratio and resolution according to your delivery needs, like YouTube videos, Instagram reels, etc. I highly recommend the below detailed guides: