If you’re a beginner or a newcomer to DaVinci Resolve (versions 18.5, 18, 17, etc.), then today’s guide on “Quick Export” will save you a ton of time especially if you export a lot of videos.
“Quick Export” is a feature in DaVinci Resolve which let’s you quickly export your timeline with fewer settings (like resolution, duration, frame rate, etc,) compared to the traditional “Deliver” page, which has a lot of settings. “Quick Export” will also help you quickly export and upload your videos directly to social media platforms like “YouTube”, “Twitter”, etc.
To do a quick export in DaVinci Resolve, go to the menu “File” > select “Quick Export”. Choose your format, say, “H.265”. Click on the “Export” button. The quick export is done!
Let’s explore the quick export feature in detail – step-by-step with pictures.
- How to Quick Export in DaVinci Resolve 18.5?
- Difference Between Quick Export and Normal Export Deliver Settings in DaVinci Resolve
- How to Change Quick Export Settings in DaVinci Resolve 17?
- Quick Export Location in DaVinci Resolve
- Can I Place In and Out Points in Quick Export in Resolve?
- Quick Export Shortcut in DaVinci Resolve
- Quick Export No Audio in DaVinci Resolve
How to Quick Export in DaVinci Resolve 18.5?
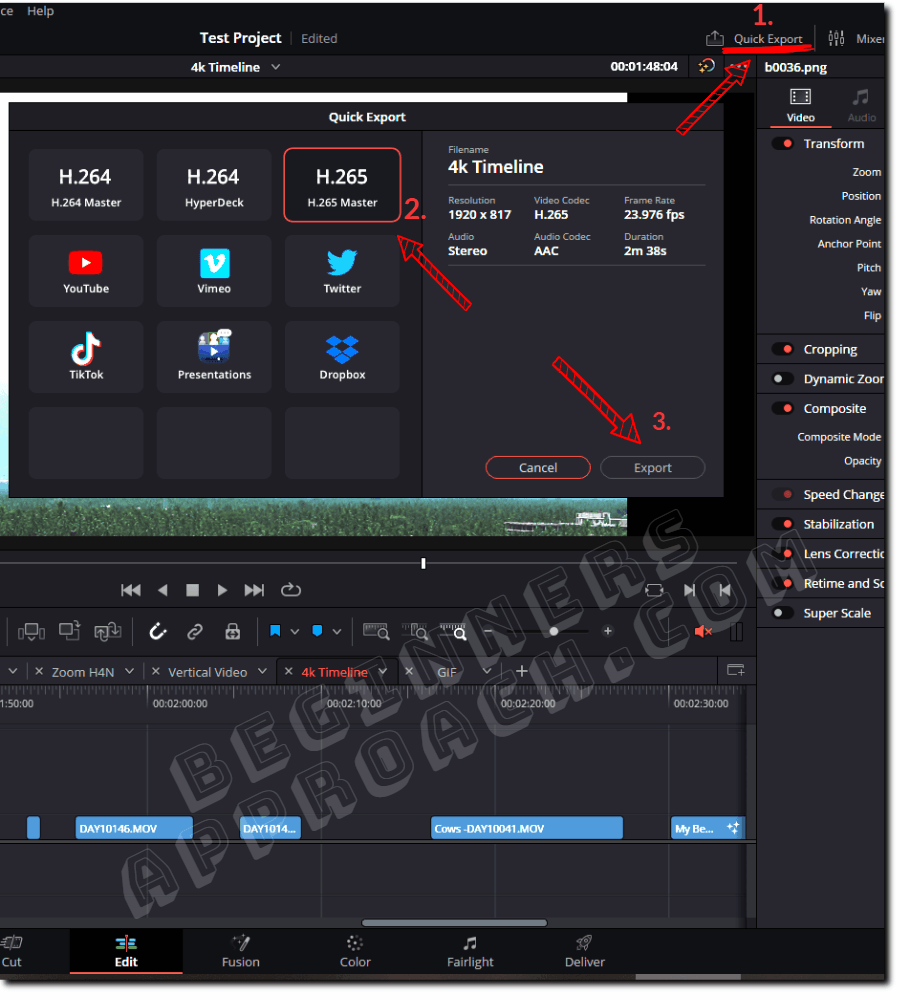
- Go to the menu “File” > select “Quick Export”.
- Choose your format, let’s say, “H.265”.
- Click on the “Export” button.
- A window will pop up, and choose your required folder for export.
- Enter your required file name and click on “Save”.
- A pop-up will tell you how long it will take to render.
- Done!
Difference Between Quick Export and Normal Export Deliver Settings in DaVinci Resolve
You can access “Quick Export” from any of the pages like “Cut“, “Edit“, “Fairlight“, “Color“, etc., whereas for normal export, you will have to strictly click on the “Deliver” page to access the settings.
“Quick Export” can be assigned a shortcut, and hence, with a single keystroke, you can export your timeline from any page. In contrast, you’ll have to update many fields in the “Deliver” page for a normal export (unless you have a preset created).
Related Article:
Quick Export in “Cut” Page in DaVinci Resolve
From the “Cut” page, you can click on the button “Quick Export” from the top right corner (apart from “File” > “Quick Export”).
How to Change Quick Export Settings in DaVinci Resolve 17?
To change “Quick Export” settings (not available in 18 & 18.5), go to the “Deliver” page and create custom render settings and save it as a preset. Then assign the newly created preset to the “Quick Exports” so that the preset will show up in the “Quick Export” pop-up.
Here’s how you change “Quick Export” settings to export video in Mp4, step by step:
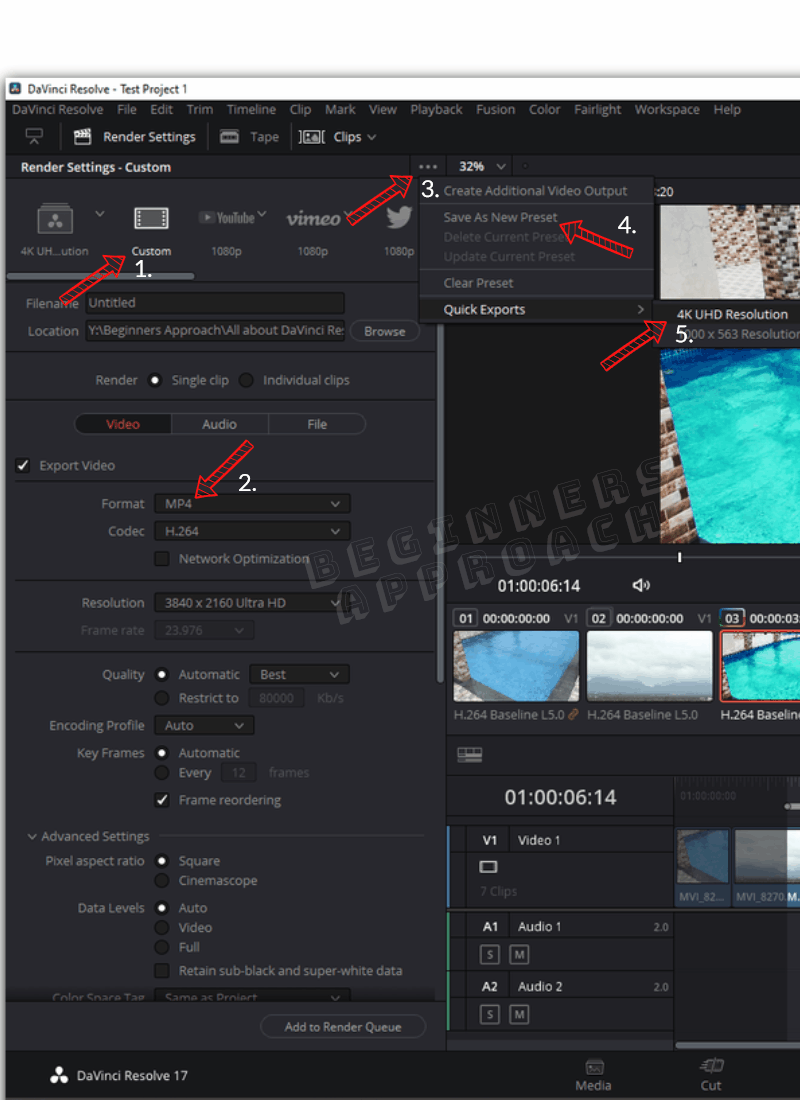
- Click on the “Deliver” tab.
- Click on “Custom“.
- Under the “Video” tab, select the “Mp4” extension from the “Format” dropdown.
- Select “Codec” as “H.264”.
- Change the resolution to your requirement, let’s say, 4K UHD (3840 x 2160).
- Update other settings if required.
- Then, click on the 3 dots from the top right corner.
- Click on “Save As New Preset“.
- Enter a proper name for your preset and save it.
- Again click on the 3 dots and click on “Quick Exports“.
- Check the preset you just created.
- This will add the preset to your “Quick Export” pop-up (when accessed through “File” -> “Quick Export”).
Next time when you go to “File” -> “Quick Export”, you will find your preset there. In fact, you can add many presets for a faster workflow.
Quick Export Location in DaVinci Resolve
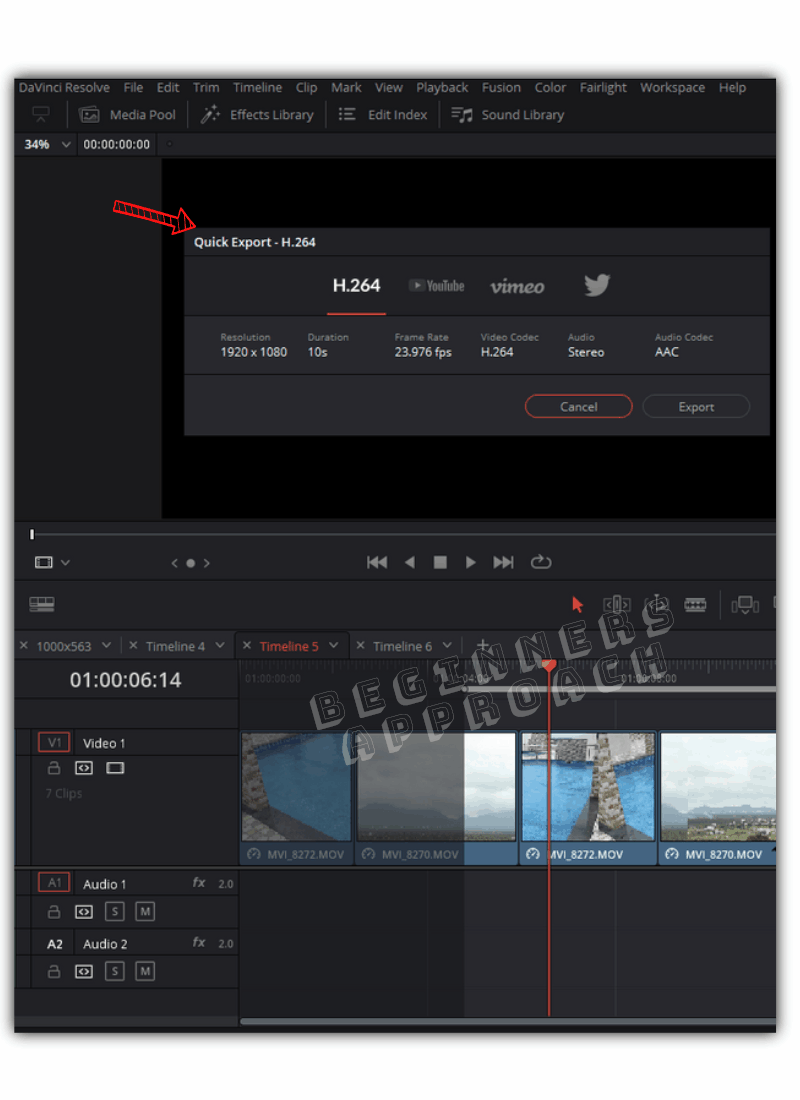
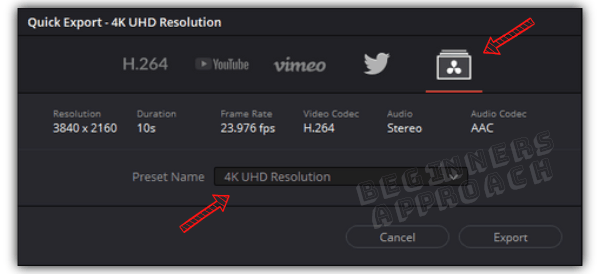
Go to “File” > “Quick Export”. Select your required preset like “H.264”, “YouTube”, or any custom presets created and added by you. Click on “Export“. You will get a window named “Choose Export Path…“. This is where you choose your export location by navigating to your required drives and folders.
Related Articles:
Can I Place In and Out Points in Quick Export in Resolve?
You can place in and out points by pressing the “i” and “o” keys, respectively, in the timeline. Then go to “File” > “Quick Export”; the pop-up will show the exact duration of the in and out points for rendering.
If no in and out points are set, then the entire timeline will be exported.
Quick Export Shortcut in DaVinci Resolve
There is no default shortcut for “Quick Export”, but you can assign a keystroke to it.
This is how you create a shortcut for Quick Export functionality:
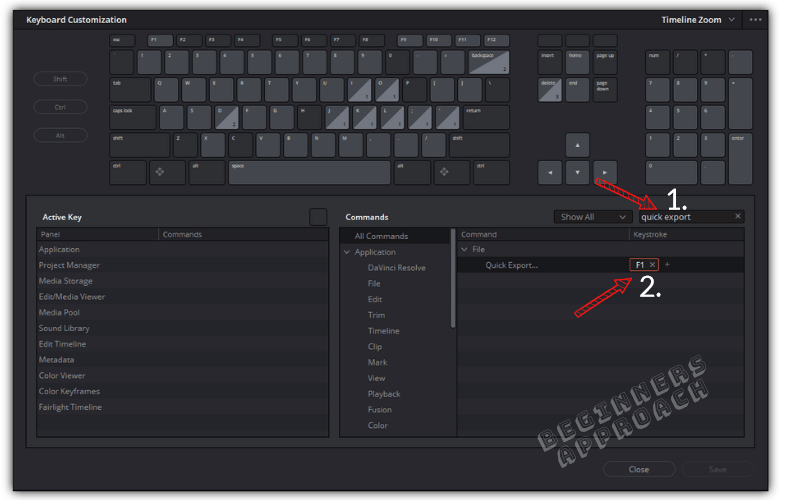
- Go to the menu “DaVinci Resolve” > “Keyboard Customization”.
- Go to the right-hand side search box and enter “quick export”.
- Go to the “Command”, “File” > “Quick Export” and click on the empty box under “Keystroke”.
- Enter any keystroke as far as it is already not assigned, say, for example, “F1”.
- Click on “Save“.
- Done!
When you hit “F1” from your keyboard from any of the pages like “Edit”, “Cut”, “Color”, etc., the “Quick Export” pop-up will be displayed!
What a time-saver it is!
This will certainly be helpful to all, especially to those who have a lot of content to be published regularly with the same render settings.
Quick Export No Audio in DaVinci Resolve
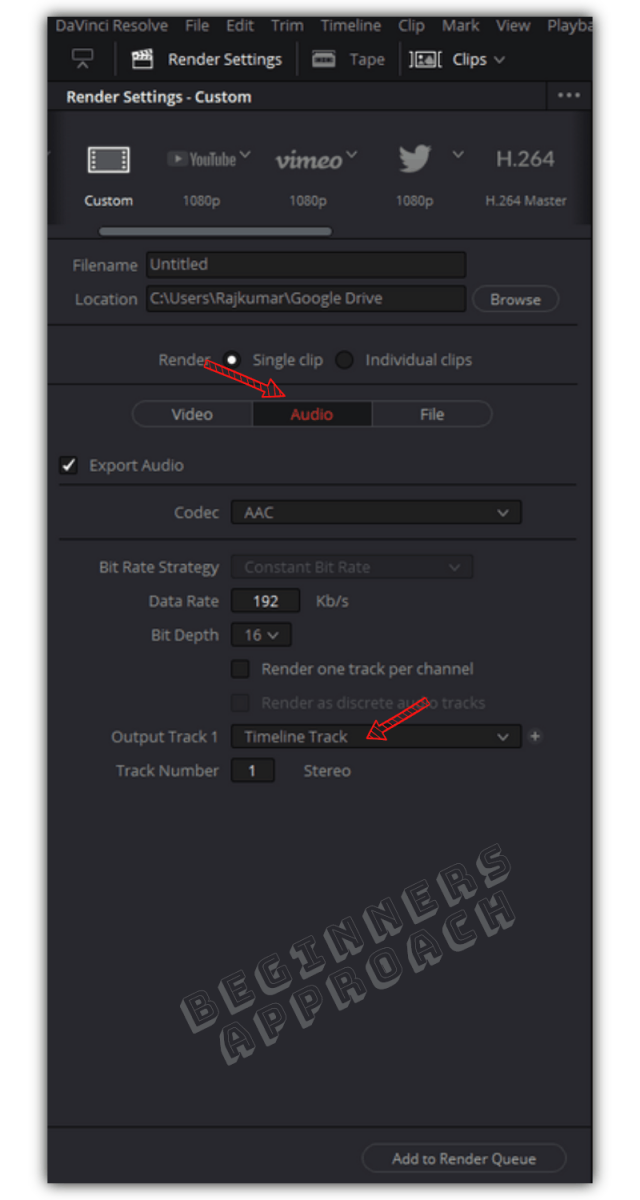
After you export either through “Quick Export” or normal export from the “Deliver” tab, if you have no audio, then go to the “Deliver” page, click on the “Audio” tab and select “Stereo” from “Output Track 1” dropdown instead of “Timeline Track “.
Save this as a new preset and add it to the “Quick Export” by clicking on the 3 dots from the top right corner. (Please refer to previous sections for step-by-step details with images).
Hi. I see you updated this post a few days ago – have you tried to find the Quick Export option under the 3 dots in deliver – it’s not there in my Studio 18.1 (and wasn’t an option under 18 either.
Thanks
Thanks for letting me know. I will verify and update the post accordingly.