If you’re a beginner or newcomer to DaVinci Resolve (versions 18.5, 18, 17, etc.), today’s guide will show you how to use the DaVinci Resolve Inspector icon feature.
What is “Inspector” in DaVinci Resolve?
The “Inspector” panel contains all the controls like zoom, rotate, crop, composite mode, stabilization, retime, etc., to modify a clip, its effects, or a transition between the clips. It has specific controls grouped according to “Video“, “Audio“, “Effects“, “Transition“, “Image“, etc.
The Inspector icon in DaVinci Resolve unlocks all the basic settings for modifying the clips according to your post-production needs.
The “Inspector” panel is available on the below pages:
- Media
- Cut
- Edit
- Fusion
- Fairlight
How to Open “Inspector” Panel in DaVinci Resolve?
- Launch DaVinci Resolve and open any project.
- Click on the “Edit” (or “Cut”) page.
- Create a timeline using your clips. (Or drag and drop the required clips into your existing timeline).
- Now click on the clip in the timeline that needs modification.
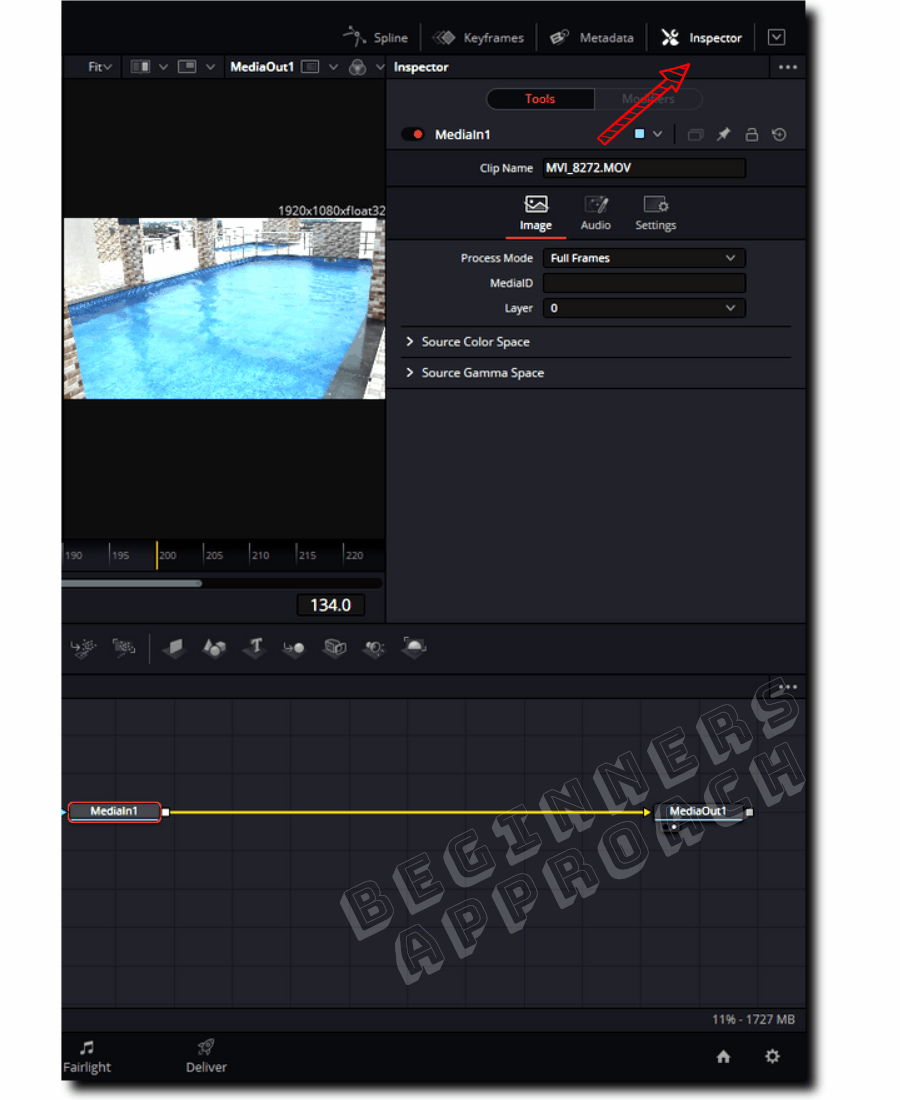
- Then go to the upper-right section to locate the “Inspector” panel. (You can find it in the top-right corner of the Resolve application.)
- Click on the “Inspector” panel to reveal the controls like “Transform”, “Cropping”, etc.
Once you start learning Resolve, you’ll quickly find out that working with “Inspector” becomes an integral part of your post-production workflow.
Beginners generally start by importing the clips into the “Media Pool” (by pressing “Ctrl + I” or “Cmd + I”).
Then create a timeline with the required resolution, say, 4K – 3840 x 2160.
Then drag and drop all the required clips into the timeline.
Then edit the clips – split, replace, cut, stretch, etc.
Then turn towards the “Inspector” panel to quickly modify the video/audio clips, images, effects, transitions, etc.
You’ll find yourself spending a lot of time in the “Inspector” panel.
Because this is where you will actually zoom, crop, or composite – or simply put, modify the clips to your taste.
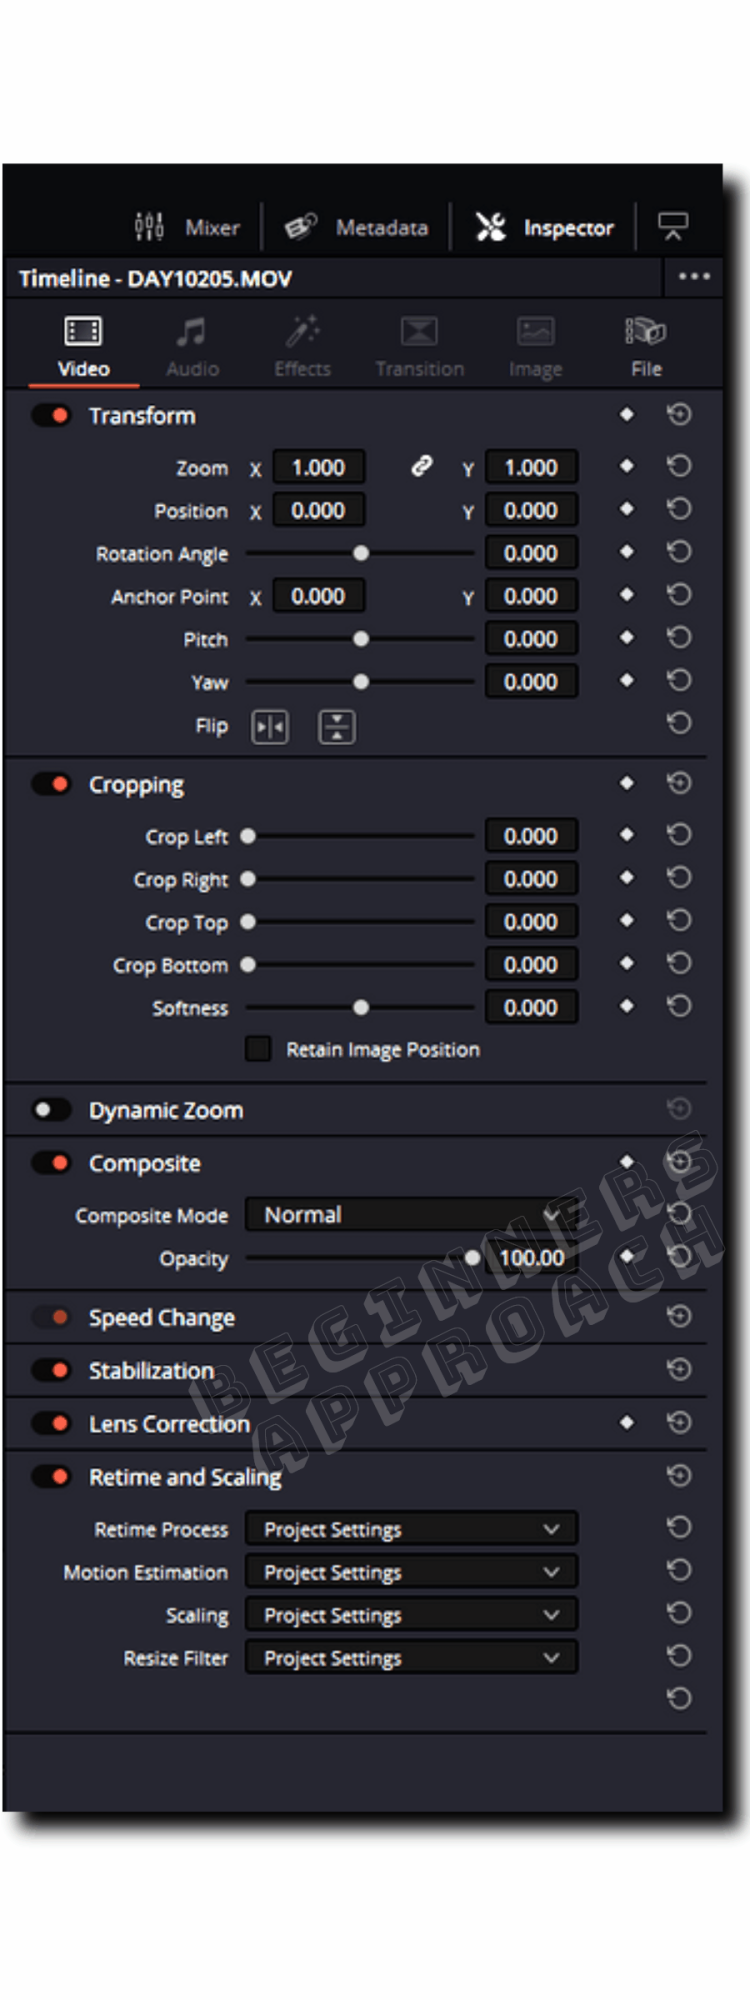
Most Important Settings in DaVinci Resolve Inspector for Video
- Transform
- Cropping
- Dynamic Zoom
- Composite
- Speed Change
- Stabilization
- Lens Correction
- Retime and Scaling
If any of the above control is disabled, click on the respective toggle button to enable it.
Another important feature in the “Inspector” panel is “keyframing“.
You can keyframe almost all of the settings under the “Inspector” panel. This is a fantastic feature!
Transform Controls
Transform controls let you adjust certain basic settings of your clips like;
- Zoom – for zooming in and out.
- Position – for panning left or right.
- Rotation angle – for rotating your video or image.
- Anchor point
- Pitch
- Yaw
- Flip – flip your clip vertically or horizontally.
Cropping Controls
Cropping controls let you crop your clip from top, bottom, left, or right. It also includes controls for “Softness” and “Retain Image Position“.
For more details, click on the below post:
Dynamic Zoom
By default, dynamic zoom is disabled. Click on the toggle button to enable it. Enabling dynamic zoom quickly introduces a zoom in or out according to the option selected in “Dynamic Zoom Ease”.
For more detailed information on different zoom techniques, click the below post:
Composite
Probably one of the most essential settings in DaVinci Resolve.
I use this feature a lot.
When you place two clips on top of each other and change the composite mode to different values, you get interesting results.
You will have to play with this setting to learn more about it.
Different options for compositing are:
- Normal
- Add
- Color
- Burn
- Luminosity (One of my favorites)
- Hard Light
- Linear Dodge
- and many more!
Stabilization
The stabilization feature lets you stabilize your shaky footage with different modes like “Perspective”, “Similarity”, “Camera Lock”, etc.
The previous version of Resolve had this feature only on the “Color” page.
Including the “Stabilization” in the “Inspector” panel on the “Edit” page has personally saved a lot of time for me by cutting back and forth between the “Edit” and “Color” pages.
(Nonetheless, you can still access the stabilization from the “Color” page.)
Retime and Scaling
I generally use the “Scaling” option a lot under the “Retime and Scaling” controls. Whenever I bring different resolution clips into the same timeline, I use the “Scaling” option to fit, fill or stretch the image as per my requirement.
Most Important Settings in DaVinci Resolve Inspector for Audio
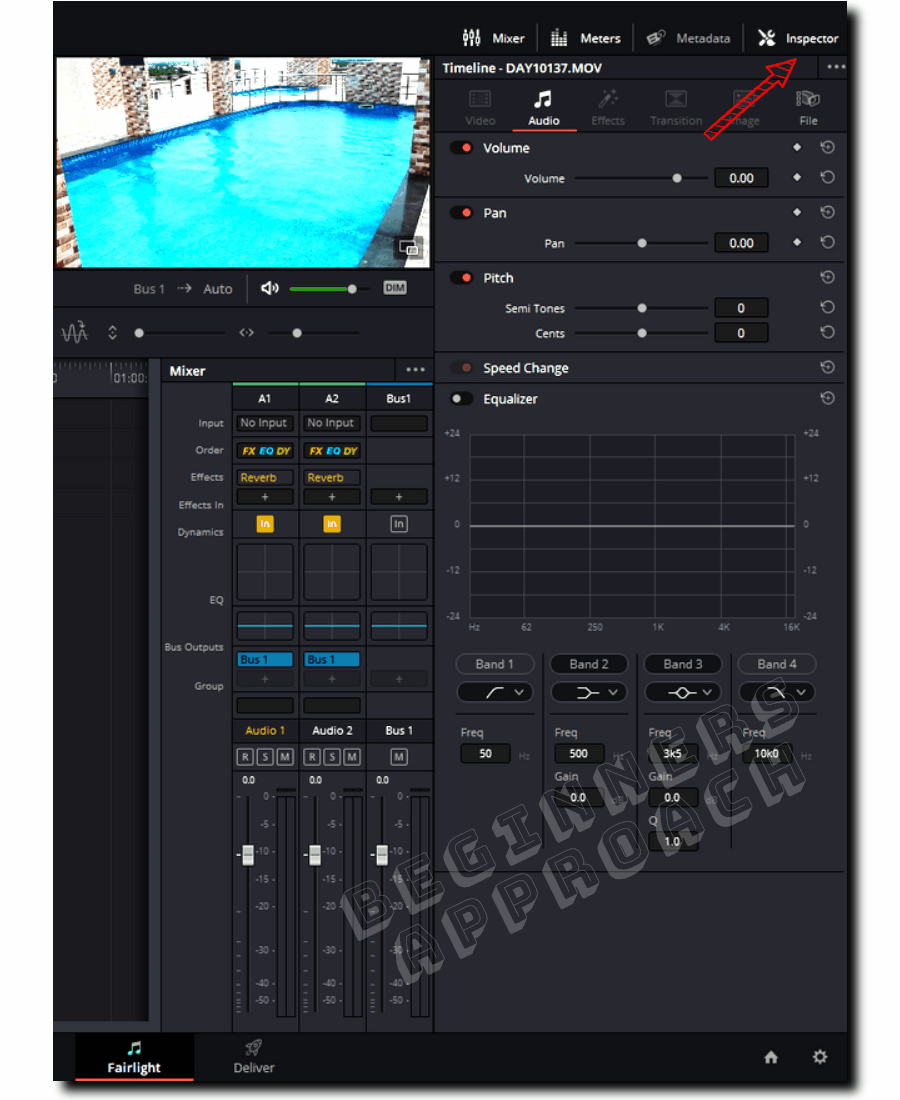
- Volume
- Pan
- Pitch
- Equalizer
Apart from the “Video” and “Audio” Inspector settings, there are settings for “Effects”, “Transitions”, and “Images” as well.
Most of them are unique to a particular effect or transition.
For example, try to drag and drop an effect from the “Effects” library on top of a clip in the timeline, let’s say, “Box Blur”.
Now click on the clip in the timeline and then click on the “Inspector” panel > click on the “Effects” tab; you’ll find settings specific to the “Box Blur” effect.
DaVinci Resolve Inspector Missing
In the latest versions of DaVinci Resolve, like versions 18 ( 17 and above), the Resolve Inspector missing error is not seen. Probably in the earlier versions of DaVinci Resolve, like version 16 or 15, there could have been some bugs with the software, but not anymore.
You may also be interested in the below posts: