If you’re a beginner or newcomer to DaVinci Resolve (versions 18.5, 18, 17, etc.), today’s guide will quickly show you how to import image sequences in Resolve and fix related issues.
To import an image sequence in DaVinci Resolve, go to the “Edit” page > click on the “Media Pool” tab. Press “Ctrl + i” (or “Cmd + i”) to import the image sequence. Choose your folder and “Open”. The image sequences is imported as a single clip. You can also import as individual images.
A DaVinci Resolve image sequence is a group of image frames that are numbered or named sequentially. By default, Resolve treats the image sequences (like png or dng) as a single clip.
But you can make DaVinci Resolve treat the image sequences as a single clip or individual image frames.
Let’s explore the DaVinci Resolve image sequence import process in detail – step-by-step with pictures.
How to Import an Image Sequence in DaVinci Resolve?
- Go to the “Edit” page, and click on the “Media Pool” tab.
- Press “Ctrl + i” (or “Cmd + i”) for importing the image sequence.
- Navigate to the desired location in your hard drive and select all of the image sequences.
- Click on “Open“.
- The image sequences are imported as a single clip.
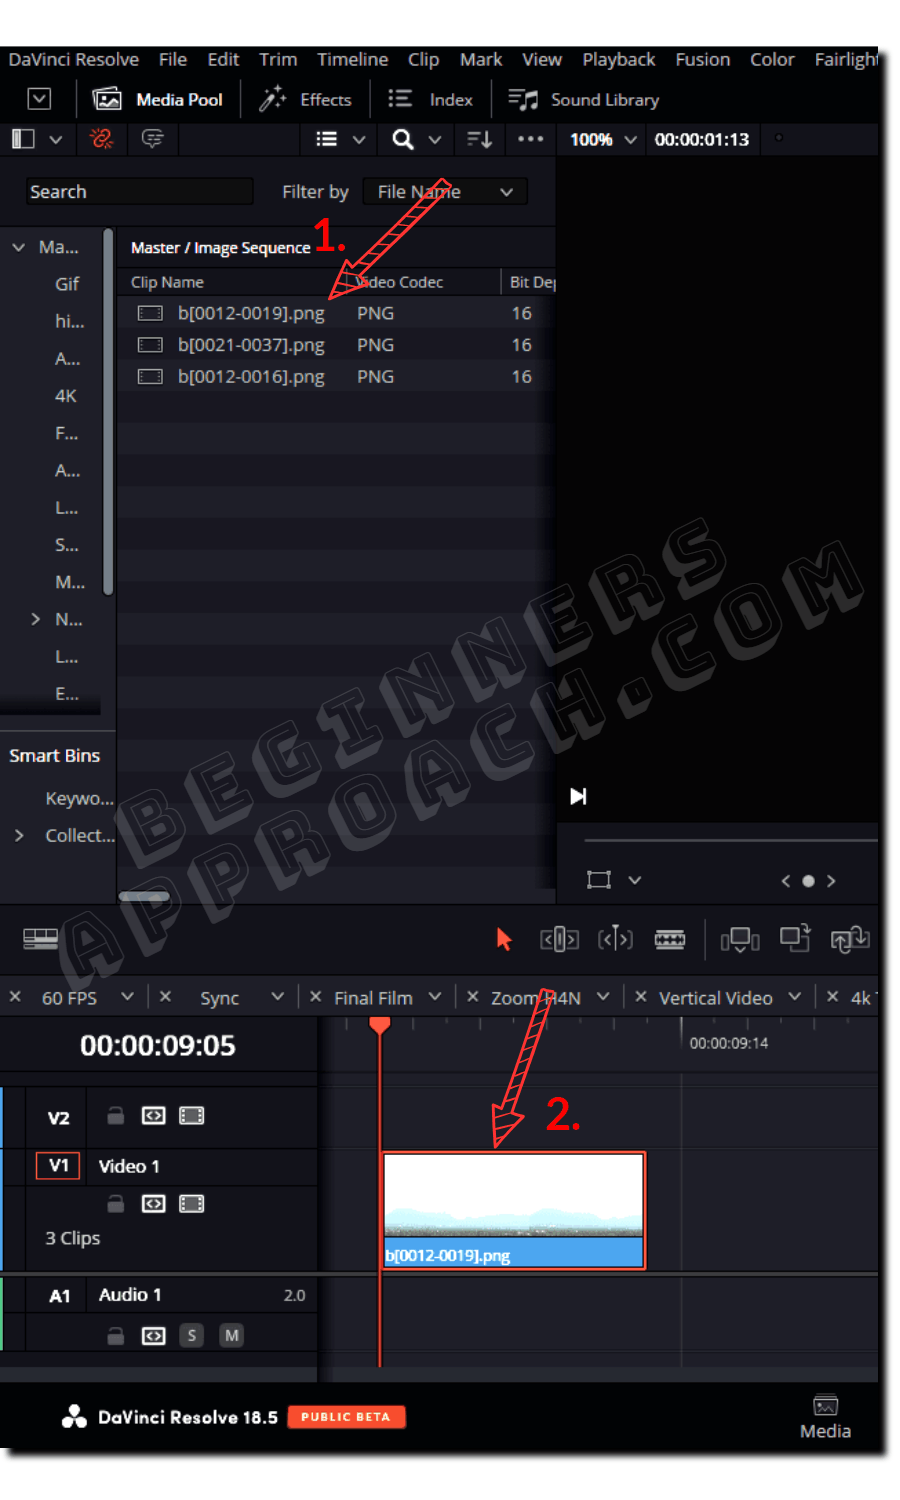
Sometimes Resolve doesn’t import the image sequence as a single clip. We’ll see how to overcome this.
DaVinci Resolve Doesn’t Import Image Sequence as a Single Clip
Resolve doesn’t import the image sequence as a single clip when the images are not sequentially named or numbered. There could be a few images that don’t have continuous numbers or are renamed differently from the other images.
Or…
You might have a group of images – all named differently. But you need Resolve to treat them as a single clip.
Either way, you’ll have to sequentially number them first and uncheck an option in Resolve, to treat it as a single clip.
Here’s how to do it.
How to Sequentially Number a Group of Images (Instantly)?
- Select all the images, either by dragging a box around them or pressing “Shift” while clicking all the images.
- After selecting all the images, right-click on the first clip and select “Rename“.
- Enter a name, let’s say “hi”, and press the “Enter” key.
- All the names of the images will be sequentially numbered automatically.
- These are now ready to be imported into Resolve.

You have to make sure the file names end with sequential numbers, like “a(001).png”, “a(002).png”…
If the file names end like these – a(001)(1).png, a(002)(1).png… then these are not sequential because the file names are always ending with “(1)”. If this is the case, remove the last number, say, “(1)”, and ensure the ending of the file name is sequential.
Now that the images are sequentially numbered, the next steps are:
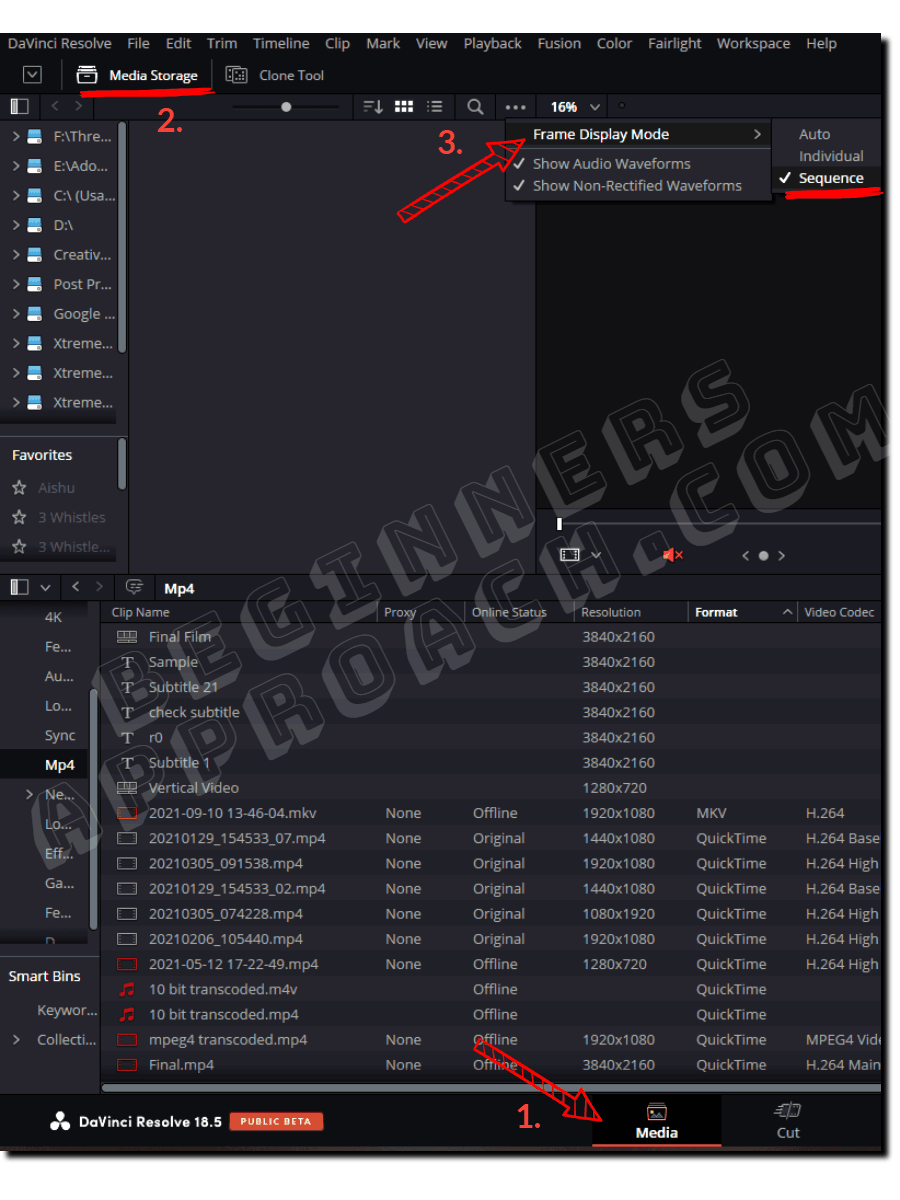
- Go to the “Media” page.
- Click on the “Media Storage” tab from the top left.
- Now click on the 3 dots and make sure the “Frame Display Mode” is set to “Sequence“. ( previously known as “Show Individual Frames”.)
- Press “Ctrl + i” (or “Cmd + i”) to import.
- Open the folder containing the image sequences.
- Select all the images and click on “Open“.
- The image sequences will be imported as a single clip inside Resolve.
The below is a screenshot from DaVinci Resolve version 17
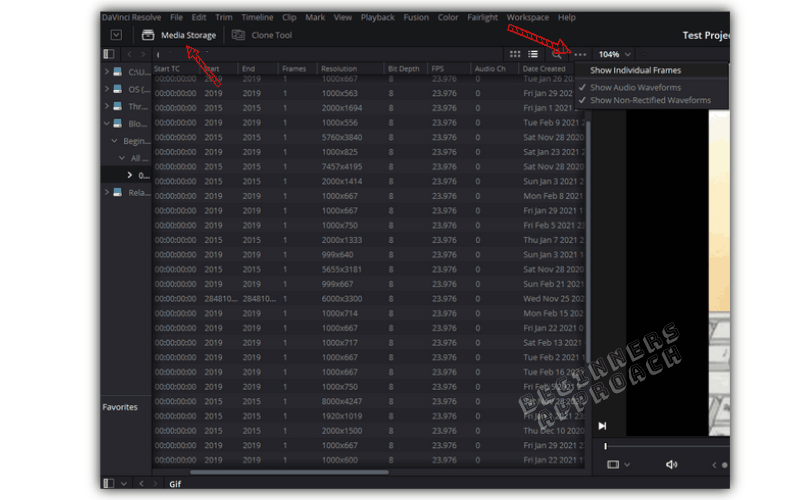
Please note:
Frame Display Mode – Sequence. This will club the image sequences into a single clip instead of showing them individually. This was known previously as “Show Individual Frames” in the earlier versions of DaVinci Resolve.
How to Import PNG Sequence to DaVinci Resolve?
To import png sequence in DaVinci Resolve, press “Ctrl + i” (or “cmd + i”) to import the png files. Select all of the png files and click on “Open”. The png sequence is now imported as a single clip.
If you want to import png sequence as individual images, then follow the below steps.
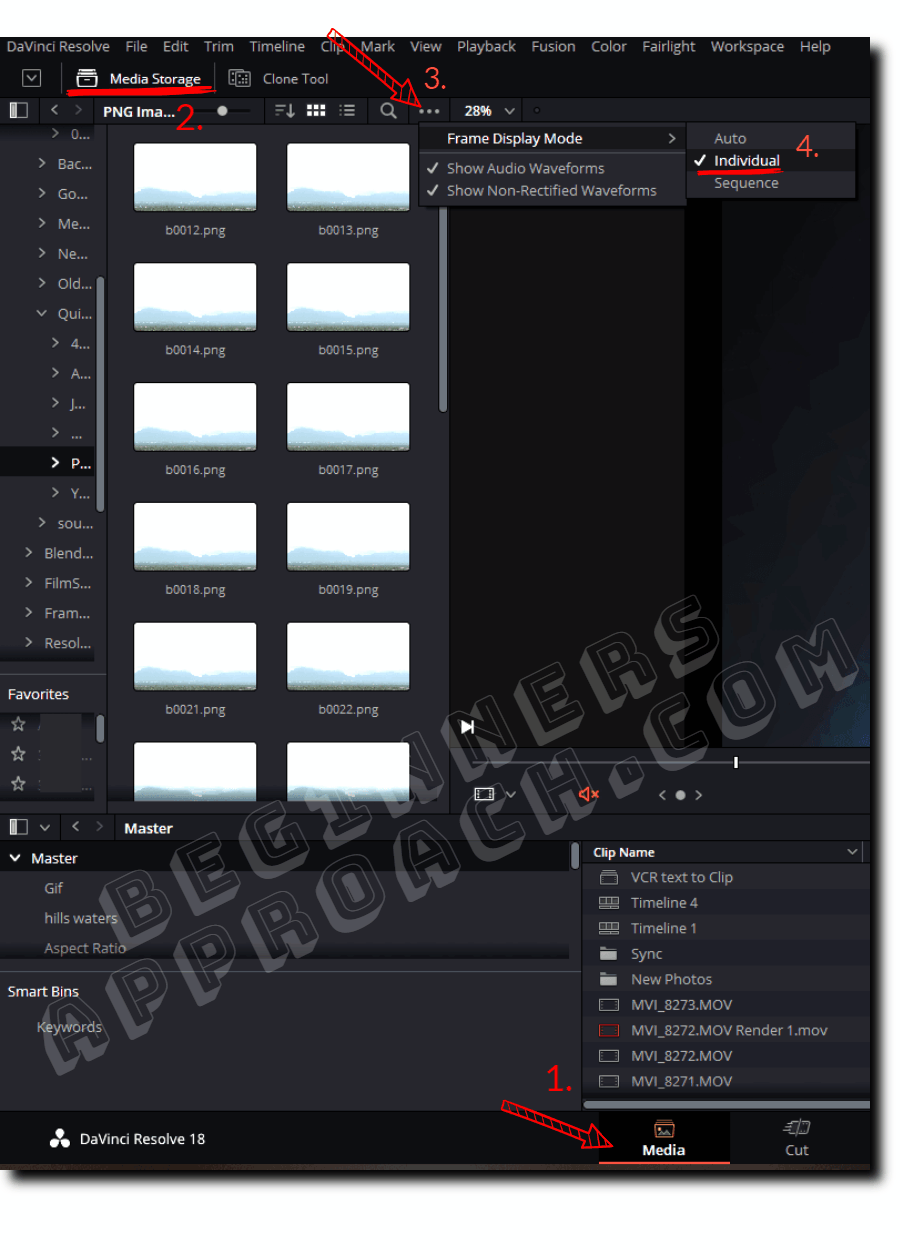
How to Make DaVinci Resolve Import an Image Sequence as Individual Frames?
- Launch DaVinci Resolve.
- Click on the “Media” page. (See the screenshot below)
- Click on the “Media Storage” tab from the top.
- Click on the 3 dots and select “Frame Display Mode” > “Individual“. (Previously “Show Individual Frames”.)
- Select the location of your images from the left-hand side, which displays all your connected hard disks.
- Select all of your images, right-click, and select “Add into Media Pool”.
- Click on the “Edit” or “Cut” page, then click on the “Media Pool”, and you’ll see all the imported images in the “Master” bin.
Before You Go
Now that you know how to import image sequence, the next natural step is to convert them into a video and export. I highly recommend the below detailed guide: