
With social media like YouTube having exponential growth, many of the gamers are making a living by recording, streaming and editing video games.
Today we’ll see if DaVinci Resolve is good for editing gaming videos. (Helpful for beginners and newcomers to DaVinci Resolve version 18.5, 18, 17, etc.)
Is DaVinci Resolve Good for Editing Gaming Videos?
DaVinci Resolve is definitely a good choice for editing gaming videos. The free version of DaVinci Resolve provides you all functionalities like 60 FPS timeline, 4K UHD resolution, editing tools, free sound effects library, world class color grading, and advanced compositing for delivering gaming videos of your choice!
Today we’ll see what is required for editing gaming videos and how to record your favorite game optimally for a smooth editing in DaVinci Resolve.
- Is DaVinci Resolve Good for Editing Gaming Videos?
- Minimum System Requirements for Editing Gaming Videos in DaVinci Resolve
- Video Editor Features Required For Editing Gaming Videos
- My Gaming PC and Laptop and Their Configuration
- Determine What Type of Editing You Want For Your Gaming Videos
- Recommended OBS Settings for Recording Games to be Used in DaVinci Resolve
- How to Record Games for Editing in DaVinci Resolve?
- Bringing the Gaming Video Inside Resolve
- Closing Thoughts
Minimum System Requirements for Editing Gaming Videos in DaVinci Resolve
If you are already running high-end games, then most probably you might meet the minimum system requirements of a GPU with minimum 4GB onboard memory, minimum 6 core CPU, a minimum of 16 GB RAM, SSD for storage, etc.
If this is the case, then no need to worry. The hardware requirements for editing videos in DaVinci Resolve are already taken care of!
If your computer doesn’t meet the minimum requirements, then don’t worry – we’ll also look at the work-arounds needed to edit and publish your gaming videos!
More on that later.
Related Article:
Is DaVinci Resolve Good for YouTube? (Things You Should Know)
Video Editor Features Required For Editing Gaming Videos
The software you use (in this case DaVinci Resolve) should support the following functionalities for an excellent output:
- Basic editing, trimming, rippling functionalities.
- Slow-motion, speed re-timing, freeze frame, rewind functionalities.
- Inbuilt special effects (like “Effects Library” in Resolve) for stylized transitions, effects, text animations, etc.
- Color correction and Color grading (DaVinci Resolve is well known for its color grading capabilities)
- Sound Effects to enhance the production value (“Fairlight Sound Library” in Resolve which provides free sound effects.)
- Green screen compositing (“Fusion” page in Resolve)
- Audio Editing (in Resolve “Edit” page is enough for sound design. But if you want a dedicated and advanced sound tool – “Fairlight” is the right page for you!).
DaVinci Resolve has all of the features inside one single platform – all for free!
There is no need for you to switch between applications for finishing your gaming videos.
On top of that, you can also use third-party plugins from Boris FX (Sapphire, Mocha), Red Giant, iZotope, etc., in the form of OFX plugins, to enhance your videos.
You can safely rely on Resolve for its powerful and flexible features.
Read the below post to know about the animation and vfx capabilities of Resolve (if you’re interested in that aspect):
My Gaming PC and Laptop and Their Configuration
Few years back – I had to upgrade my PC. I was in a tough spot.
I wanted a PC that could accommodate both H.264 footage editing and high end gaming.
I already had Canon T5i dslr camera and Fuji mirrorless camera that could shoot 1080p and 4K at H.264 respectively.
At the same time I was interested in playing high-end games like Far Cry, Fortnite, Call of Duty, etc.
So naturally I wanted a system that could handle both editing and gaming needs.
After researching online like crazy, I understood that most of the hardware configurations were the same for video editing pc and gaming pc, except a few, like color-calibrated monitors for detailed color correction, which was not essential for gaming.
Of course – the budget also played a huge part. Then I zeroed in on the below.
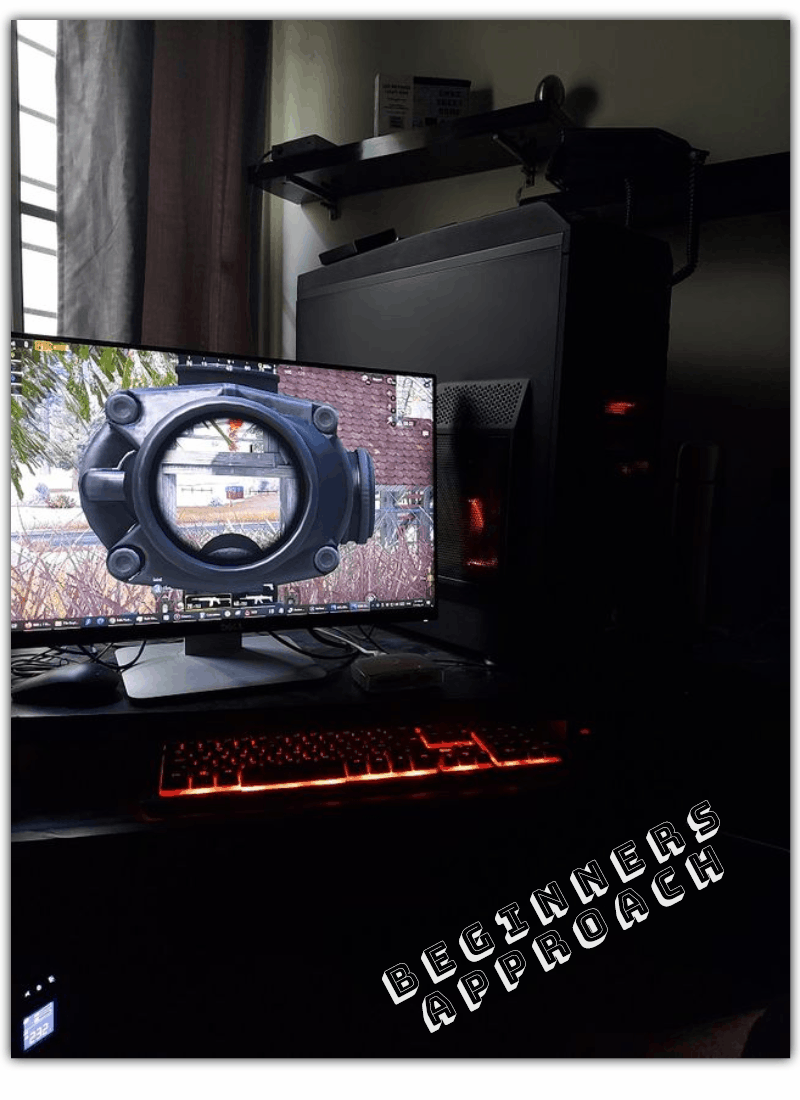
My desktop’s hardware configuration (mid-range pc bought on 2015):
- Processor = Intel Core i7 – 5820K @3.30 GHz – 6 core
- GPU = Nvidia GeForce GTX 970 – 4 GB onboard Memory
- 3 SSDs – Samsung Evo 850
- 16 GB RAM – Corsair
- 1080p 60 Hz Monitor – Dell U2414H (Factory color calibrated)
- Asus Workstation motherboard
With this kind of PC, I was able to edit highly compressed codecs like H.264 and also indulge in gaming.
As demand for my work increased, I badly needed a mobile workstation that could also handle both H.264 editing and high-end gaming, on the move.
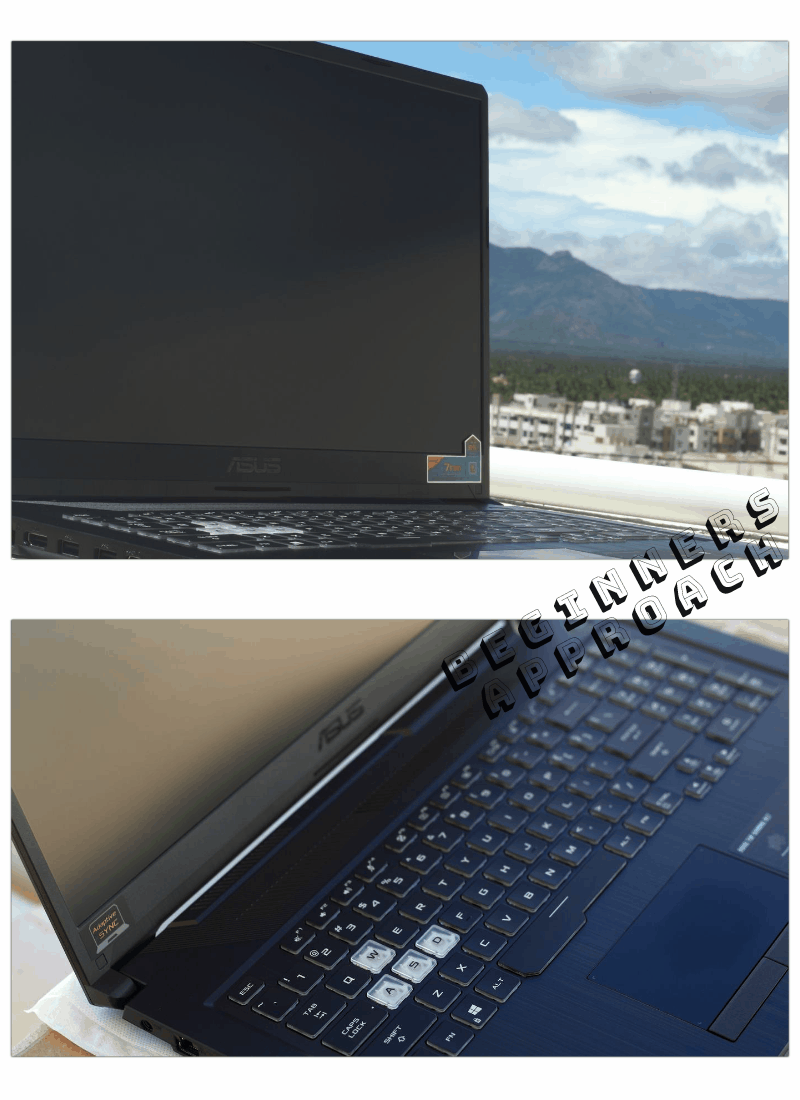
After doing research, I zeroed in on the budget Asus A17 gaming laptop.
Asus A17 TUF Gaming hardware configuration:
- Processor = AMD Ryzen 5 Hexa Core 4600H
- GPU = NVIDIA GeForce GTX 1650
- 512 GB SSD , 1TB HDD
- 8 GB RAM (this is less)
Thing to keep in mind is that both of the above struggle to play 4K H.264 footage in real time when any fusion related effects are applied to it.
This is expected because H.264 and H.265 are not editor friendly codecs. They will put a huge stress on your pc’s resources.
So mostly, I take the proxy route. I will either transcode the 4K H.264 footage to 720p or use the “Optimize Media” option to downscale the footage to “DNxHR LB” while editing. This is an editor-friendly codec and maintains real-time playback.
So if you’re one whose pc doesn’t meet minimum system requirements, then you need to do the same – transcode or optimize your media to an editor-friendly codec. It will ensure the playback is real-time and no frames are dropped.
Once the editing is done, I point my footages to the original high resolution 4K and then export!
If your work demands lot of videos to be published regularly to YouTube, then read the below post to quickly export directly to YouTube from the “Edit” page without going to “Deliver” page:
Determine What Type of Editing You Want For Your Gaming Videos
Before you start recording and editing your gaming video, take a minute to decide if you want the output to be a funny montage or a walkthrough or a tutorial kind of video.
Deciding this upfront should help you in recording and editing your gaming videos for maximum impact.
Once you have made up your mind, let’s now record in OBS Studio (free software for screen recording) – keeping in mind the optimal settings required for a smooth editing in DaVinci Resolve.
To learn about screen recording in OBS Studio, please click on the below post for a quick walkthrough:
Recommended OBS Settings for Recording Games to be Used in DaVinci Resolve
- Launch OBS Studio screen recording software.
- Go to the menu and click on “File” -> “Settings“.
- Click on the “Output” tab -> “Recording“.
- Choose your “Recording Path“. This is where your recorded videos will be stored.
- “Recording Format” – let be “mkv” as default. (You can later convert to mp4 easily within the same application, discussed later).
- “Encoder” – select “Hardware (NVENC)” (or AMD VCE for AMP GPU).
- Click on “Video” tab.
- Set your “Base” and “Output Resolution” to, say, “1920 x 1080” (you can change this to your required resolution)
- Change the “Common FPS Values” to “60” for a smoother video. Also ensure you set 60 FPS from the settings of your game before playing and recording.
- Click on “Apply” and “Ok“.
The above settings ensure your GPU is used for encoding (or exporting) your 60 FPS 1080p video in .mkv format.
(Keep in mind that DaVinci Resolve won’t support mkv. Hence we will convert it to mp4 within OBS before importing it inside DaVinci Resolve. More on that later).
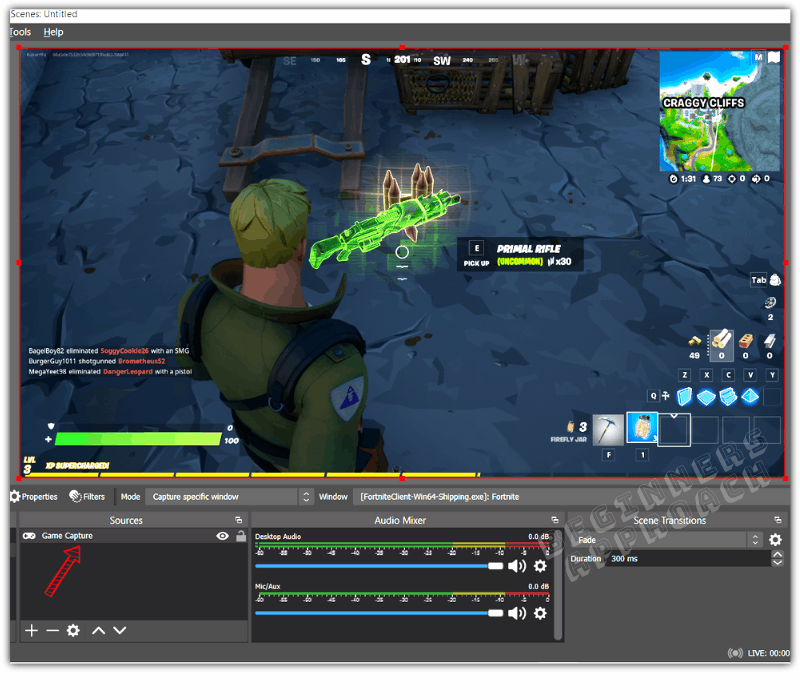
How to Record Games for Editing in DaVinci Resolve?
- Launch your game, say, Fortnite, and minimize it.
- Now open “OBS Studio“.
- Under the “Sources” section, click on the “Plus” button and select “Game Capture“.
- In the next window, select “Mode” = “Capture specific window”.
- “Window” = your game, let’s say, “[FortniteClient-Win64-Shipping.exe]: Fortnite”.
- Click on “Ok“
- Now maximize your game. Come back to OBS and you’ll see your game displayed in OBS.
- If you want your face to be displayed along with the game, then click on the plus button under the “Sources” section.
- Select “Video Capture Device“. Give “Ok“. (Also ensure to have a microphone connected to record your audio. If not you could also directly record your voice in DaVinci Resolve. So no worries).
- Your webcam will display your video. Resize the screen to make it small and move it to any corner as per your need, so that the game dominates the screen.
- Make sure the “Video Capture Device” is placed above the “Game Capture” under the “Sources”. If not, just drag and drop it.
- Now click on “Start Recording” from the right-hand side bottom.
- Open your game, start playing and show your skills!
- Come back again to OBS to stop the recording.
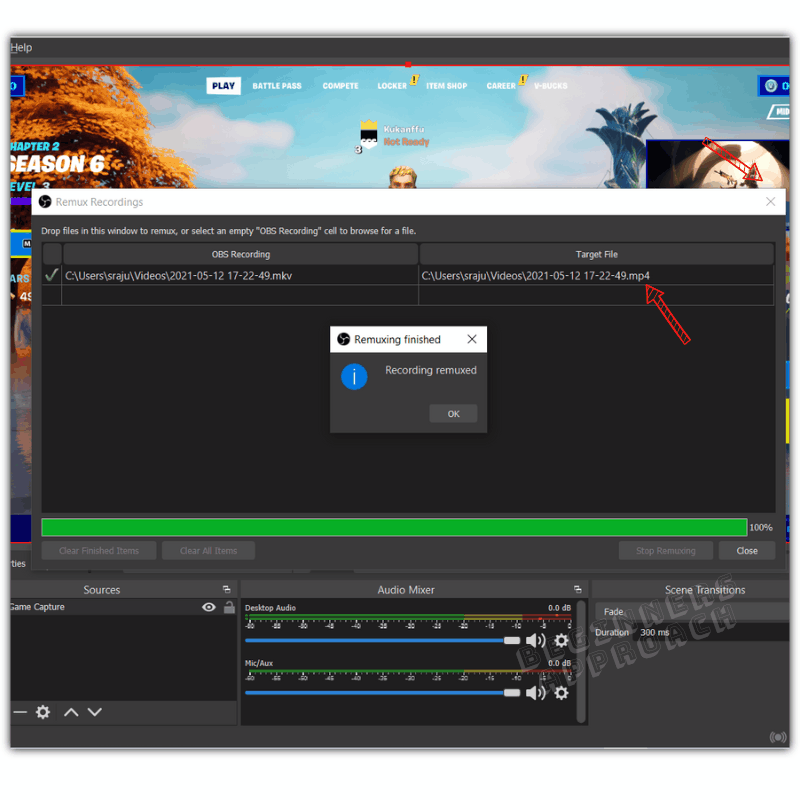
Convert MKV Format to MP4 Format in OBS Studio
- Open OBS Studio.
- Click on “File” -> “Remux Recordings“.
- Select your mkv video file (your recorded video).
- Under the “Target File“, rename the file extension to “.mp4” and choose the desired location to save it.
- Click on “Remux“.
- Your file is now converted to .mp4 – DaVinci Resolve recognizable format!
If you don’t have DaVinci Resolve, then click on the below post to know how to download and install:
Download & Install DaVinci Resolve on Windows: (Step-by-Step Guide)
Bringing the Gaming Video Inside Resolve
Launch Resolve and then import the video clip. Set your timeline resolution to match the source footage (let’s say, 1920 x 1080 at 60 FPS), which should also be your export resolution.
Keep in mind that once you set your frames per second and import some footages inside Resolve, you won’t be able to change it afterwards.
To know more, click on “Frame Rates in DaVinci Resolve (Things You Should Know)“
After importing, if you see any syncing issues between the audio and video, or if your media becomes offline, then check out the below post for solution:
Once all is set, the next thing is editing your video. If you’re completely new, then quickly get started on DaVinci Resolve editing by going through the video from Blackmagic Design.
If you are already familiar with editing, then go through the below informative video by Casey Faris – which specifically covers how to edit and export the gaming videos inside Resolve:
Closing Thoughts
DaVinci Resolve should easily accommodate your editing needs for gaming.
You don’t have to switch applications for a particular functionality like VFX or sound design.
All required features are bundled together inside the free version of DaVinci Resolve – saving you a lot of headache!
The only thing required from your end (if you’re a beginner) is investing your time to learn Resolve.
It is a steep learning curve – but well worth the effort!
You may also be interested in the below post:
Premiere Pro Vs DaVinci Resolve (Which is Easier to Learn for Beginners?)