
This is part of the DaVinci Resolve Subtitles series.
After completing your subtitle work, it’s time to export them.
There are 2 different scenarios based on your workflow:
- Export only subtitle
- Export video along with the subtitle
Without wasting time, let’s dive right in!
If you have finished the captioning (subtitling) work while you are on the “Edit” page and you need only the subtitle and not the video, then do the following:
How to Export Only the Subtitle in DaVinci Resolve Quickly?
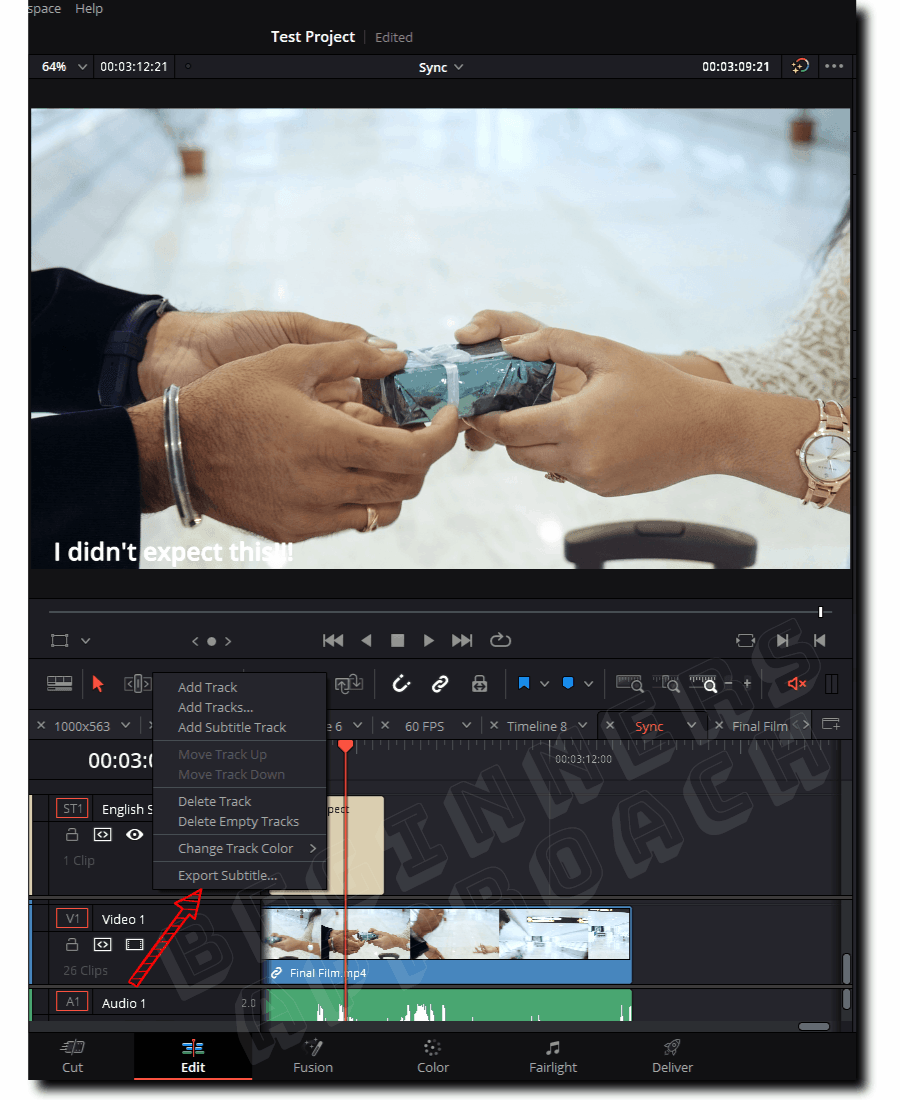
- Under the “Edit” page, right-click on the subtitle track header.
- Click on the “Export Subtitle” option. (You can also click on the “File” > “Export” > “Subtitle”.)
- An “Export Subtitle” window will pop up.
- Enter your desired filename.
- Select “.srt” for the “Save as Type” file format for your subtitle file. (Or you could choose your required file formats like “.vtt”, “.ttml”, “.dfxp”, etc.)
- Click on “Save“.
Your subtitle file will be exported as a “.srt” file.
You can open the .srt file using a notepad and check its contents. You can also import the .srt file back into Resolve to verify its contents.
Please keep in mind the below important points while exporting your subtitles:
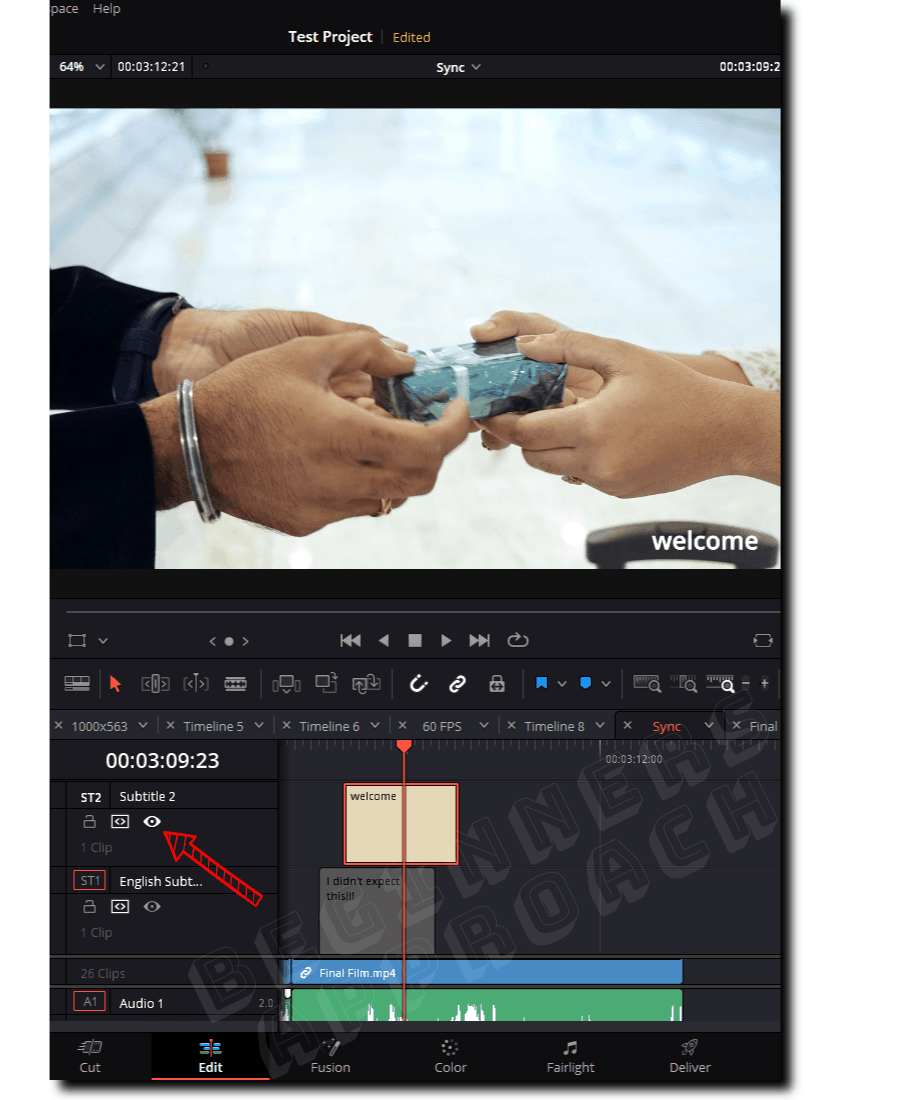
- When you have multiple subtitle tracks, make sure to right-click on the required subtitle track header on the “Edit” page timeline.
- If you export the subtitle via “File” > “Export” > “Subtitle”, then make sure the required subtitle track is active in the timeline, by clicking on the eye icon called “Enable Subtitle Track”.
How to Export Subtitles Along with Video in Resolve?
- Go to the “Deliver” page.
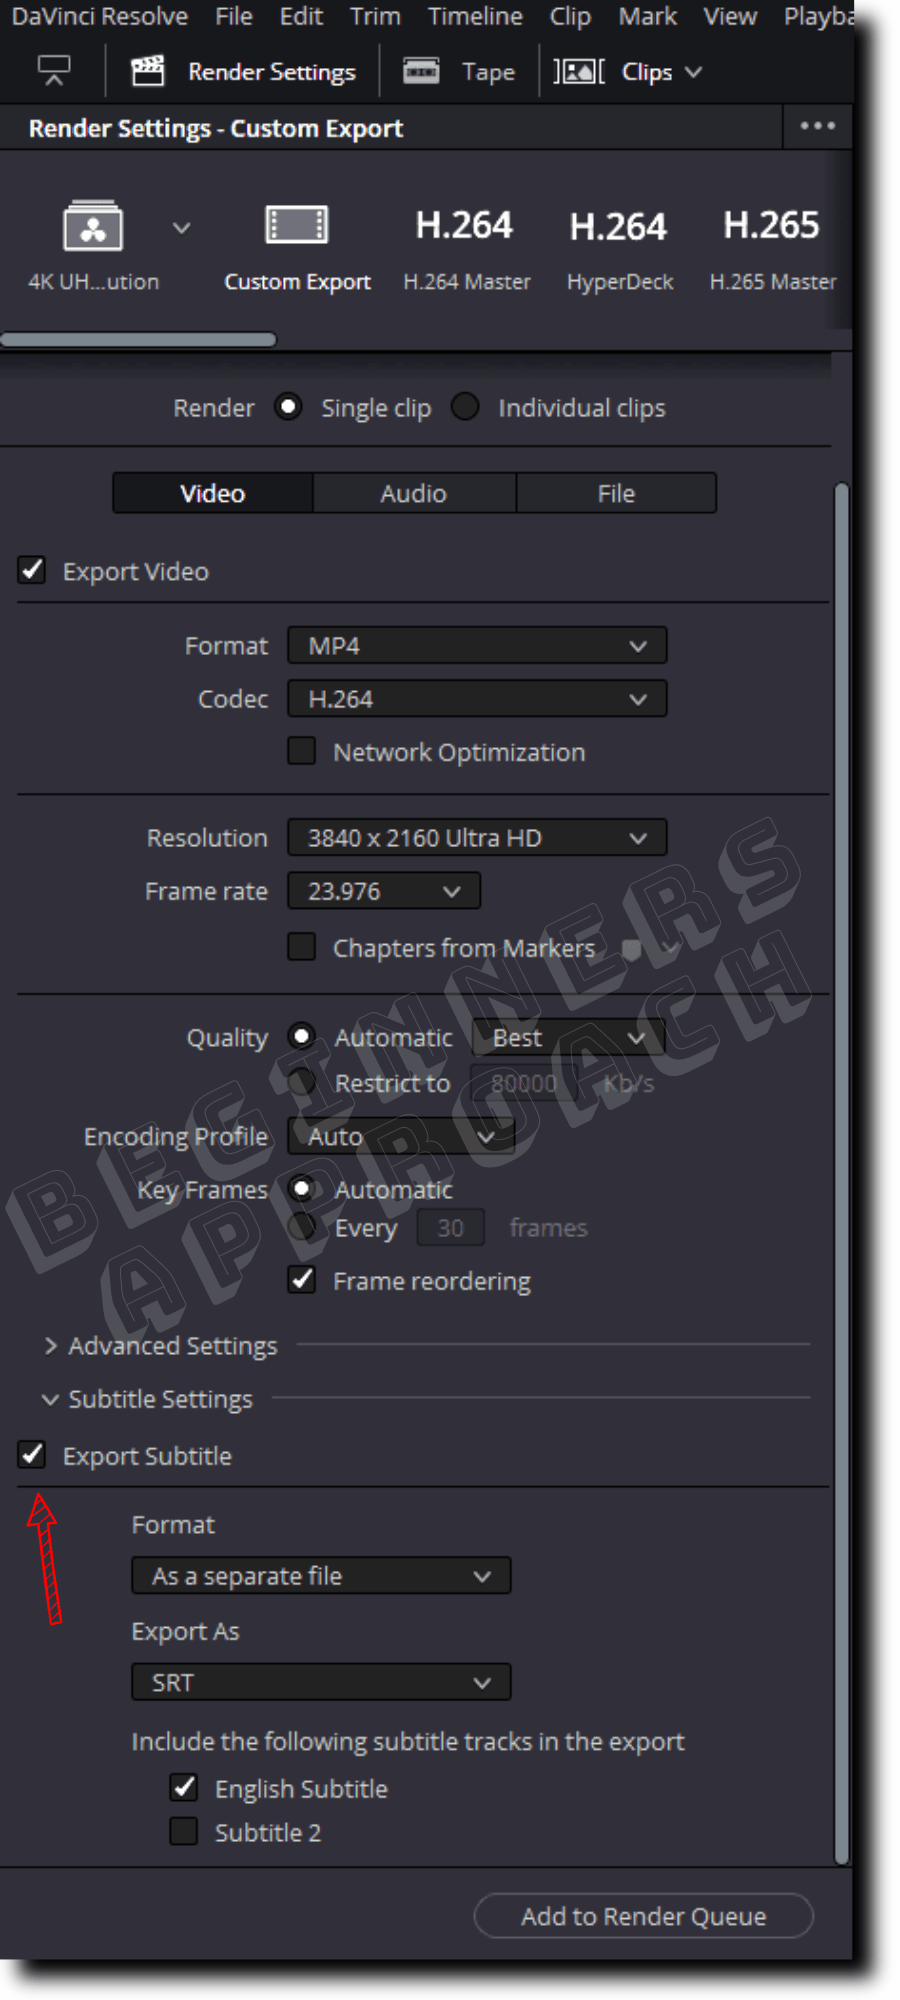
- Under the “Video” panel, choose your required “Format” (say “Mp4”) and choose your required “Codec”, say, “H.264”.
- Choose your resolution, say, “3840 x 2160” for a 4K UHD delivery and choose your frame rate, say, “23.976”.
- Click on the “Subtitle Settings” panel and it will reveal additional settings related to subtitle.
- Check the “Export Subtitle” checkbox.
- Under the “Format” dropdown, choose “As a separate file”.
- Choose “Srt” for “Export As“.
- “Include the following subtitle tracks in the export” > select your required subtitle track (if you have multiple subtitle tracks)
- Click on “Add to Render Queue” and then click on “Render All” from the right-hand side to render your video along with the subtitle.
When you choose “As a separate file” for subtitle format, Resolve will export your video as well as the .srt subtitle file separately.
If you want the subtitle to be burned in (baked right into the video) then do the following:
How to Export Subtitle Burned into the Video in Resolve?
Go to the “Deliver” page. Under the “Video” panel, click on the “Subtitle Settings” panel > Check the “Export Subtitle” checkbox. Under the “Format” dropdown, choose “Burn into video”. Click on “Add to Render Queue” and then click on “Render All” from the right-hand side.
Resolve will export your video with the subtitle permanently burned in.
How to Export Subtitles from Davinci Resolve to YouTube?
To export subtitles along with the video for YouTube delivery, go to the “Deliver” page; under the “Video” panel, click on the “Subtitle Settings” > check the “Export Subtitle” checkbox. Under the “Format” dropdown, choose “As a separate file” > Choose “Srt” for “Export As”. And then select your required subtitle track.
Then add it to the render queue and then render it.
After the render is complete, go to your YouTube studio account. Upload both the video and the “.srt” subtitle file.
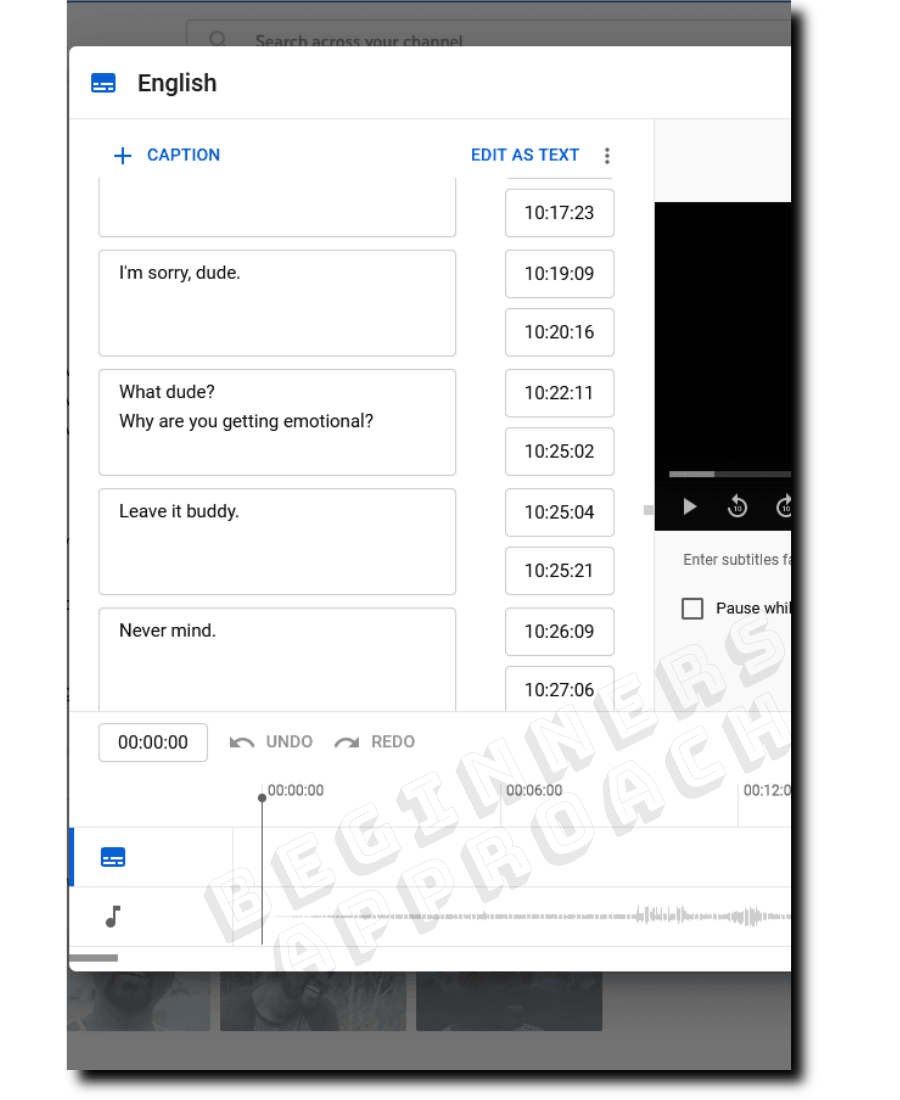
Double-check if the subtitle matches your audio. After ensuring everything is fine, then publish!
Subtitle Not Rendering in DaVinci Resolve?
The most common issue is the subtitle not rendering in Resolve. Make sure to check the “Export Subtitle” checkbox in the “Deliver” page under the “Video” panel. If you have multiple subtitles, then choose the required subtitle track which contains your subtitle.
On the “Edit” page, make sure your required subtitle track is not disabled. If it is disabled, then click on the eye icon to enable the subtitle track. Now when you export, your subtitle should render along with the video.
Related Article:
Hi,
really good article! Thank you!
Quick question:
A friend created subtitles with a specific style in Davinci Resolve. He then exported a .srt file and when I import them back into Davinci the whole styling (font, background, line spacing, color) is gone and back to the standard. Is there any way to import a .srt file with a specific style? In Premiere Pro this totally works.
It’s a little frustrating.
Thank you