DaVinci Resolve can export frames (still images) in formats like PNG, JPG, TIFF, etc. You can either export a single frame or go to the “Delivery” page and export a sequence of frames (images).
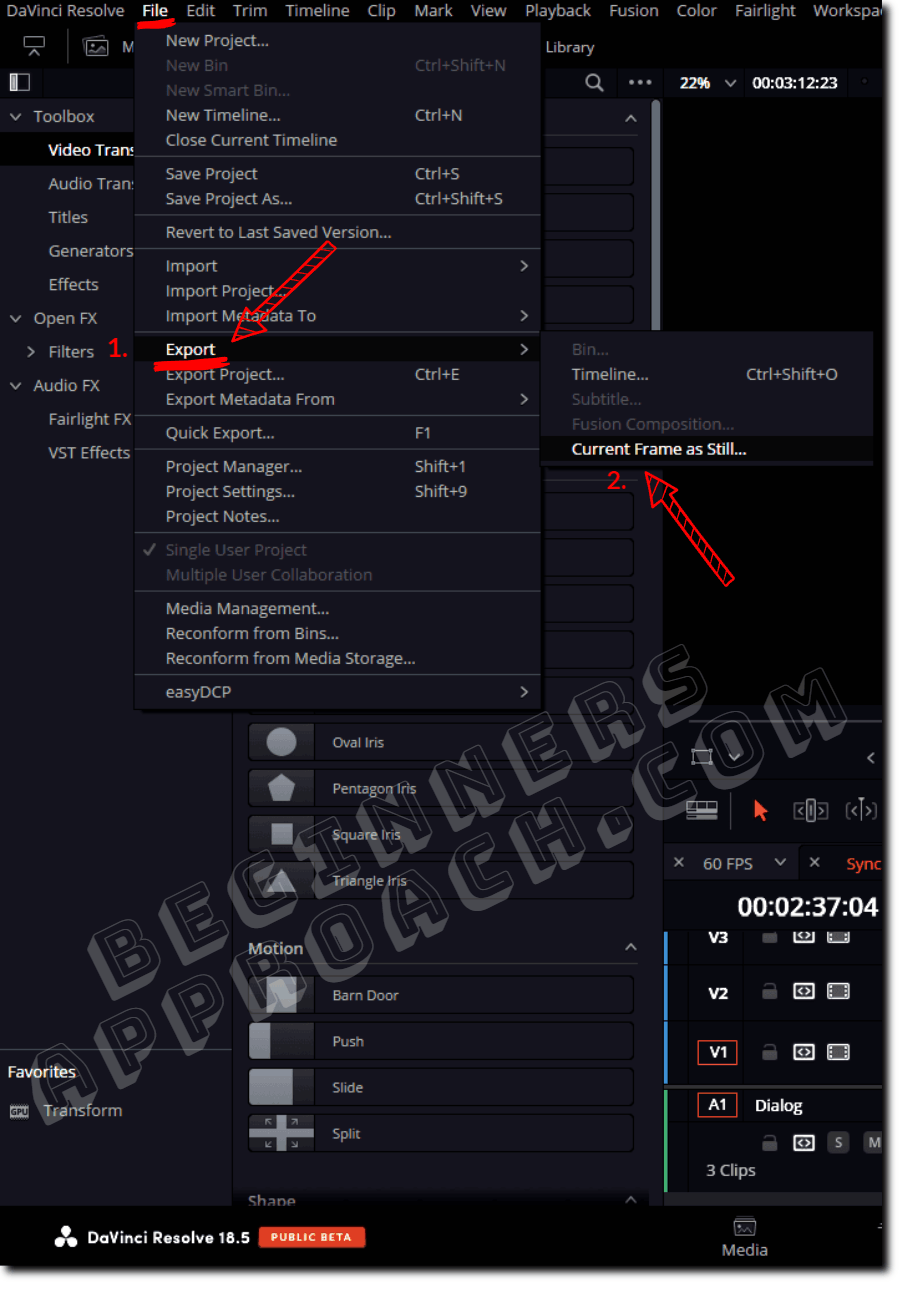
To export a frame (still image) in DaVinci Resolve 18.5 and above, place the playhead on the required frame on the timeline of the “Edit” page. Then, navigate to “File” > “Export” > and select “Export Current Frame as Still”. The frame is exported.
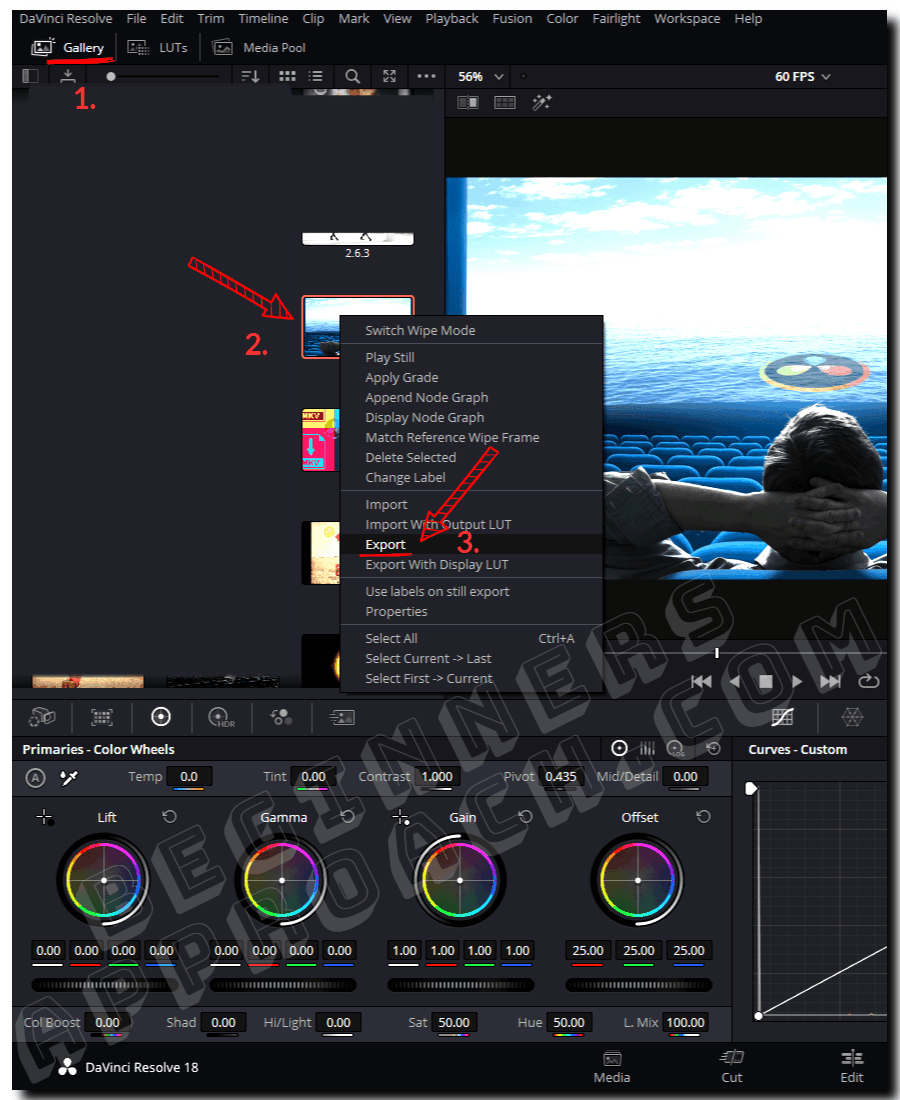
In the older versions of DaVinci Resolve 18 or 17, to export a still, first select the image in the timeline of the “Edit” page, then go to the “Color” page, right-click on the viewer, and select “Grab Still”. From the “Gallery” tab, right-click on the grabbed still and then select export to various formats like jpeg, png, tiff, etc.
Before getting started, ensure you have the desired timeline resolution set in the “Project Settings”, for the highest quality output.
For example, if you want your image to be of the highest quality, say, 4K UHD (3840 x 2160), then set the same in the “Project Settings” > “Master Settings” > “Timeline Format” > “Timeline Resolution”.
There might be chances that you would have lowered the timeline resolution for smooth playback. This is just a reminder so that before exporting the image, you have the highest quality output.
If you’re a beginner or newcomer to DaVinci Resolve (versions 18.6, 18.5, 18, 17, etc.), then today’s guide will show you how to export Png, Jpg, TIFF, etc., as a single frame and a sequence of frames in Resolve.
How to Export a PNG Frame in DaVinci Resolve?
- Under the “Edit” page, click on your desired PNG image to select it.
- Go to the “Color” page.
- Right-click on the viewer and select “Grab Still“.
- Click on the “Gallery” tab (left-hand side) to reveal the screenshot.
- Locate your still and right-click it.
- Select “Export“.
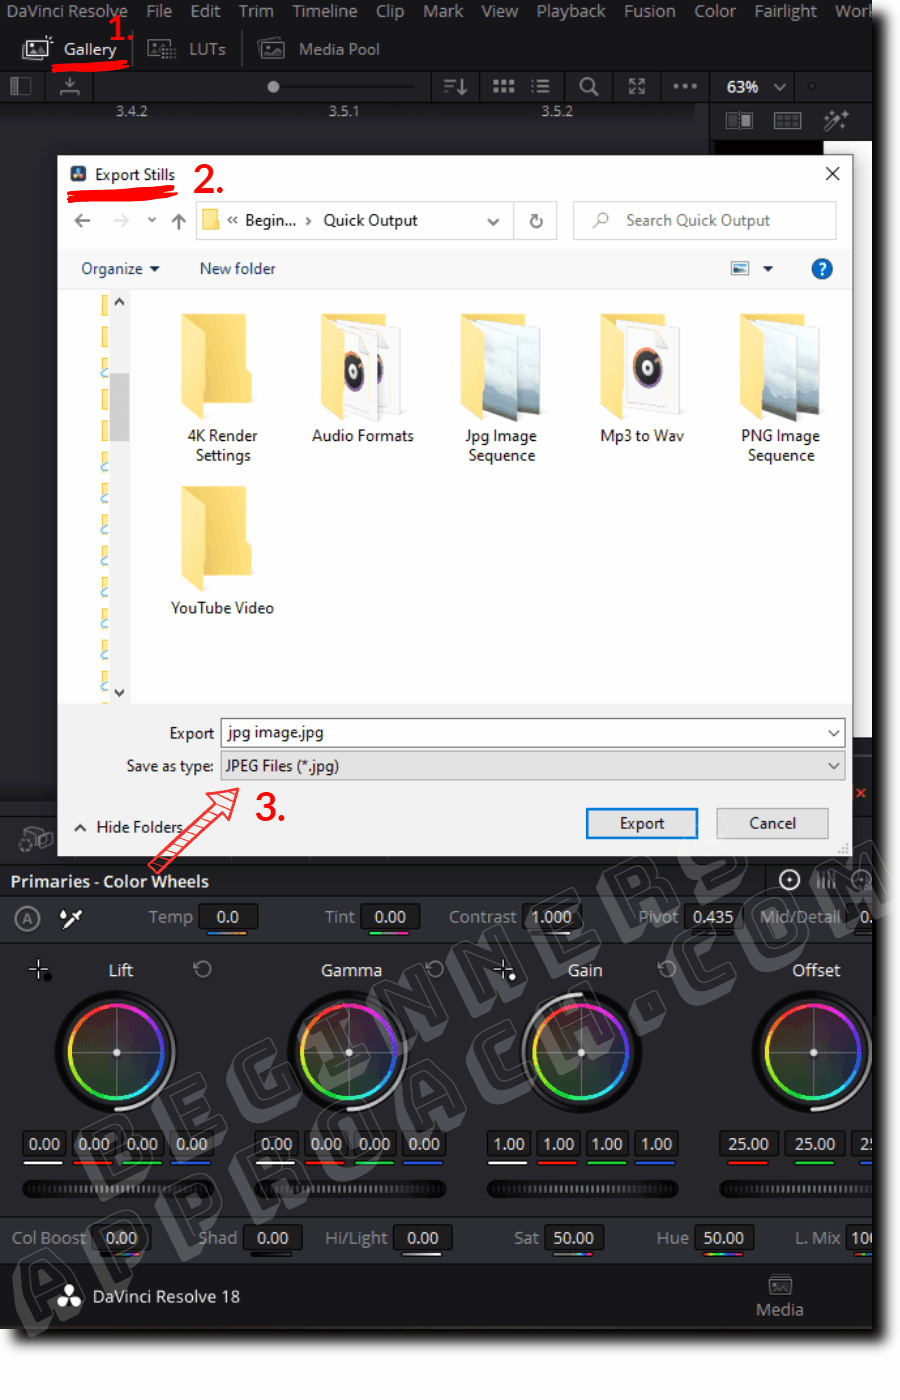
- Choose your destination folder from the “Export Stills” window to save the still.
- Enter a name in the “Export” field.
- Select the “png” extension from the “Save as type” dropdown.
- Click on “Export” as shown in the image below.
When you open the exported folder, you’ll see the “.drx” file along with png. You can choose to either delete or keep it. In most cases, you won’t need the “.drx” file.
If you want to learn more about PNG image format in DaVinci Resolve, like importing, making it transparent, and fixing any issues, then check out the below detailed guide with pictures:
How to Export PNG Image Sequences in Resolve?
- On the “Edit” page, select your clip or mark in (short cut i) and out (o) in the timeline.
- Go to the “Fusion” page (the one next to the “Edit” page – bottom center of the Resolve window.)
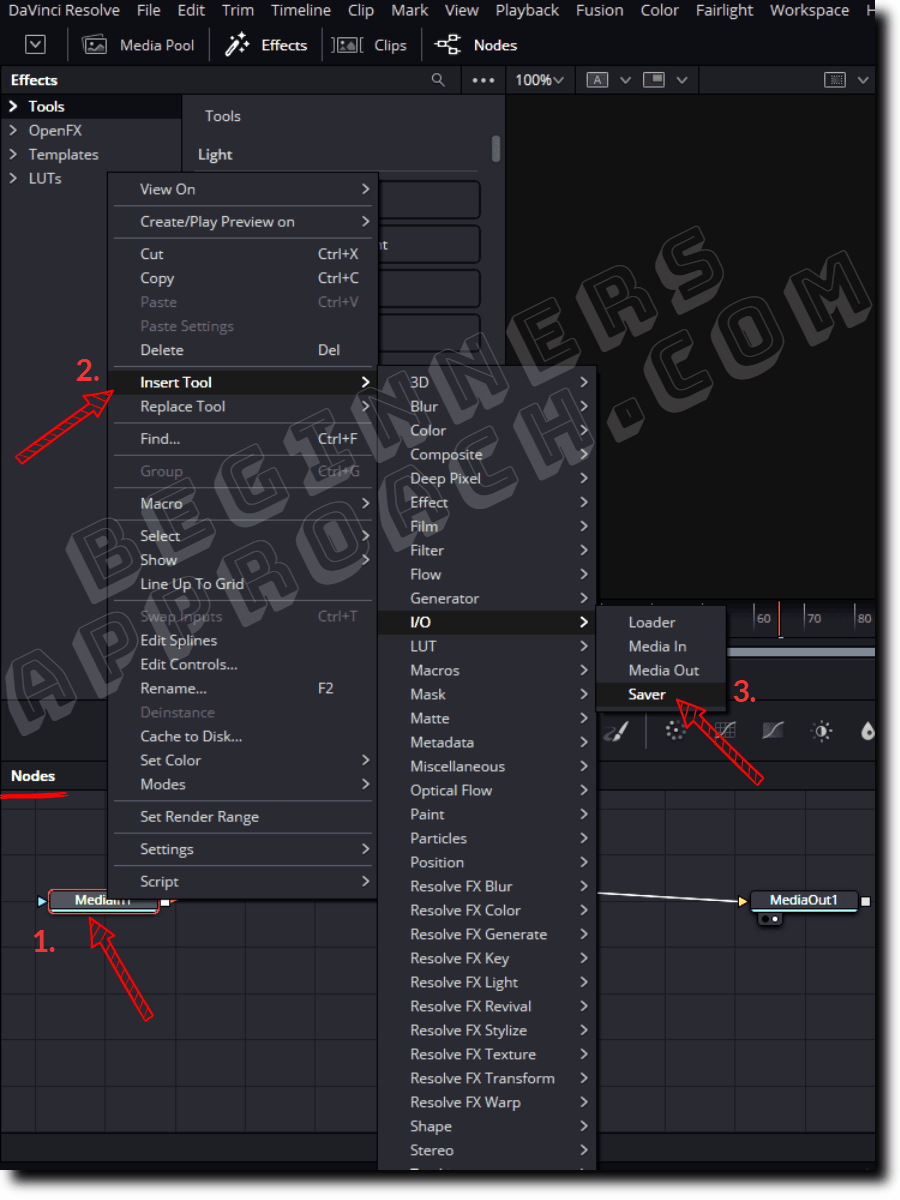
- Right-click on the “MediaIn1” node under the “Nodes” work area.
- Click on “I/O” > then select “Saver”.
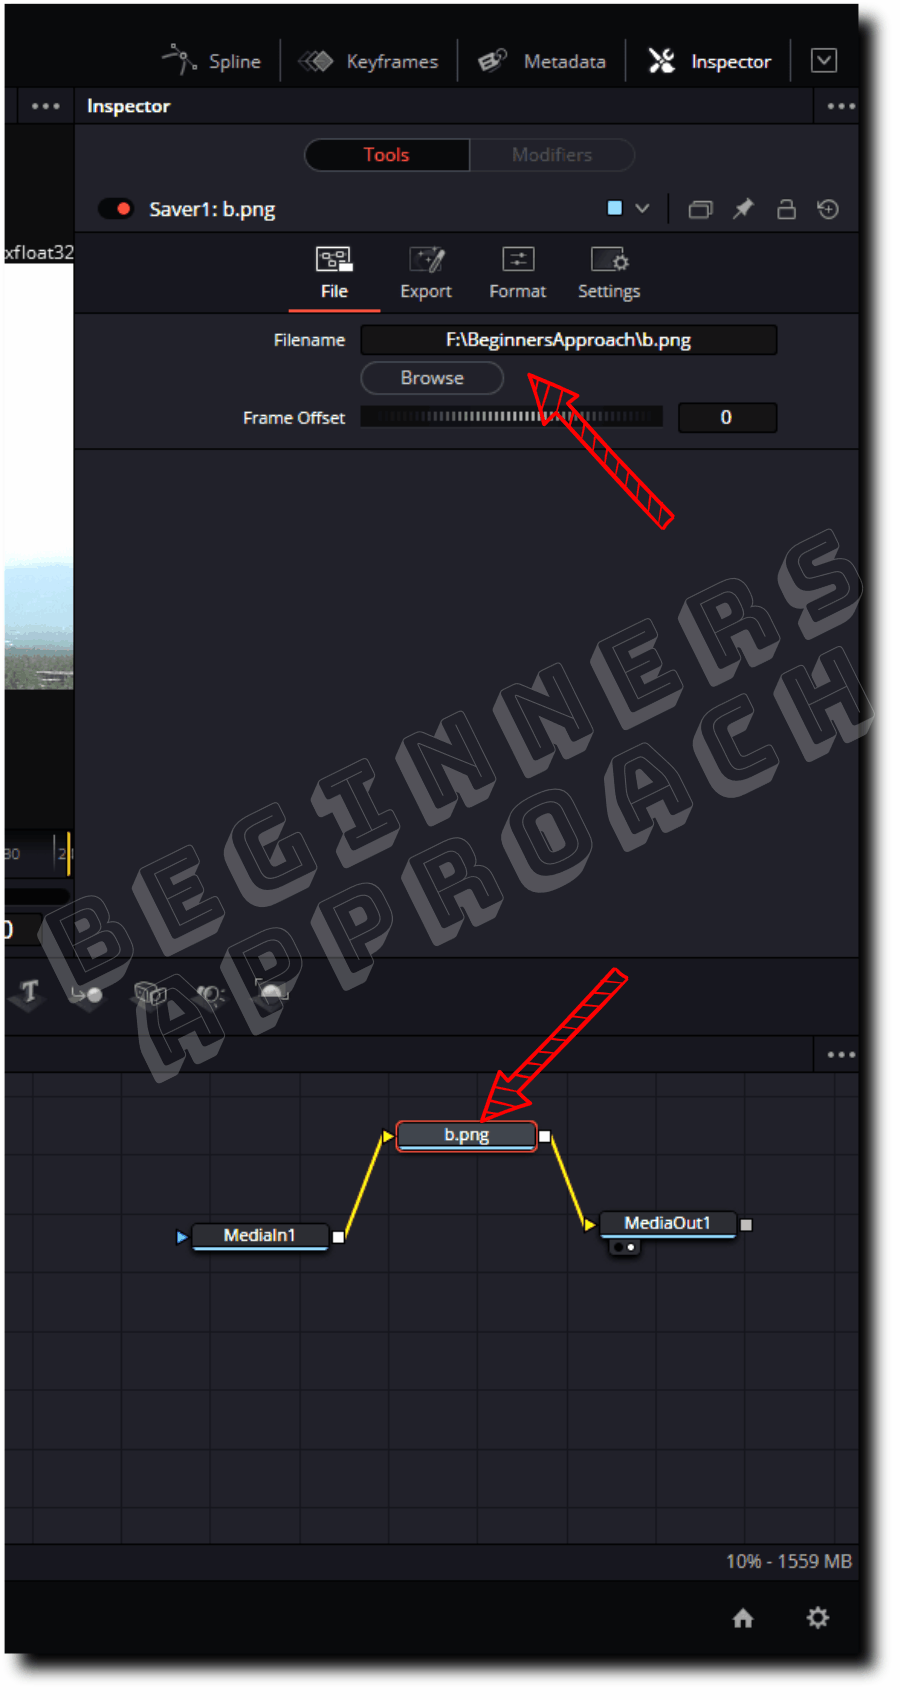
- Click on the “Saver1” node and then click on the “Inspector” tab from the upper right corner.
- Under the “File” tab, click on the “Browse” button.
- Enter any file name with a “png” extension, say, “a.png”.
- “Save as type” = “All Files”.
- Then, click on “Save“, as shown in the below image.
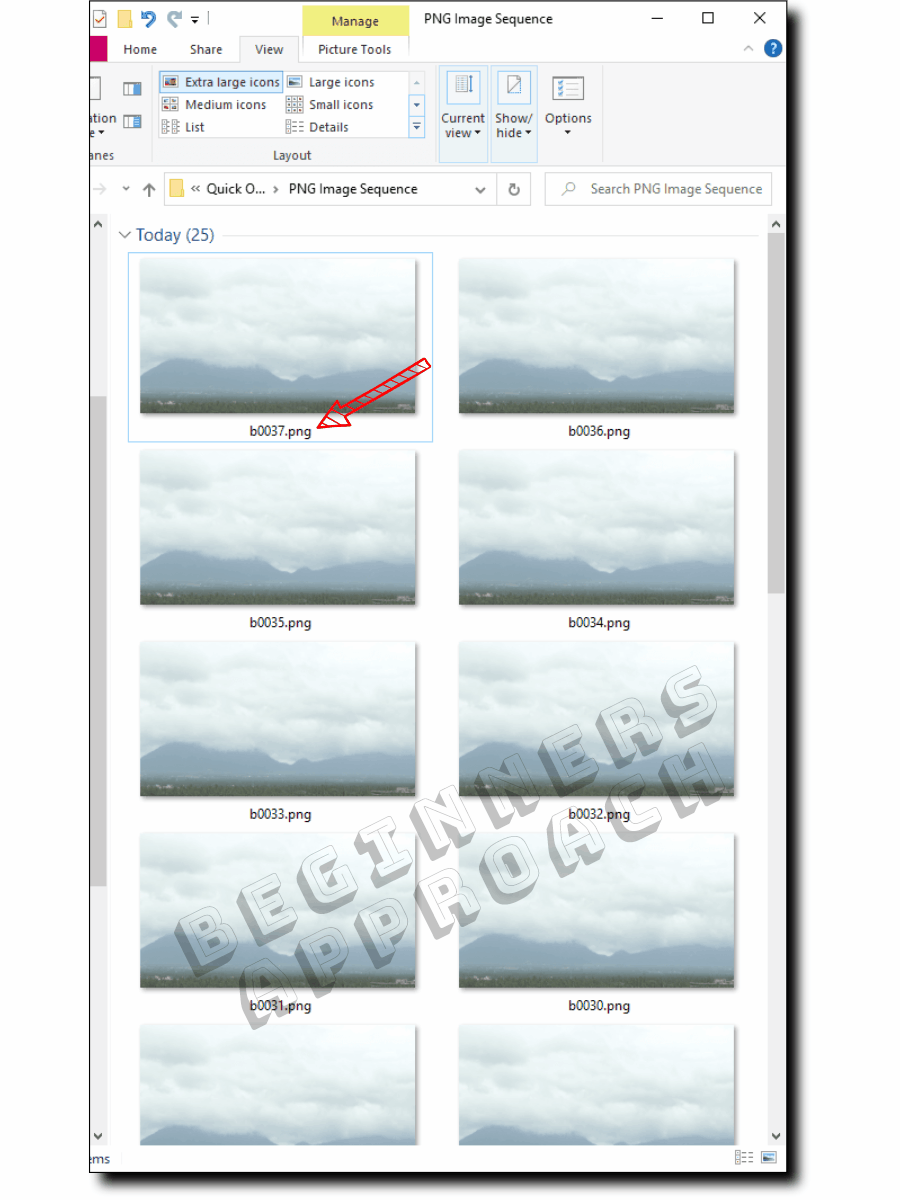
- Now, go to the menu, click on “Fusion” > then click on “Render All Savers“.
- Rendering will start and take a few minutes based on the length of the clip.
- Done! Resolve will convert the video clip into a series of .png image sequences.
If you want to learn more about image sequences in DaVinci Resolve – like importing, exporting, converting images to video, and fixes for issues, then I’d highly recommend the below detailed guide:
How to Export a JPEG Frame in DaVinci Resolve?
- Under the “Edit” page, click on your desired jpg image to select it.
- Go to the “Color” page.
- Right-click on the viewer and select “Grab Still“.
- Click on the “Gallery” tab (left-hand side) to reveal the screenshot.
- Locate your still and right-click it.
- Select “Export“.
- Choose your destination folder from the “Export Stills” window to save the still.
- Enter a name in the “Export” field.
- Select the “jpg” extension from the “Save as type” dropdown.
- Click on “Export“.
How to Export Jpg Image Sequences in Resolve?
- On the “Edit” page, select your clip or mark in (short cut i) and out (o) in the timeline.
- Then go to the “Fusion” page.
- Right-click on the “MediaIn1” > “Insert” > “I/O” > select “Saver“.
- Then go to the “Inspector” tab (found in the upper right corner).
- Under the “File” tab, click on the “Browse” button.
- Enter any name with a “jpg” extension, say, “image.jpg”.
- Select “All Files” for “Save as type”.
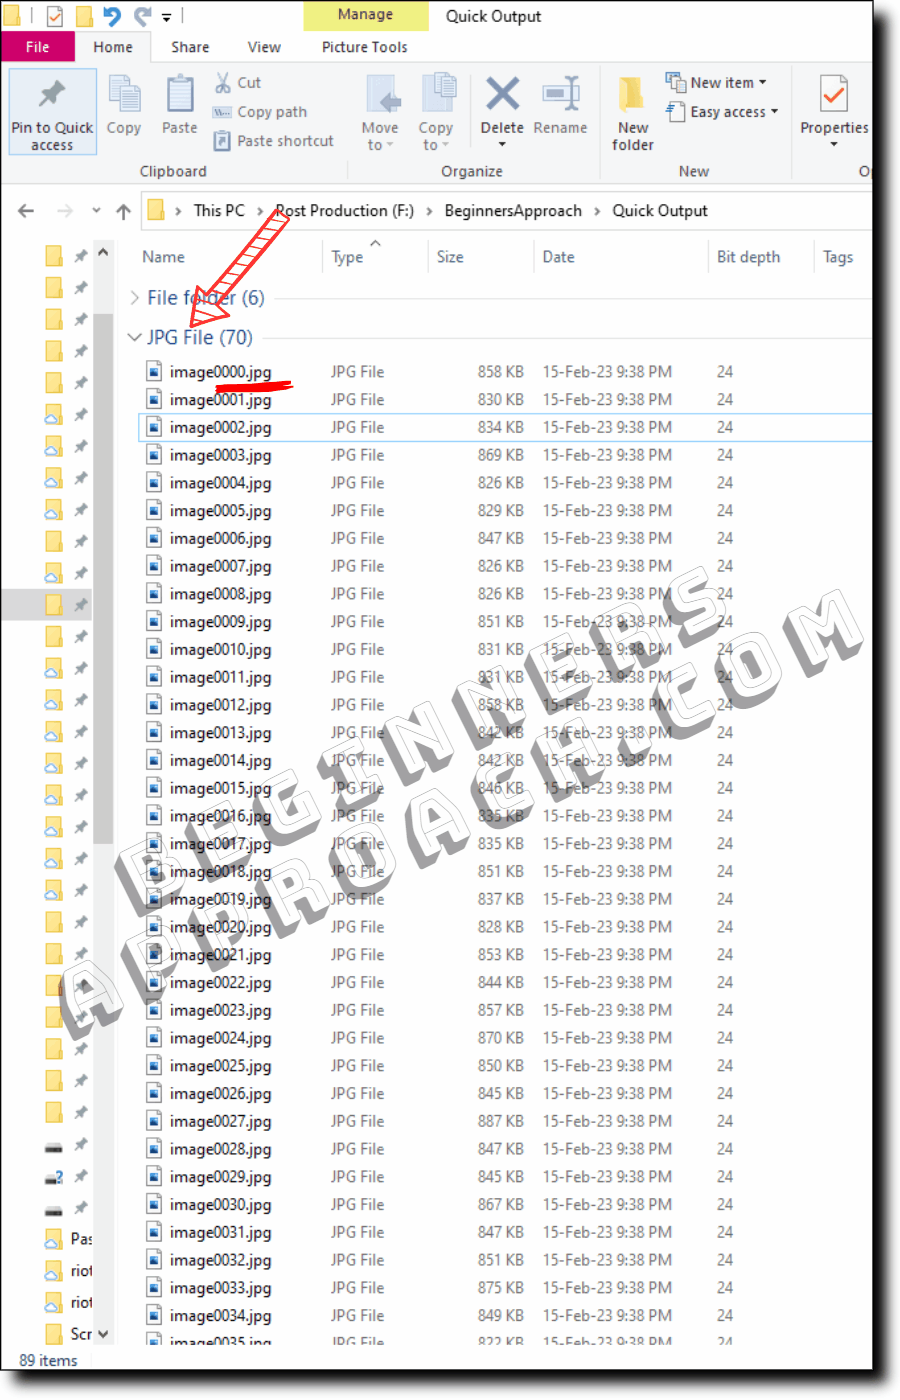
- Then from the menu, click on “Fusion” > “Render All Savers“.
- Resolve will render the video clip into a series of Jpg image sequences, as shown in the below image.

How to Export a TIFF Frame in DaVinci Resolve?
- Go to the “Color” page.
- Click on the “Clips” tab and then select your clip from the timeline.
- Right-click on the viewer and select “Grab Still“.
- Click on the “Gallery” tab (left-hand side) to reveal the screenshot.
- Locate your still and right-click it.
- Select “Export“.
- Choose your destination folder from the “Export Stills” window to save the still.
- Enter a name in the “Export” field.
- Select the “Tiff Files “.tif” extension from the “Save as type” dropdown.
- Click on “Export“.
The Tiff files are uncompressed image formats that take up a lot of space!
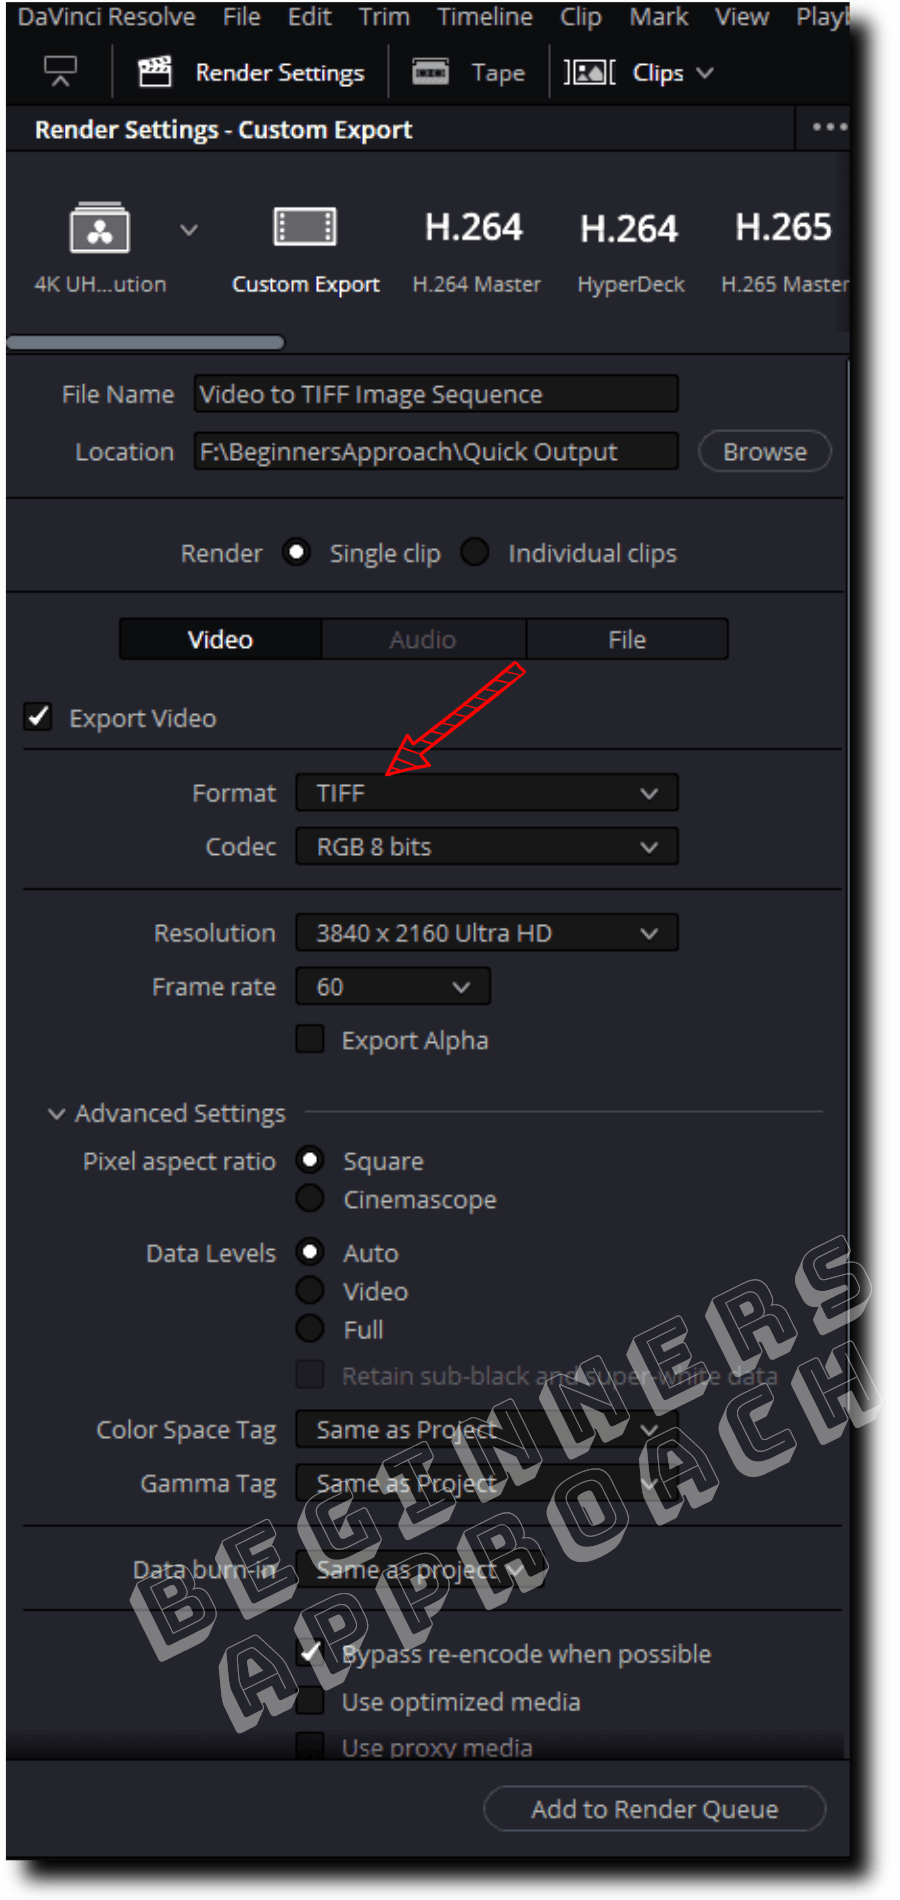
How to Export as TIFF Image Sequences in DaVinci Resolve?
- Go to the “Deliver” page.
- Click on the “Custom Export” tab.
- Select “Single Clip” for “Render” (which is the default value).
- Under the “Video” tab, select “TIFF” (or “DPX“) from the “Format” dropdown.
- Codec = “RGB 8 Bits” (or any value based on your requirement).
- Resolution – your desired one, let’s say, “3840 x 2160 Ultra HD”.
- Frame Rate = your desired one, let’s say, “23.976”.
- Enter a File name and location at the top of the Render Settings.
- Click on “Add to Render Queue”.
- Then click on “Render All”.
- Done! Resolve will convert the clip into a series of .TIFF image formats.
Can I Export An Image From the “Edit” Page of Resolve?
You can export a still image (frame) from the “Edit” page of DaVinci Resolve versions 18.5 and above, by going to “File” > “Export” > and selecting “Export Current Frame as Still”.
In the older versions, like 18 or 17, there is no direct way to export an image from the “Edit” page. You must either go to the “Color”, “Fusion” or “Deliver” pages to export it. However, you can press “Ctrl + F” (or “Cmd + F”) for full screen. Then press the “Windows key + Print key” from your keyboard.
This places a “png” image screenshot in this folder = “C:\Users\<your user name>\Pictures\Screenshots”.
For a high-quality resolution, you must follow the tips given in this post for exporting your image.
Before You Go
If your workflow involves a lot of image editing, then the below guides will be very helpful and speed up your work:
Thank you for this post. I was pulling my hair out every time I had to work on Da Vinci with any format. Thanks to your ffmpeg command (without the “scale” option) it’s finally working and what more I can easily modify all videos with one loop.
Glad the post helped you!