
If you’re a beginner or newcomer to DaVinci Resolve (versions 18.5, 18, 17, etc.), today’s guide will show you how to clear cache in Resolve, find its location, and related tips.
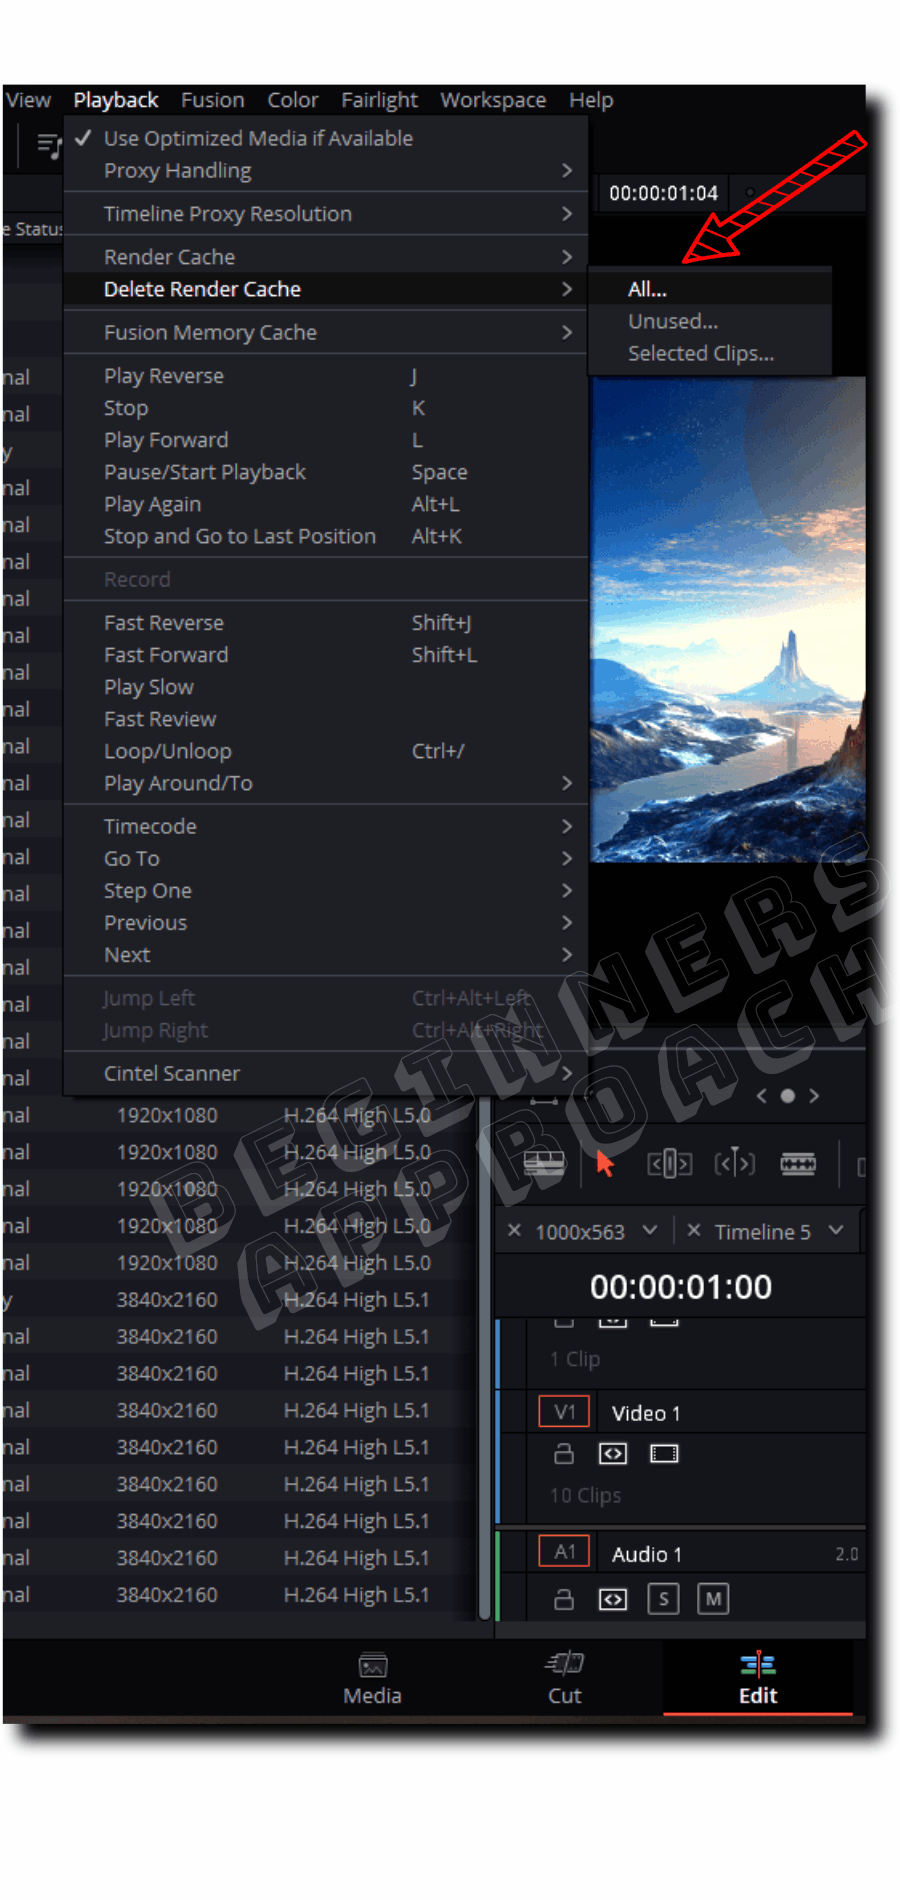
To clear the cache in DaVinci Resolve, go to the menu “Playback”. Click on “Delete Render Cache” > then click on “All”. This should delete all of your rendered cache files from the current project.
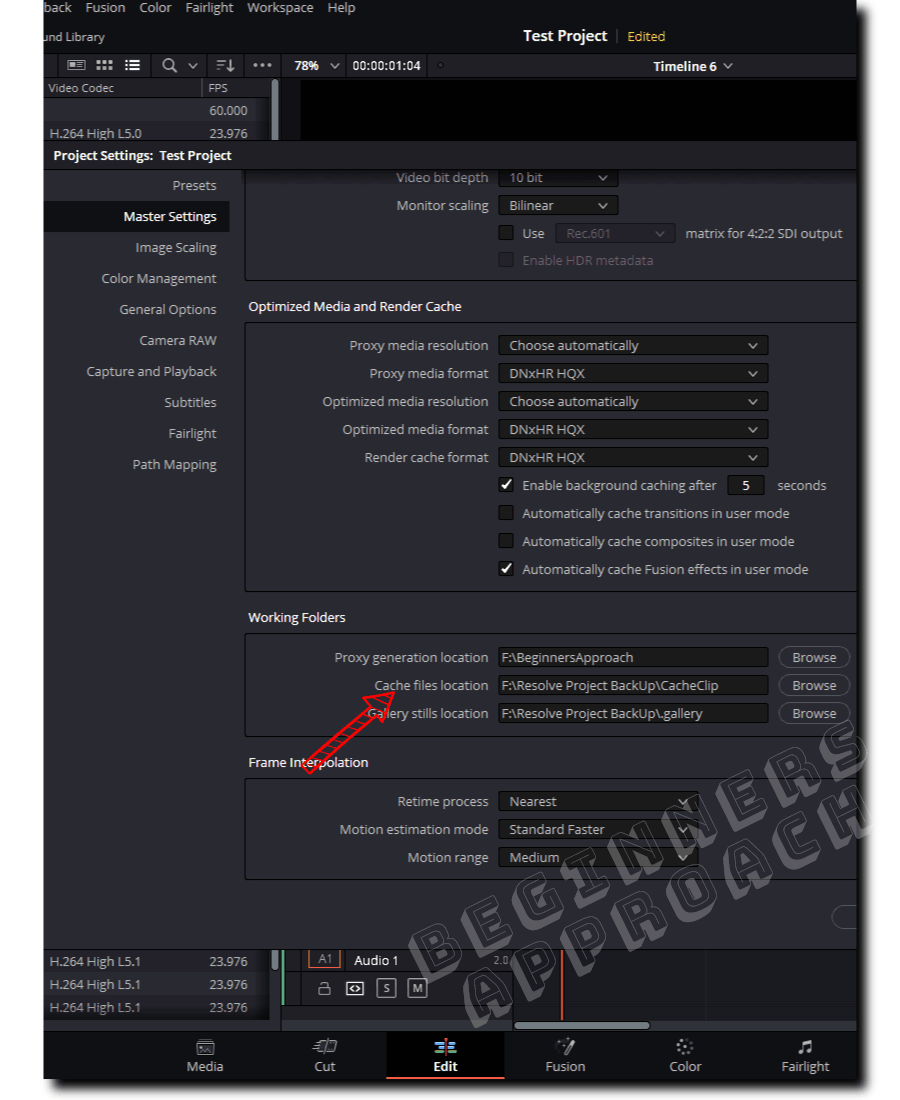
DaVinci Resolve cache location can be accessed by going to the “Project Settings”, then clicking on the “Master Settings” > “Working Folders” section. “Cache Files Location” is your Render Cache files folder on your hard disk.
Let’s explore the clearing of cache files in Resolve in detail – step-by-step with pictures.
How to Clear Cache in DaVinci Resolve?
- Launch Resolve and open your project.
- Go to the menu toolbar and click on “Playback“.
- Click on “Delete Render Cache” > then click on “All”.
- This should delete all of your rendered cache files from the current project.
Different Ways to Delete the Cache Files in DaVinci Resolve
- All – All the cached files of the clips are deleted. (That is, all the cached clips will be reset).
- Unused – Only those cached files are deleted whose corresponding clips and effects are no longer used in the timeline. (That is, the unused cache files will be cleared).
- Selected Clips – Cache files will be deleted for those clips which are selected in the timeline.
How to Delete Cache Files during Editing in Resolve?
The best option to delete render cache files while you are inside a project and still editing is selecting either or both of the options – “Unused” and “Selected Clips” found under “Playback” > “Delete Render Cache” from the menu toolbar.
There will be times when even after selecting the option “Delete Render Cache” found under “Playback”, the cache files are not completely deleted from your hard disk.
If this is your case, and you still feel you can clear up more space, do the below.
How to Manually Delete Render Cache Files Permanently and Save HUGE Space in Resolve?
- Click on the bottom right corner cog wheel – the “Project Settings” (shortcut is “Shift + 9”).
- Click on the “Master Settings” and scroll down till you see the “Working Folders” section (immediately below the “Optimized Media and Render Cache” section.)
- “Cache Files Location” is your Render Cache files folder on your hard disk.
- (By default, this is the first scratch disk (storage disk) displayed in the “Preferences” > “Media Storage”.)
DaVinci Resolve CacheClip
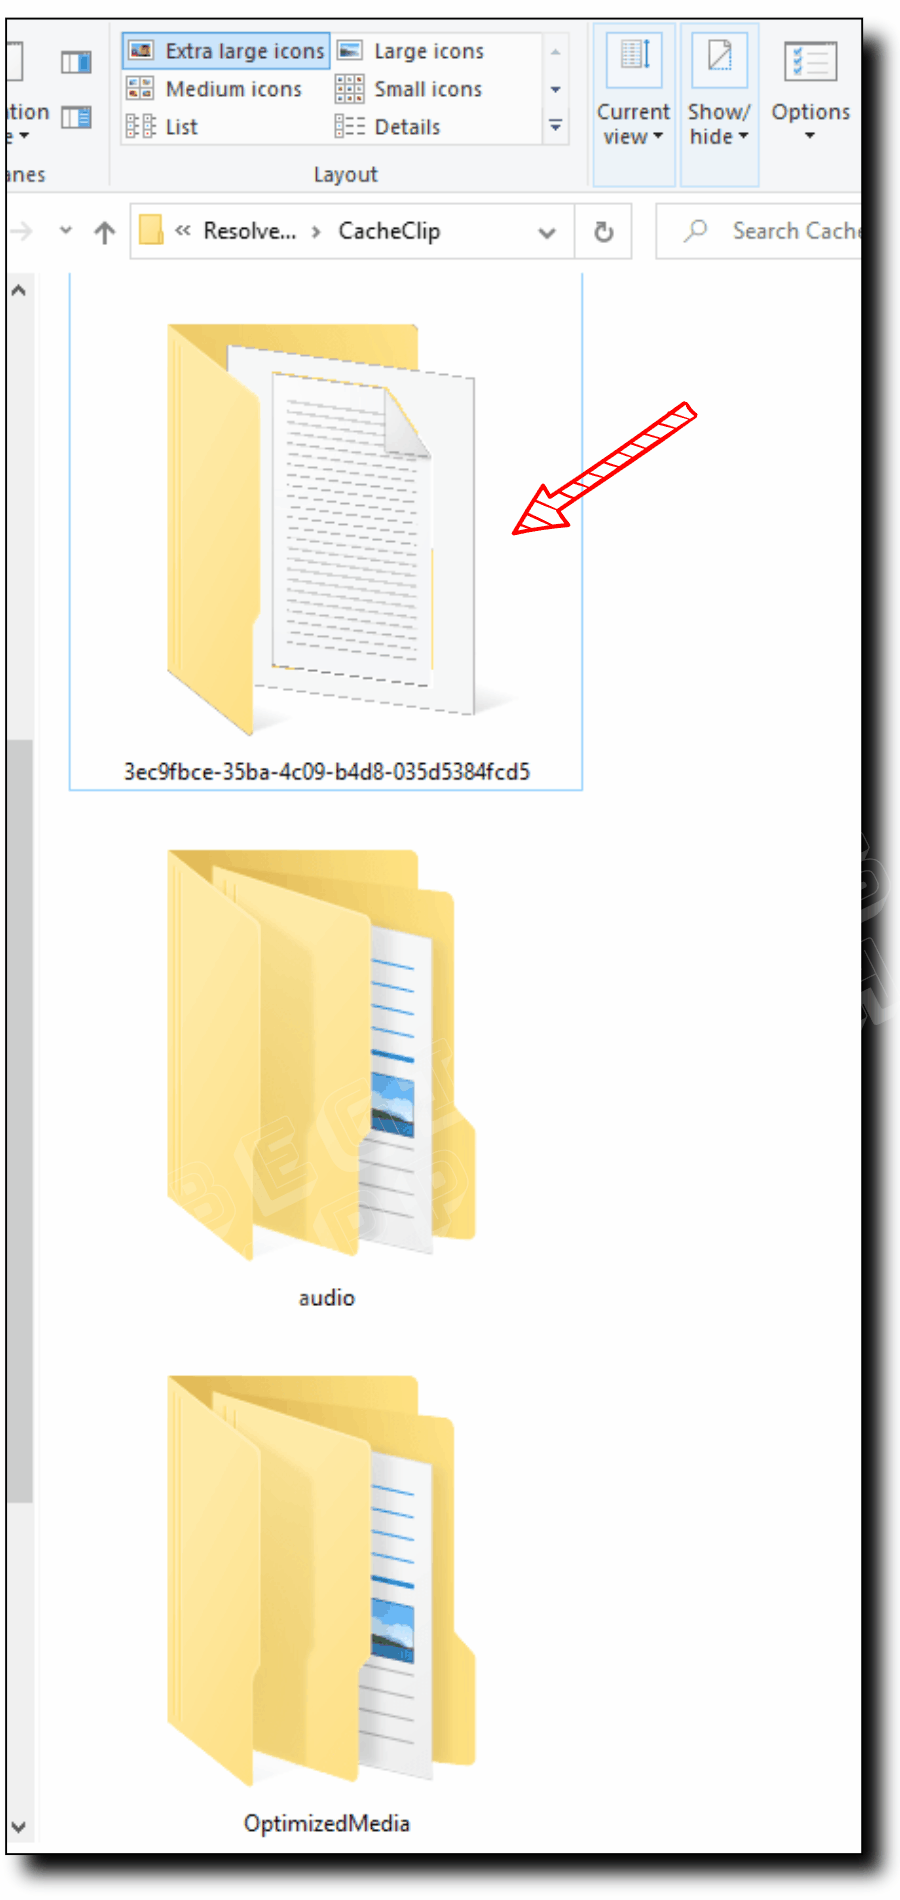
The DaVinci Resolve cacheclip folder contains the rendered cache files in your hard disk, which takes a lot of space.
- Navigate to the above folder, that is, get inside the “CacheClip” folder. (<Hard Drive Name> -> <Your Personal Folder-> “CacheClip”.)
- You’ll notice the folder contains a few sub-folders with alphanumeric names and “OptimizedMedia” (this folder will be created only when you generate optimized media, otherwise not).
- You can now go ahead and safely delete the folders with random alphanumeric names which are most probably your rendered cache files. (You can leave out the “OptimizedMedia” folder if you wish to.)
- (Right-click the folders > select “Properties” > note the “Size on Disk”. These could be HUGE GB files).
Manually Delete “.DVCC” Files in Resolve
.DVCC files are proprietary DaVinci Resolve image formats that are created during render caching and optimized media generation.
You can navigate to the “CacheClip” folder (the one displayed under the “Working Folders” section in the “Project Settings” window – refer to the above section for more details).
Search for “.dvcc” in the search bar. It will return all the files with the “.dvcc” extension.
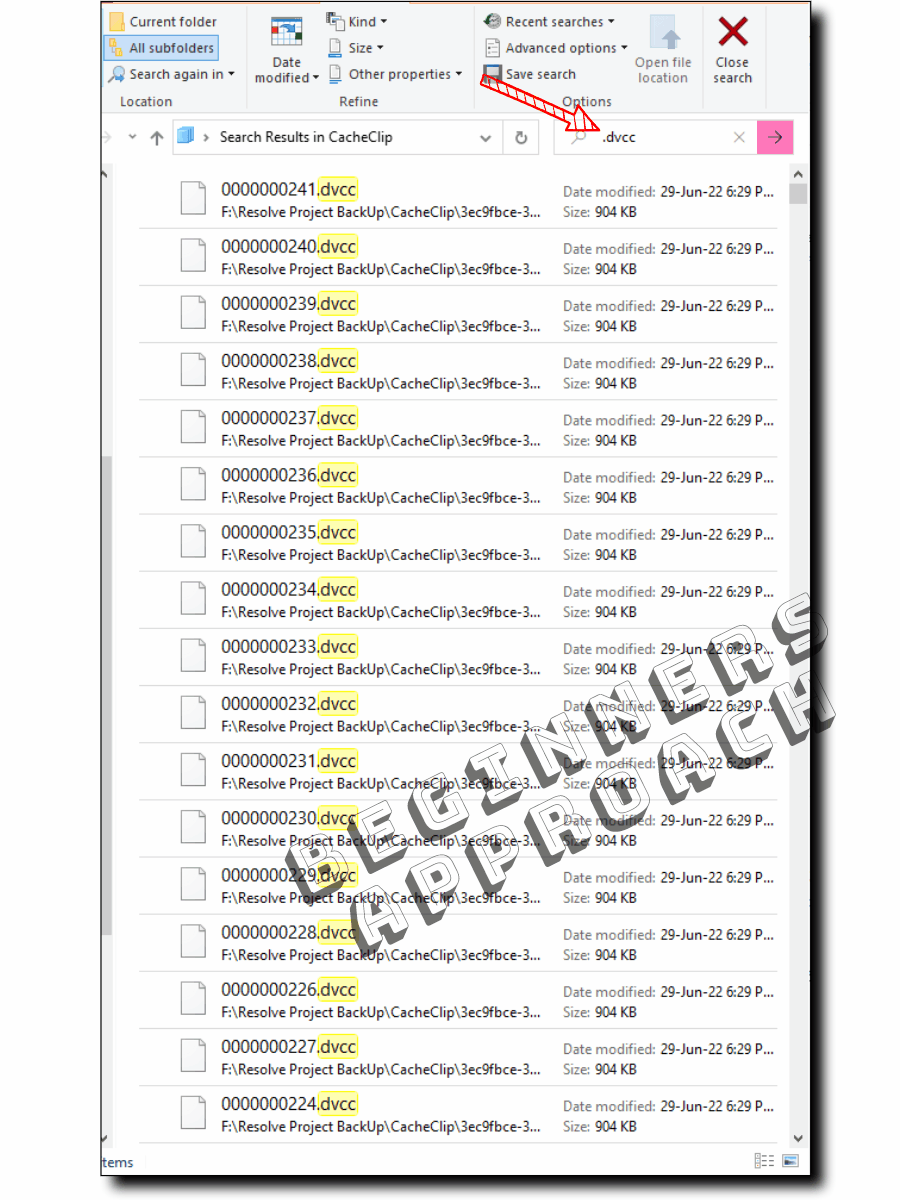
Before selecting all and deleting them, please keep in mind that the search result will also display “OptimizedMedia” files that end with the file extension “.dvcc“.
If you are absolutely sure and need to delete the “.dvcc” files, you can select all of them and permanently hit delete to save storage space.
Automatically Clear Cache Files in DaVinci Resolve?
There is no automatic clearing of cache files in DaVinci Resolve. You will have to go to the menu toolbar and click on “Playback” > “Delete Render Cache” > and then click on “All”. This will delete all of your rendered cache files from the current project.
Or you can manually delete the folder as discussed in the above sections.
I searched for SO LONG trying to figure out what these were. Thank you for not only sharing your information, but showing how to clear them out as well. Have a lovely day!!
Great to hear!