
If you’re a beginner or newcomer to DaVinci Resolve (versions 18.5, 18, 17, etc.), today’s guide will show you how to delete optimized media in DaVinci Resolve and free up your disk space.
Optimized Media files could be HUGE(in GBs), occupying a lot of storage space.
To delete optimized media in DaVinci Resolve, first, find the folder of the “Cache Files Location by going to “File” > “Project Settings” > “Master Settings” > “Working Folders”. Get inside the folder, then find the “OptimizedMedia” folders and delete them. Optimized media files are deleted.
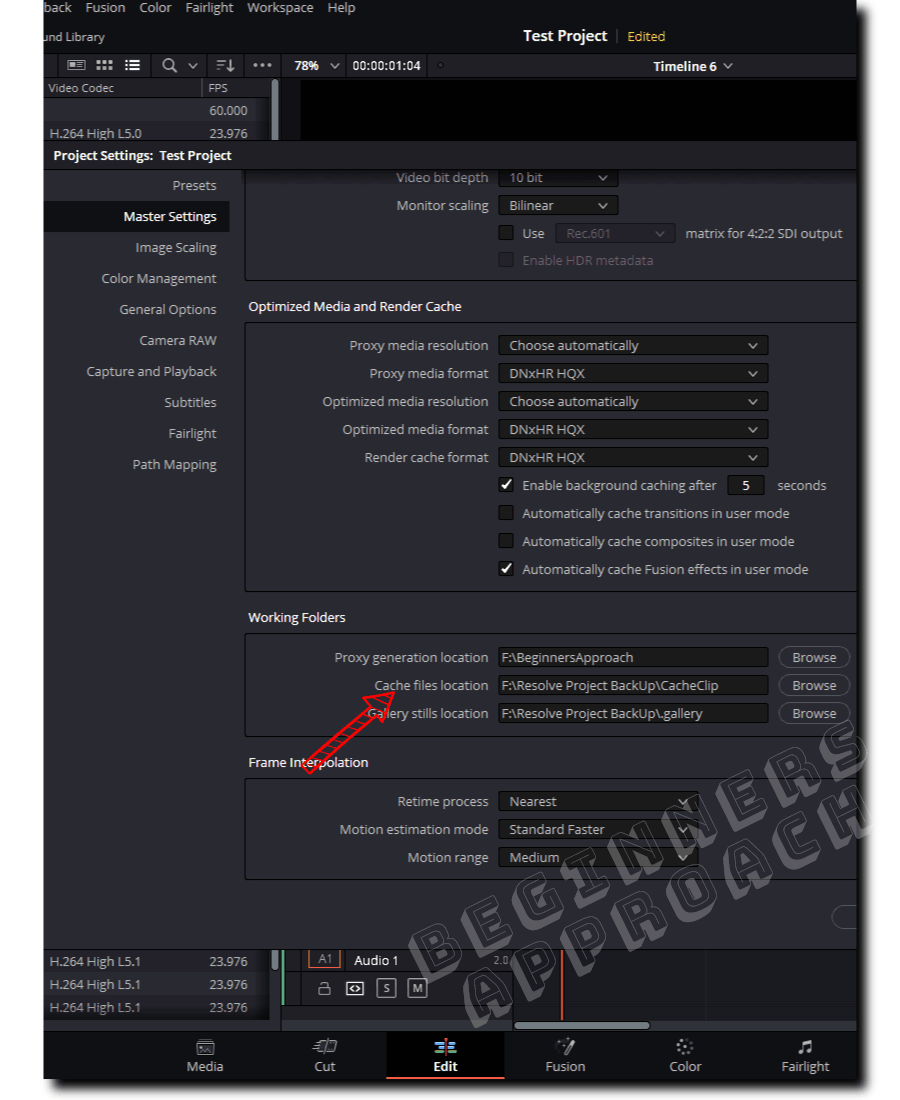
DaVinci Resolve optimized media location can be accessed by navigating to “File” > “Project Settings”. Click on “Master Settings” > scroll down till you see the “Working Folders” > “Cache Files Location”. This is where optimized media are stored in your hard disk.
Let’s explore the above process of clearing the optimized media and finding its location in detail – step-by-step with pictures.
How to Delete Optimized Media in DaVinci Resolve?
- Go to the “Project Settings” (short cut is “Shift + 9”), by clicking on the bottom right corner cog wheel.
- Click “Master Settings” and scroll until you see the “Working Folders” section.
- Take note of the folder against the “Cache Files Location” (your optimized media location).
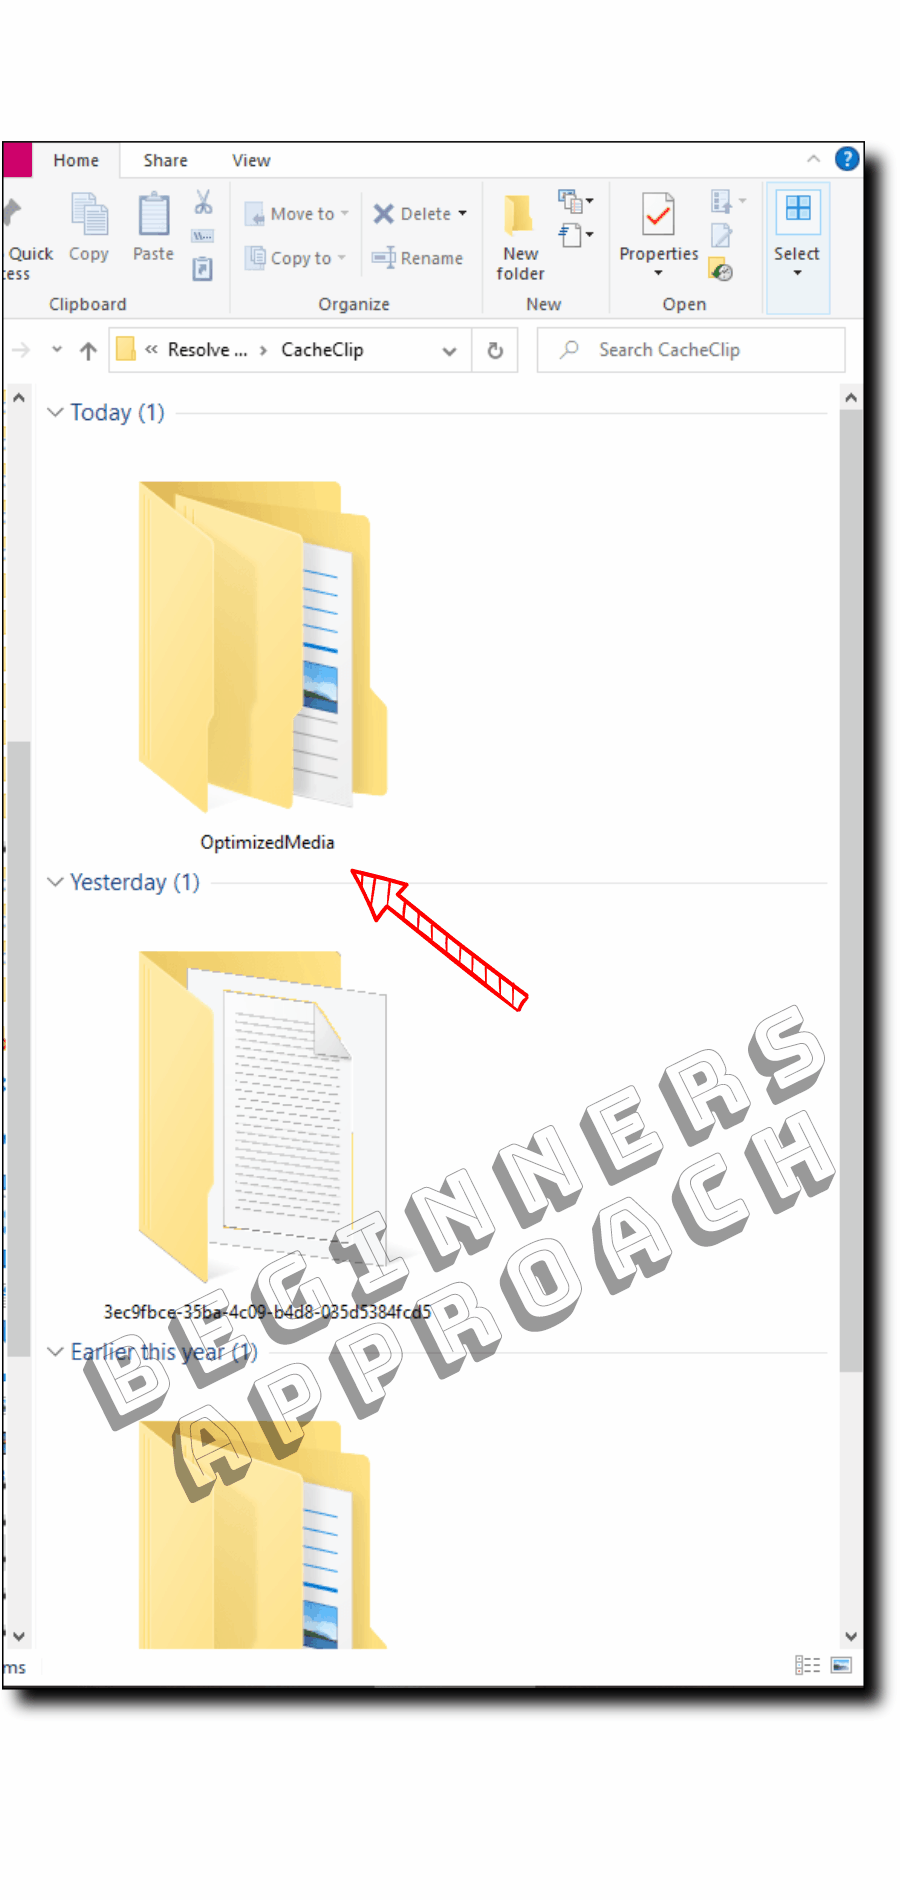
- Navigate to the folder and find the “OptimizedMedia” folder. Double-click and get inside it.
- You can select all the random alpha numerals folders and delete them to save space.
(Note – always be extra careful and mindful of deleting anything. Have a backup in case something goes wrong. But in this case, even if you delete the optimized media, you can re-generate them.)
Manually Delete Optimized Media Files with the “.DVCC” extension in Resolve
.DVCC files are proprietary DaVinci Resolve image formats that are created during optimized media generation and render caching.
You can navigate to the “CacheClip” folder (the one displayed under the “Working Folders” section in the “Project Settings” window – refer to the above section for more details).
Then double-click the “OptimizedMedia” folder.
Search for “.dvcc” in the search bar. It will return all the files with the “.dvcc” extension.
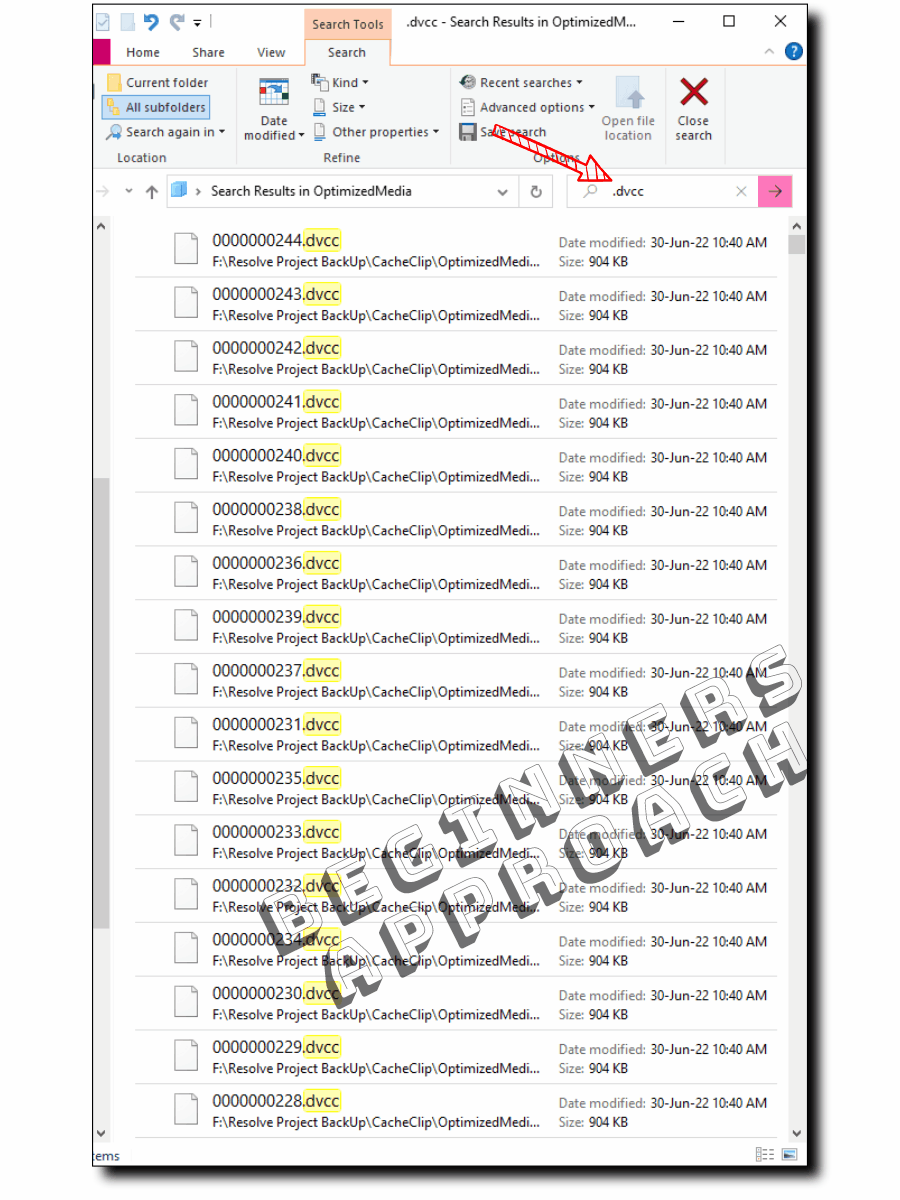
Before selecting all and deleting them, please keep in mind that the search result will also display render-cache files that end with the file extension “.dvcc“.
(The render cache files with the .dvcc extension are placed outside the “OptimizedMedia” folder.)
So make sure you are either inside the “OptimizedMedia” folder or are prepared to delete all the .dvcc files irrespective of optimized media or cache files.
If you are absolutely sure and need to delete the “.dvcc” files, you can select all of them and permanently hit delete to save massive storage space.
Automatically Clear Optimized Media Files in DaVinci Resolve?
There is no automatic deletion of optimized media files in DaVinci Resolve. It is a manual process. Navigate to the “OptimizedMedia” folder on your computer (as discussed above) and delete them.
Before You Go:
Now that you know how to delete optimized media in Resolve, you should also know how to clear render cache files to free up disk space. I highly recommend the below detailed guide:
Great job on these lessons–thank you. Sometimes the render cache gets messed up for a clip that’s been altered a bunch of times. Those clips play back full speed but they’re really jerky. How do I FORCE just that clip to re-render, right now?
Just right-click on the clip in the timeline and select “Render in Place…”