
This is part of the DaVinci Resolve Fade In and Fade Out series.
If you’re a beginner or newcomer to DaVinci Resolve (versions 18.5, 18, 17, etc.), today’s guide will quickly show you how to fade out audio in Resolve.
To fade out audio in DaVinci Resolve, go to the “Edit” page > your timeline. Go to the end of your audio clip and point your mouse over the upper right-hand side to reveal the white handle (called the fade-out handle). Click and drag it to the left. Your audio is now faded out.
Let’s explore the audio fade out and fade in, in detail – step-by-step with pictures.
And we’ll also look at fixes for issues related to audio transitions.
How to Fade Out Audio in DaVinci Resolve Quickly?
- Go to the “Edit” page, which contains your project timeline.
- Place your audio clip (or your music) into the timeline from the “Media Pool”.
- Go to the end of your audio clip and point your mouse over the upper right-hand side to reveal the white handle (called the fade-out handle).
- Click and drag it to the left. Now, this is called the Fade out curve. This will gradually lower the volume over time.
- You will also see a small circle in the center of the fade-out curve. With the help of this curve, you can alter the shape of the straight line to a curve such that the audio eases in or eases out.
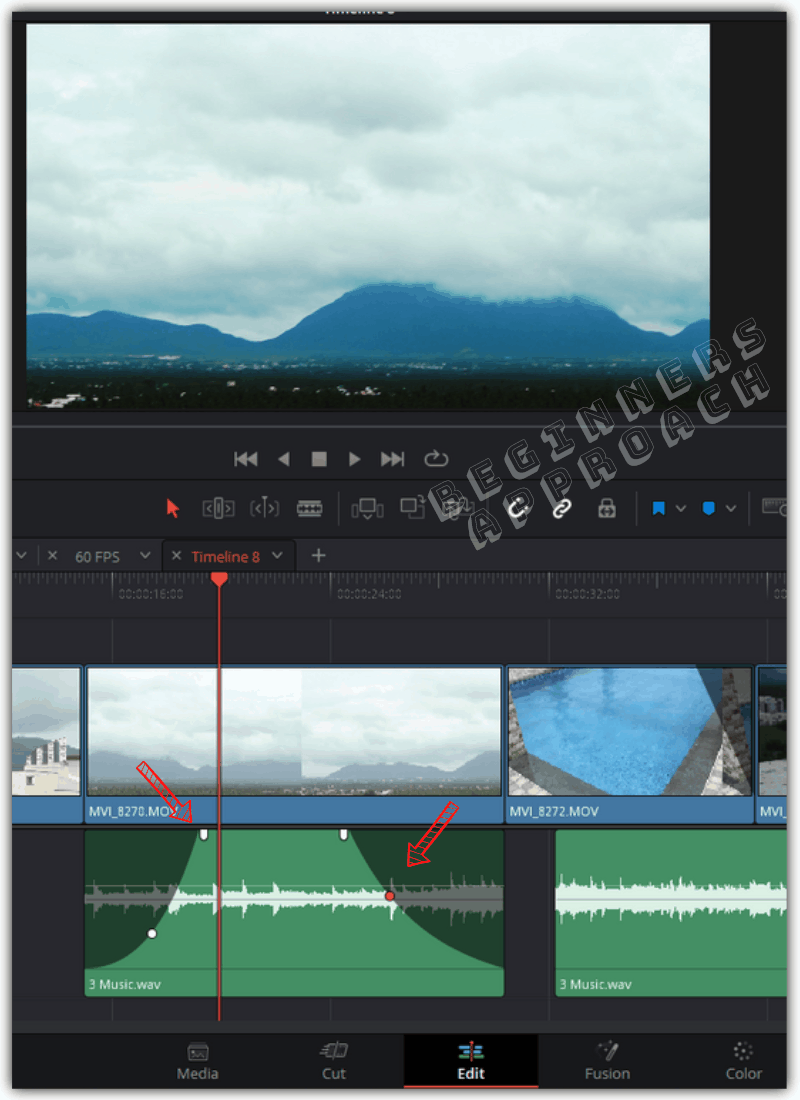
You can play with the small curve and change the shape of the curve to your taste – till you get the right sound!
How to Make Audio Fade In DaVinci Resolve?
- Go to the “Edit” page which contains your audio clip in the timeline.
- Go to the front of your audio clip (or music) and point your mouse over the upper left-hand side to reveal the white handle (called the fade-in handle).
- Click and drag it to the right. Now, this is called the fade-in curve. This will gradually increase the volume over time.
- You will also see a small circle in the center of the fade-in curve. With the help of this curve, you can alter the shape of the straight line to a curve such that the audio eases in or eases out.
How to Fade Music in DaVinci Resolve?
To fade music in DaVinci Resolve, go to the timeline under the “Edit” or “Fairlight” page. Go to the end of your audio clip and hover your mouse over the top right corner. Grab the white handle and drag it to the left. Your music is now faded out.
How to Quickly Fade Between Audio Clips (Cross Fade) in DaVinci Resolve?
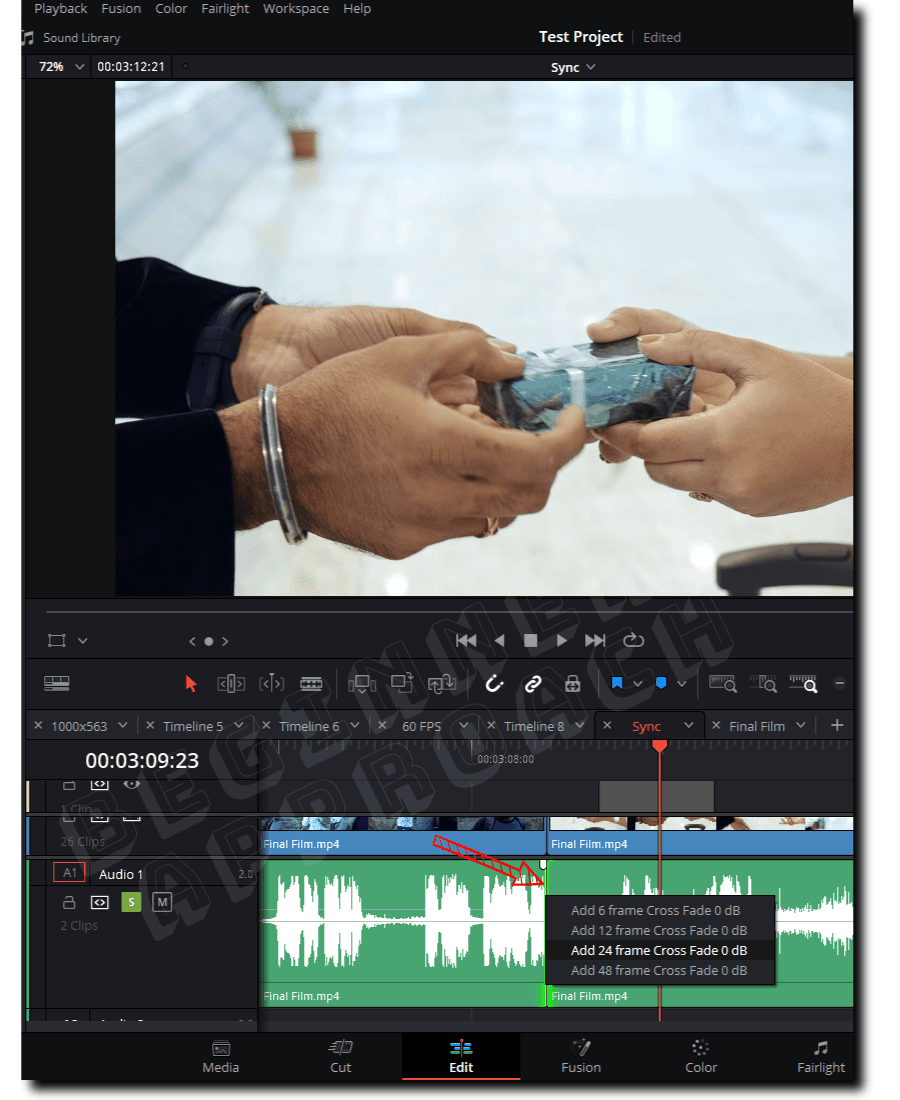
To quickly add a crossfade between the edit points of 2 audio clips, press the “Alt” button and then right-click on the meeting point of the 2 clips and select, let’s say, “Add 24 Frame Cross Fade 0 dB“, which will place a 1-second cross fade between the clips.
Pressing the “Alt” key will make sure the audio and video clips are unlinked before placing the crossfade.
If the audio and video clips are linked, then Resolve might place the crossfade (or cross dissolve) to both the audio and video clips. Therefore, unlink them first.
DaVinci Resolve Audio Transitions – Cross Fade
You can go to the “Effects Library” > “Audio Transitions” and select different crossfades like “+3 dB”, “-3 dB” or “0 dB”. Drag one of them and drop it in between the 2 audio clips in the timeline to get the crossfade effect.
You’ll note that the default audio transition will be the “Cross Fade 0 dB” (denoted by a vertical red marking).
(The audio transition “Cross fade” is the equivalent of the video transition “Cross dissolve“.)
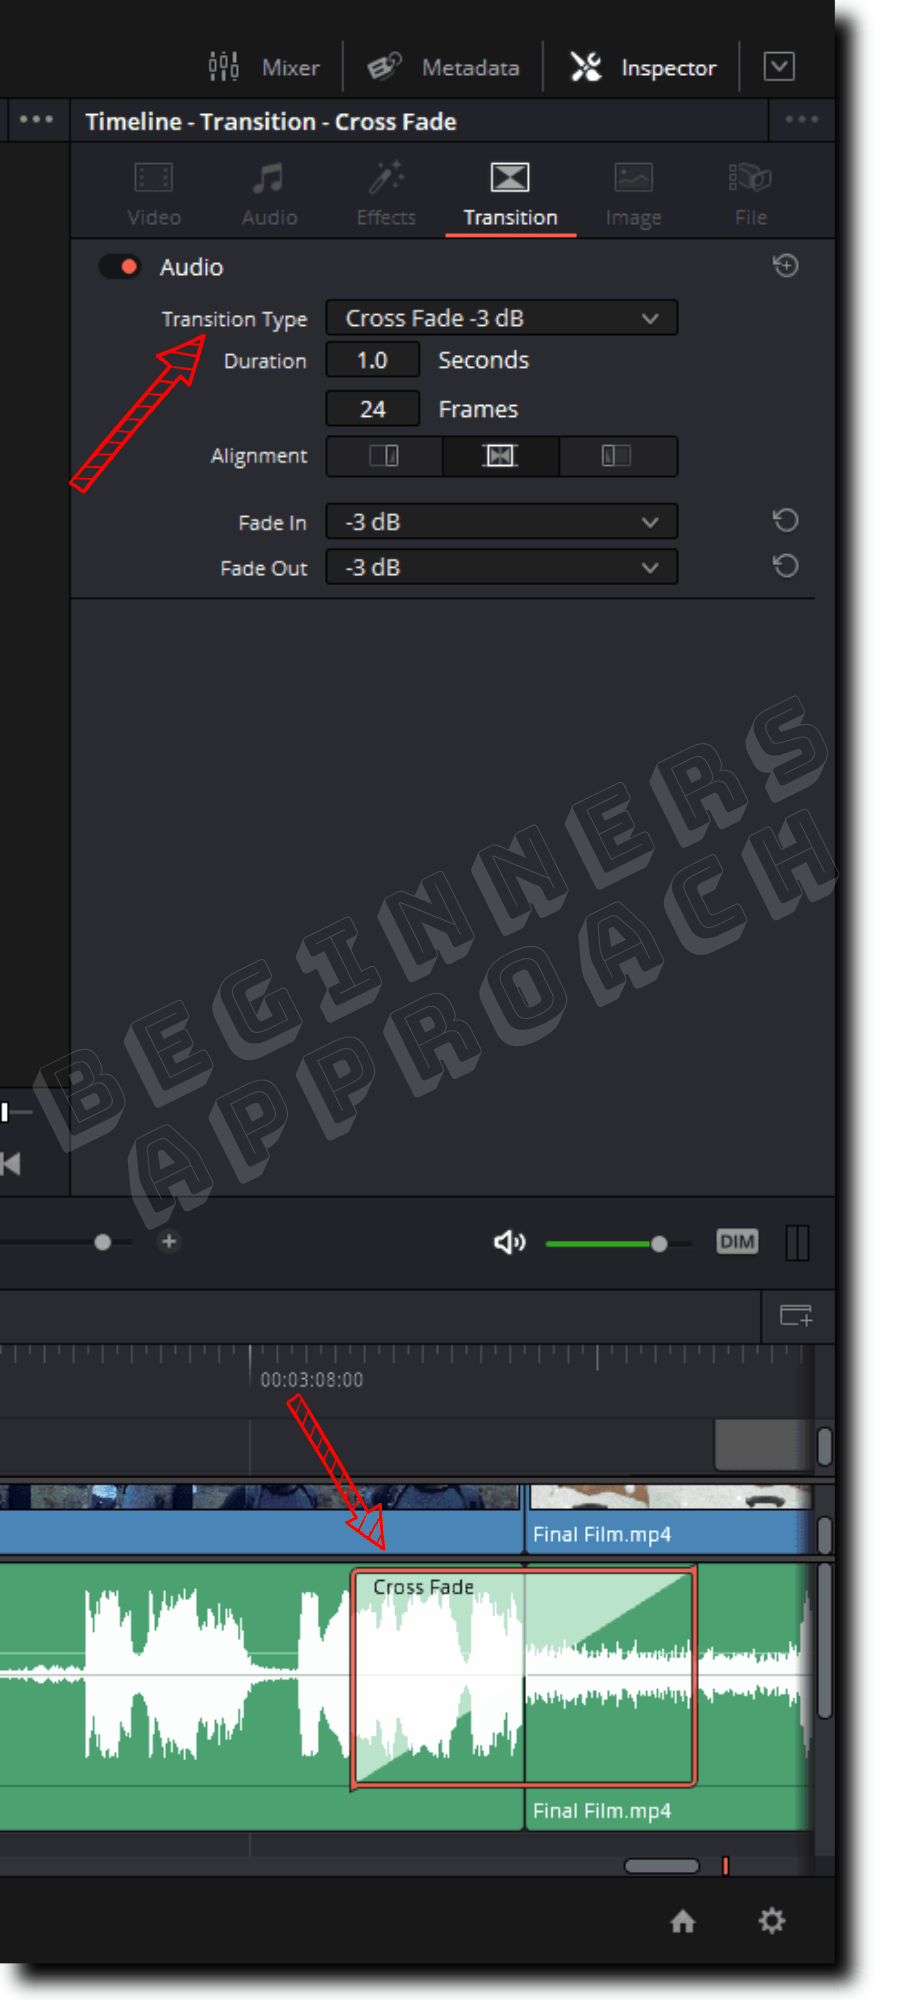
You can click on the audio transition in the timeline to select it and then go to the “Inspector” tab > “Transition” to further change the below settings to your taste:
- Transition type
- Duration – the length of the cross fade transition.
- Alignment
- Fade in and Fade Out in dB.
Play with them till you get the sound of your taste.
How to Fade Out Multiple Audio Clips in DaVinci Resolve?
First, to fade multiple audio clips, select all the audio clips by drawing a box around them or shift-clicking them. Then press “Shift + t”. This will place the default transition “Cross Fade 0 dB” on all the edit points and clips.
You can change the default transition by right-clicking on your required transition, say, “Cross Fade -3 dB”, and select “Set as Standard Transition”.
Related Article:
DaVinci Resolve Audio Cross Fade Not Working
The audio cross fade won’t work if there is no overlap between the heads and tails of the two clips.
That is…
If you place 2 whole clips (without trimming) end to end in the timeline, then there is no overlap between the tail of the first clip and the head of the second clip. So you won’t be able to place an audio transition (cross fade) between the 2 clips.
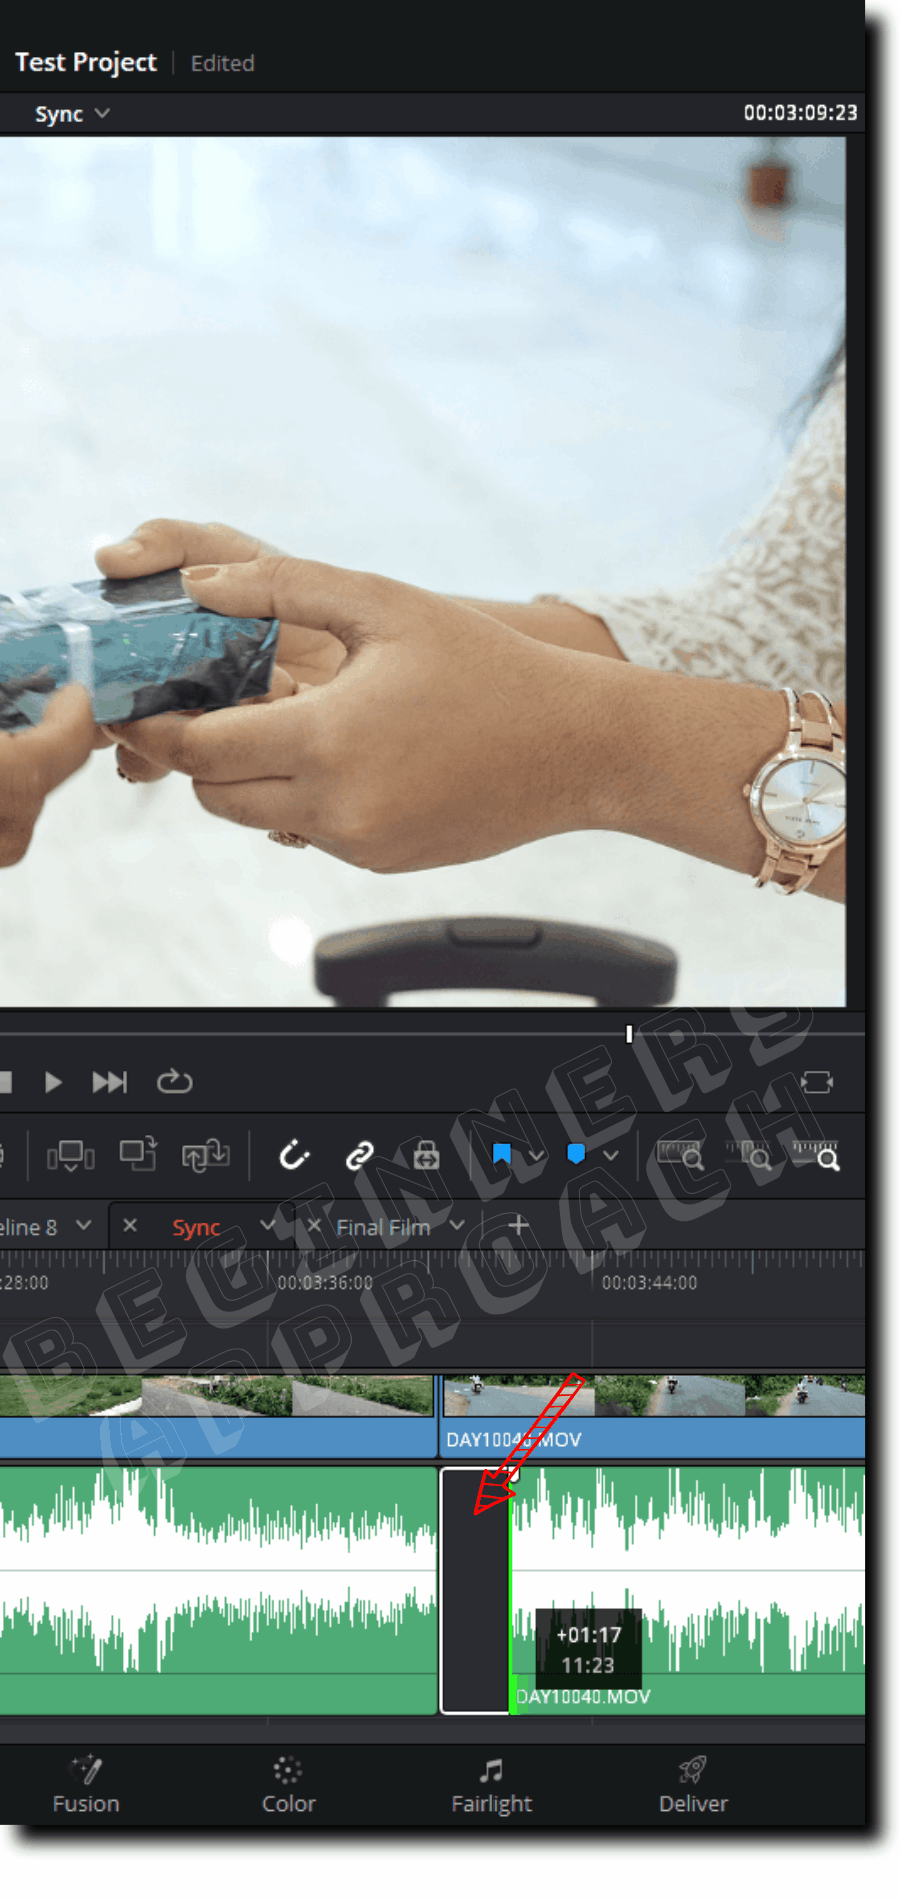
To solve this issue, trim the end of the first audio clip and then the starting of the following audio clip by a few frames, as shown above. Then place them end to end (without any gap). Now you can successfully place the audio cross fade between them (because of the overlap).