
Today we’ll see how to create your own subtitles, import existing subtitles, and other important tips.
The subtitle feature in DaVinci Resolve is more or less similar to a text box but has a lot of useful settings and a dedicated subtitle track – to make your life easy.
Without wasting time.
Let’s dive right in!
Before Adding Subtitles – The 3 Important Tips
#1) Make sure you add the subtitle after locking your editing or add them at the last stage so that you don’t unnecessarily waste your time should you re-edit again.
#2) If you do this manually, allocate a lot of time for the captioning work before the delivery. On paper, they look easy, but when it comes to matching the subtitle with the dialogue – it is time-consuming. (Oftentimes, I had to postpone the planned delivery date because of the manual effort involved.)
#3) Subtitle Regions – An important feature (released in version 18) lets you add multiple subtitles for multiple characters at the same time in a single frame by creating regions. This is a super cool feature.
By arranging the subtitles appropriately, their position on the screen can indicate which character is speaking each subtitle.
To know more, click on the below:
Does Davinci Resolve Have Auto Subtitles?
DaVinci Resolve doesn’t generate auto subtitles. You will either have to add manually or import subtitle files into Resolve. But third-party services can generate auto subtitles for your video outside of Resolve.
Adding subtitles is a manual process. Make sure the audio track is big enough so that you can easily recognize the waveforms for speech/dialogues. This will quicken the captioning process.
Another power tip – place markers (by pressing “m”) wherever you need subtitles in the timeline after locking the edit. This should further quicken the subtitling process.
How to Add Subtitles (Captions) in DaVinci Resolve Quickly?
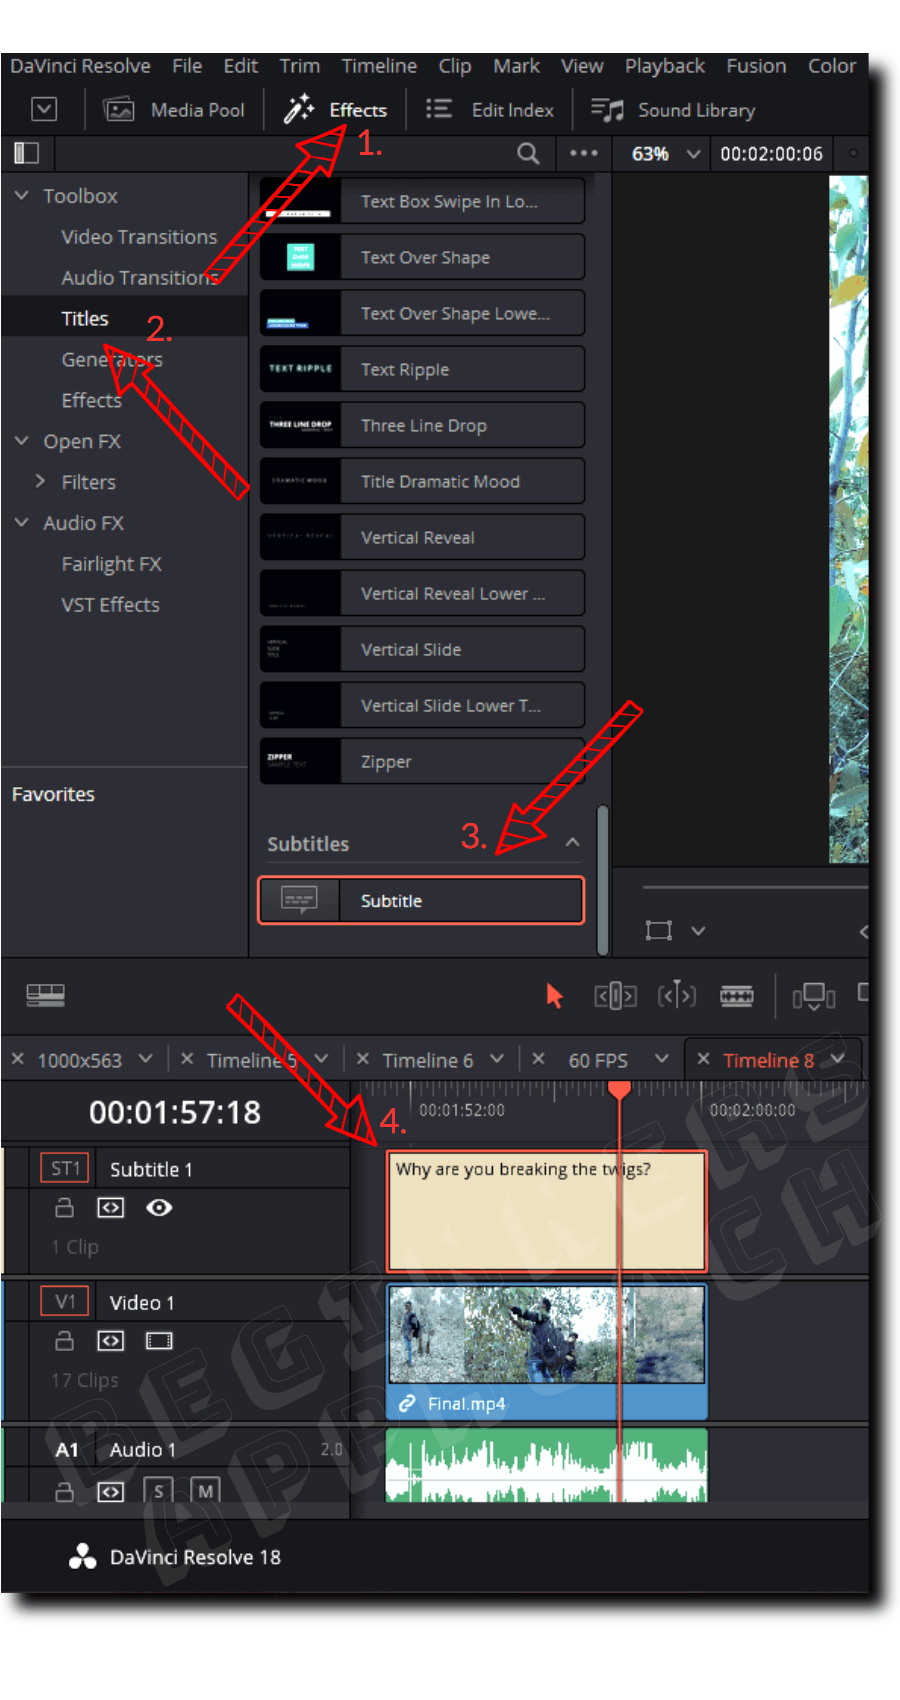
- Under the “Edit” page, place your playhead at the desired place in the timeline.
- Click on the upper left corner “Effects” tab > “Toolbox” > “Titles” > scroll down till you see the “Subtitles” section.
- Drag and drop the “Subtitle” box into the timeline – where your playhead is placed.
- A subtitle track containing the subtitle (caption) box is automatically created on top of your existing video tracks.
Next, we will see how to bring an existing subtitle (mostly a .srt file) into Resolve.
Make sure the .srt file timecode matches the actual timecode of the final edit inside the timeline. Otherwise, you’ll have to make many adjustments to your subtitle inside the timeline to match the audio.
How to Import Subtitles (.SRT) to DaVinci Resolve Quickly?
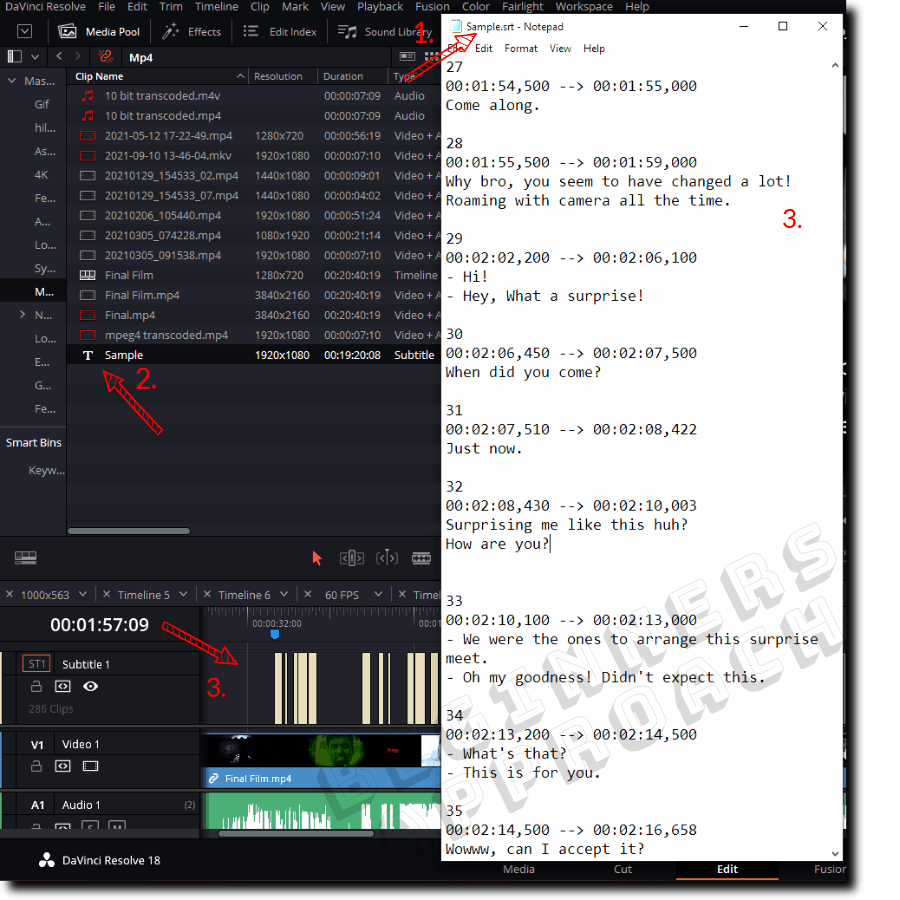
- On the “Edit” page, go to the menu and click “File” > “Import” > “Subtitle”.
- Choose your folder which contains the .srt file.
- Select the desired subtitle file and click “Open” to import it.
- Your subtitle (.srt) file will now be available in the “Media Pool”.
- Now place a marker (by pressing “m”) in the timeline – where your first dialog would start. This should be the starting point of your first subtitle.
- Now drag and drop the imported subtitle into the timeline where you just placed the marker.
- Done!
How to Adjust the Subtitle As Per the Audio in Resolve?
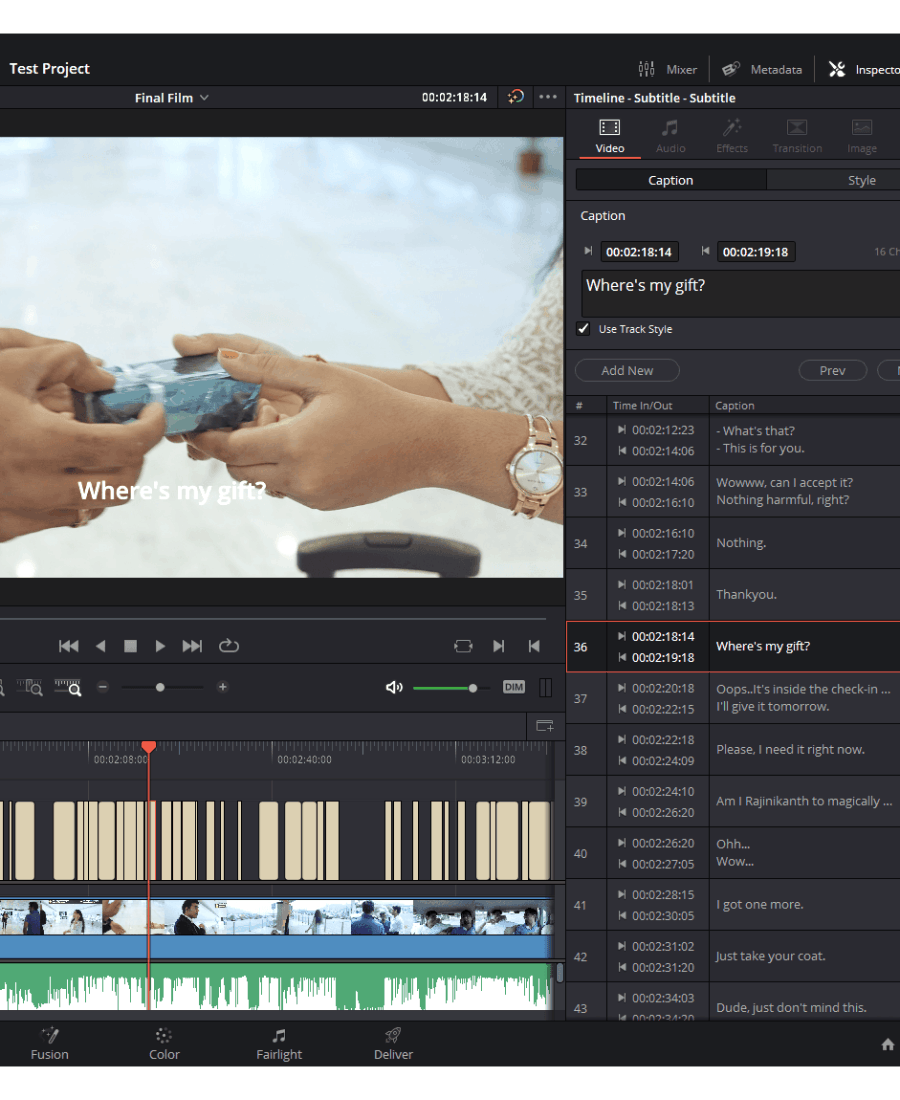
After importing the subtitle, you might note some slight inconsistencies – some subtitles don’t match the exact start or end of the audio dialogue. If this is the case, then you can individually select the subtitle clip and move them left or right with the help of your mouse to match the audio.
Or you can change the timecode for in and out points by going to the “Inspector” tab > “Caption”. Then update the timecode (see the screenshot below) as per the time of the audio displayed in the timeline.
If you think the entire subtitle track is out of sync with the audio, then delete the subtitle track, place the marker accurately for the first audio dialogue in the timeline and then again drop the subtitle to match the starting marker. This should solve the out-of-sync issues.
How to Edit Subtitles in DaVinci Resolve Effectively?
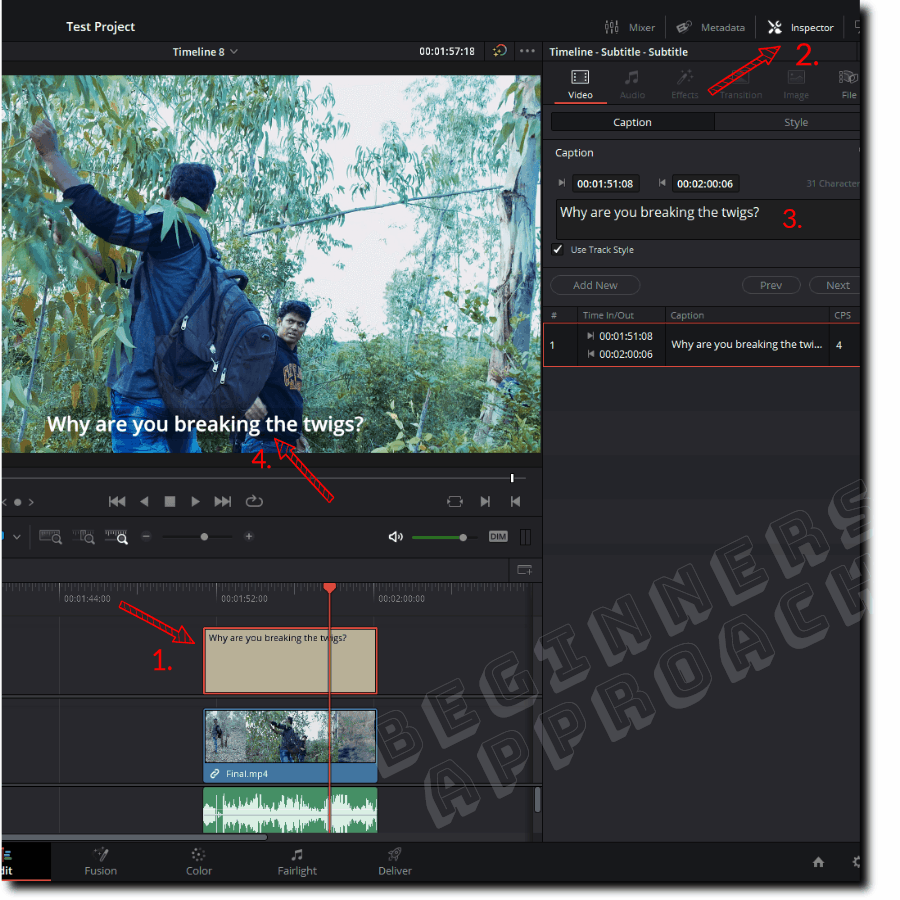
- After adding the subtitle box to the timeline, click on it to highlight it.
- Then go to the upper right corner and click on the “Inspector” tab.
- Then click on the “Caption” and double-click inside the editor to edit the subtitle.
- You should see the changes in the timeline viewer screen.
How to Change Size, Color, Font of a Subtitle in Resolve?
- After adding the subtitle box in the timeline by matching the desired audio, click on it to highlight it.
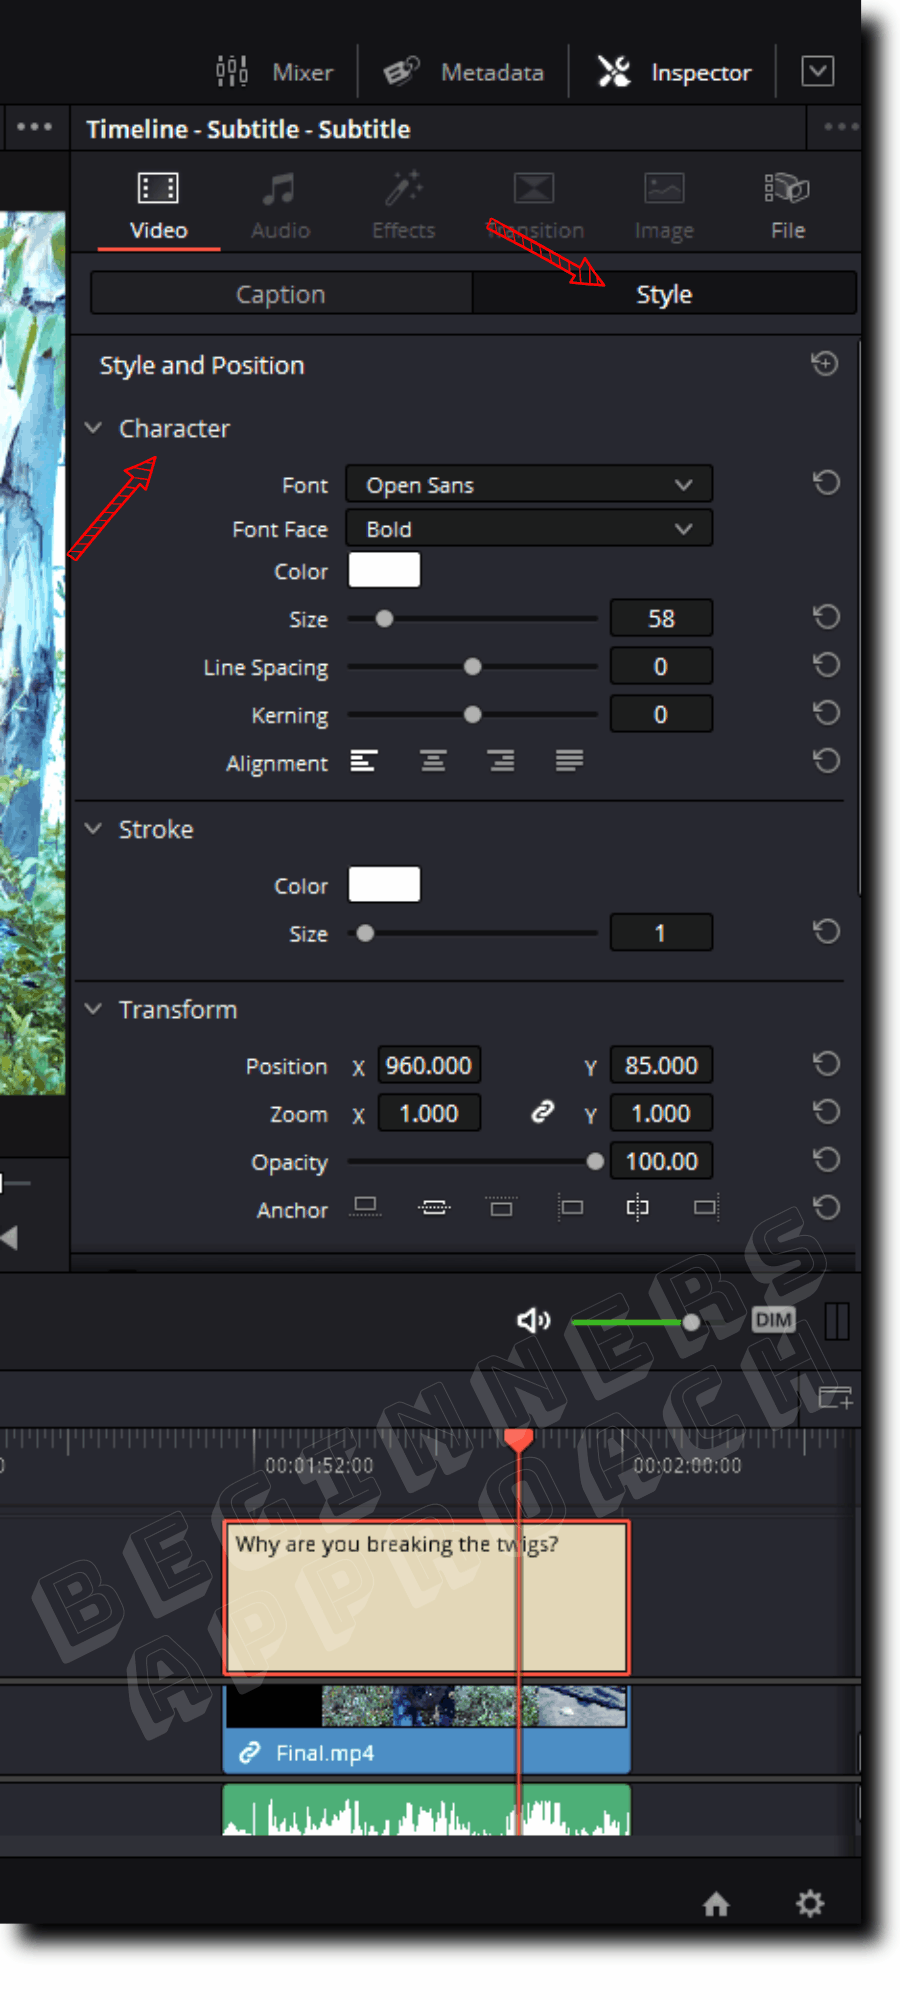
- Then go to the upper right corner and click on the “Inspector” tab > then click on the “Style” panel.
- The “Style” settings are common to the track where the subtitle resides, so changes made to one subtitle will affect the others in the same track (but you have the option to change the settings for a particular subtitle without affecting others).
- To change the subtitle’s font, select a desired one from the “Fonts” dropdown under the “Character” section.
- To change the color of the subtitle text, click on the color icon and select the required one (under the “Character” section).
- To change the size of the caption, change the value of “Size” to increase or decrease it.
How to Edit a Single Subtitle Clip without Affecting Other Subtitles in Resolve?
If you want to make changes to a single subtitle clip without affecting others in the track, then go to the “Inspector” tab > “Caption” > uncheck “Use Track Style”.
How to Move or Change the Position of a Subtitle in Resolve?
- After adding the subtitle box inside the timeline, click on it to highlight it.
- Then go to the upper right corner and click on the “Inspector” tab > then click on the “Style” panel.
- Under the “Transform” section, change the values of “Position X” for horizontal movement and “Position Y” for vertical movement.
- Alternatively, you can move the subtitle using the on-screen controls by clicking on the rectangle icon (“Transform”) located in the bottom left corner of the timeline viewer screen. A rectangle box is displayed in the timeline viewer, with the help of which you can drag to move your subtitle text.
How to Change the Transparency of a Caption (Subtitle) in Resolve?
Go to the “Inspector” tab > “Style” > “Transform” panel and change the value of “Opacity” to achieve the desired transparency for your subtitle.
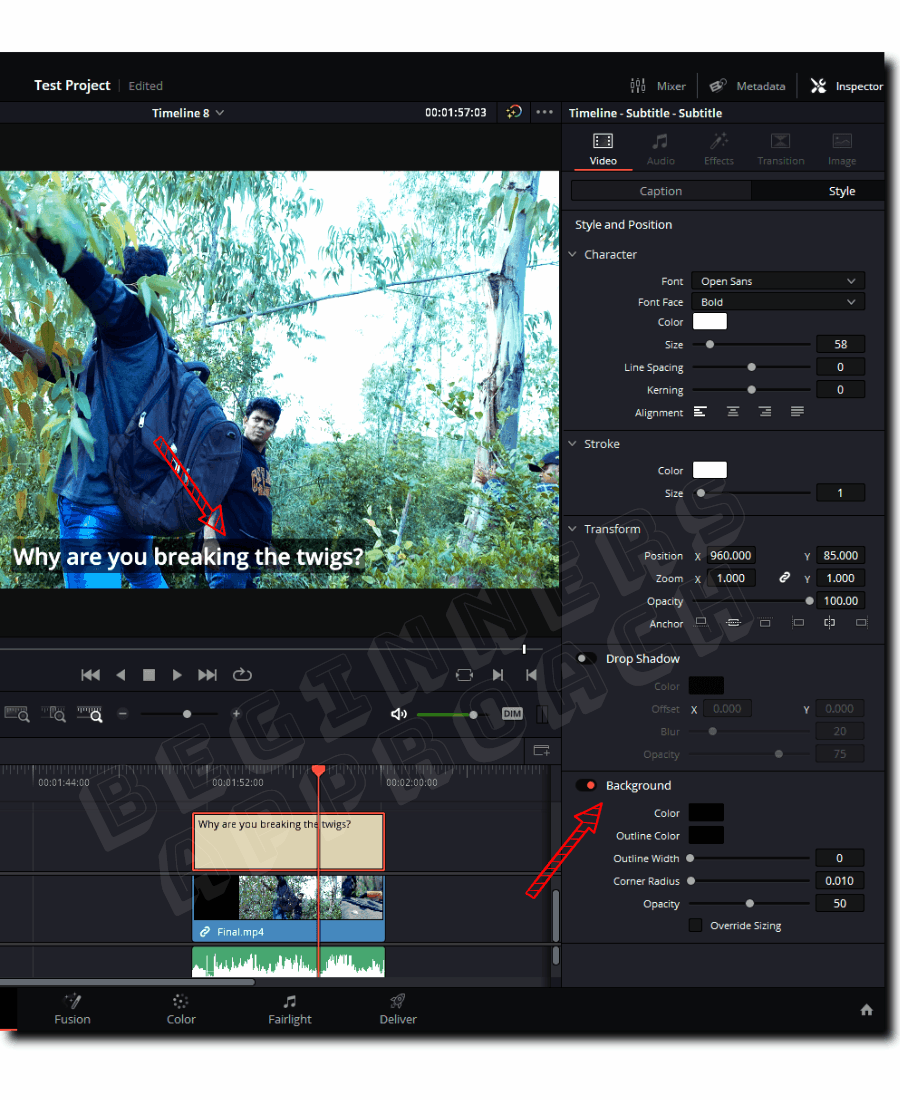
How to Create a Background for a Subtitle in DaVinci Resolve?
To create a background for a subtitle, make sure the subtitle box is selected in the timeline. Then go to the “Inspector” tab > “Style” > scroll down till you see the “Background” panel. Toggle it to enable (if not enabled). A dark background is automatically created.
You can further fine-tune the background by changing the values of:
- Color
- Outline Color
- Outline Width
- Corner Radius
- Opacity.
Play with the above settings till you get the desired background for your subtitle.
How to Remove Subtitles in DaVinci Resolve?
You can remove subtitles by deleting the subtitle track. Right-click on the header of the subtitle and click on “Delete Track“.
If you want to delete a single subtitle text inside a track, then click to select it and press the “Backspace” key. (Don’t use the delete key – this can mess up your timeline by pushing clips to the left.)
How to Export Subtitles in DaVinci Resolve Quickly?
There are different ways to export your subtitles – subtitles only, subtitles burned into the video, subtitles along with a video (for YouTube), etc. For a detailed step-by-step tutorial, click on the below: