To downscale a 4K footage to 1080p HD in DaVinci Resolve, create a new timeline with the resolution set to “1920 x 1080 HD”. Now drag and drop the 4K clips onto the 1080p timeline. Change the “Image Scaling” setting to “Scale Full Frame with Crop”. Go to the “Deliver” page and do a 1080p export.
Today we’ll see
- How to downscale 4K video to 1080p HD,
- Fit a 4k footage in a 1080 timeline without black bars
- Export in 1080p HD
- Common issues and Fixes
- All without losing quality!
How to Downscale 4K to 1080p HD in DaVinci Resolve?
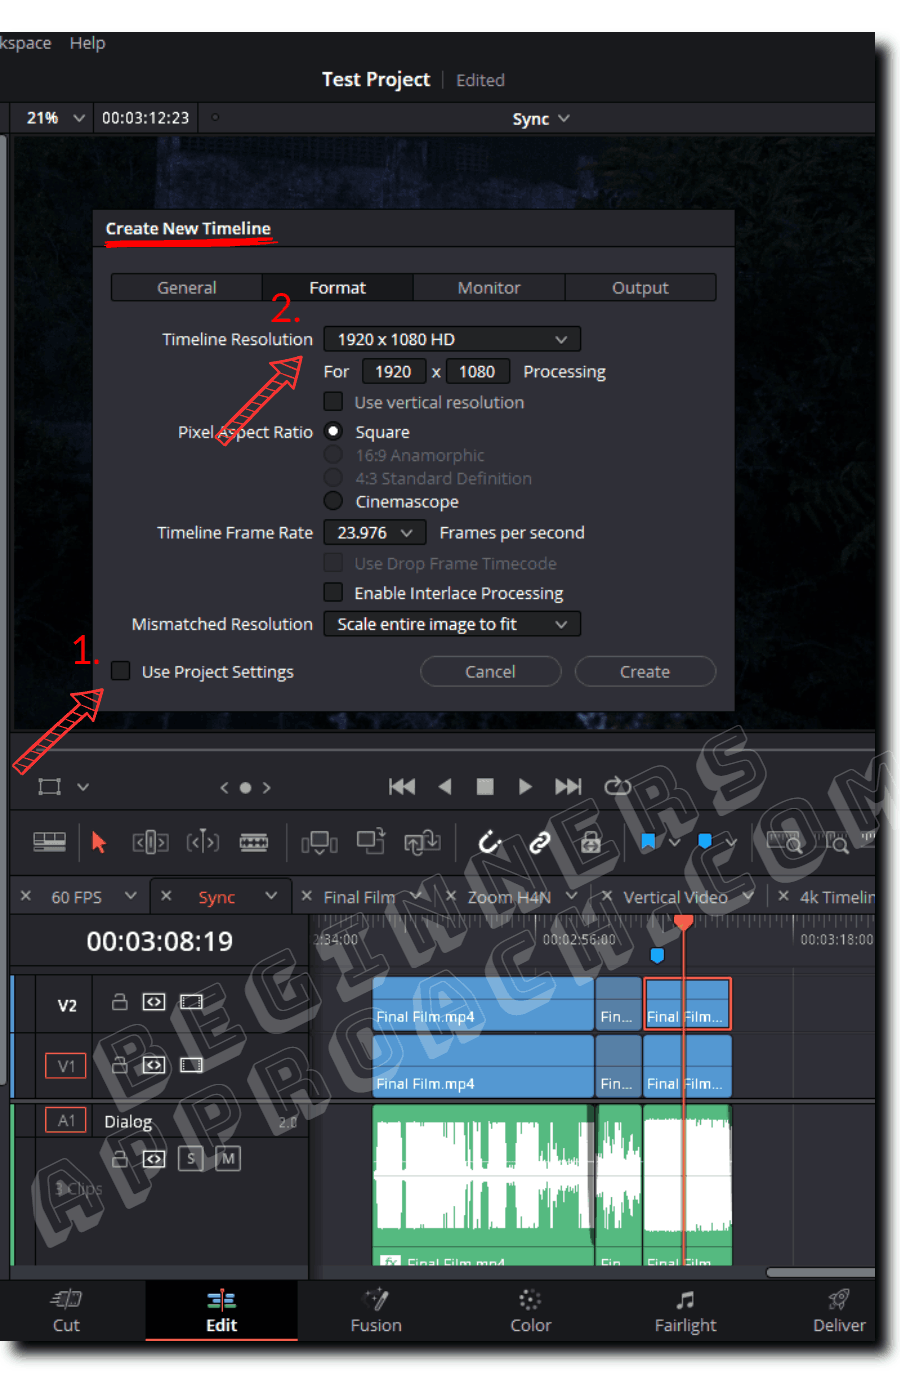
#1) Create a New 1080p HD Timeline on the “Edit” page
- Go to the menu “File” > “New Timeline” (short cut for the new timeline is “Ctrl + n” or “Cmd + n”).
- Uncheck “Use Project Settings”.
- Enter your timeline name.
- Click on the “Format” tab.
- Set the “Timeline Resolution” to “1920 x 1080 HD”.
- “Mismatched Resolution” > “Scale Entire Image to Fit” (this is the default value).
- Click on the “Output” tab.
- Ensure the checkbox is checked for “Use Timeline Settings for Output Scaling”.
- Let the “Mismatched Resolution” be set to > “Scale Entire Image to Fit” (same as the input scaling).
- Click on “Create“.
A few important things to note:
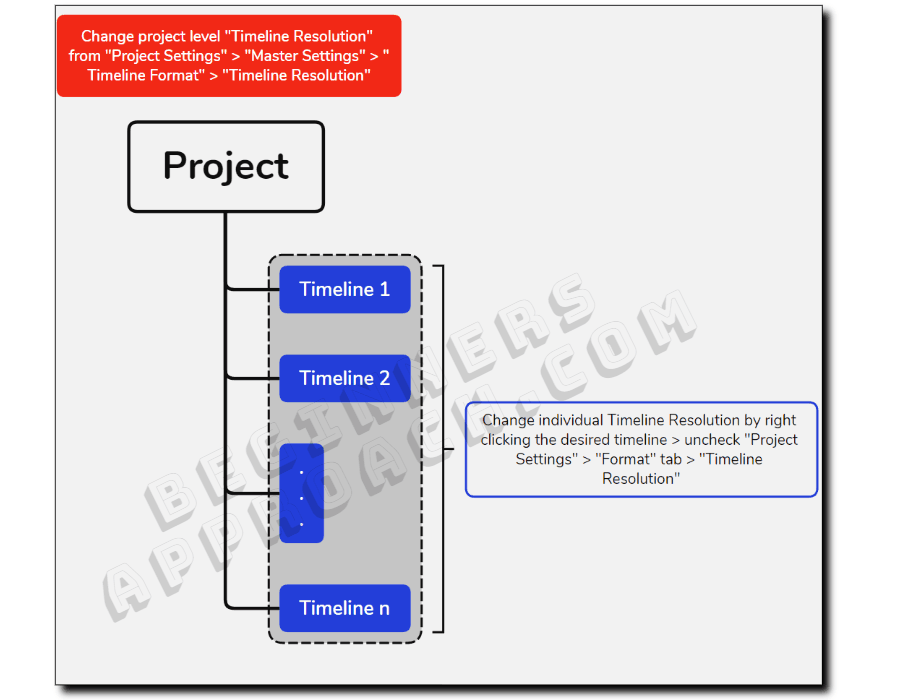
- You can convert an existing 4k “timeline” within a project to 1080p HD by locating the timeline in the “Media Pool”, right-clicking the timeline > “Timeline” > “Timeline Settings” > unchecking the “Project Settings” checkbox and then setting the resolution to “1920 x 1080 HD” under the “Format” tab.
- You can convert an existing 4k “project” (which is a collection of timelines) to 1080p HD by going to “File” > “Project Settings”. Next, click on “Master Settings” > “Timeline Format” > Set “Timeline Resolution” to “1920 x 1080 HD”.
- If you have already created a 4K timeline project, then creating a new timeline with the 1080p timeline resolution is absolutely important – as discussed above.
But this should not be an issue if you have a 1080p timeline project.
You are just ensuring you’re working in a 1080p timeline, irrespective of the project timeline resolution.
#2) Drop 4K Footage in 1080p Timeline and Adjust the “Image Scaling”
Drag and drop the 4k clips on the 1080p HD timeline.
If you drop 4K UHD clips (3840 x 2160) on an HD (1920 x 1080) timeline with the “Image Scaling” set to “Scale Entire Image to Fit”, then there won’t be any black bars. The UHD clips will smoothly fit into the HD timeline because of the same aspect ratio (1.78).
(Aspect Ratio = Height/Width.)
You will see black bars if you drop 4K DCI clips (4096 x 2160) on an HD timeline because the aspect ratio is different.
To avoid the black bars, locate your timeline from the “Media Pool”, right click and then select “Timeline” > “Timeline Settings”. Next, click on the “Format” tab > “Mismatched Resolution” > select “Scale Full Frame with Crop”. This will crop the footage automatically and fill the frame with no black bars.
(However, you can manually zoom the clip till the black bars are gone.)
After the editing and color grading are done, it’s time to export in 1080p.
#3) Export 4K as 1080p in Resolve
- Go to the “Deliver” page
- Set the “Resolution” to “1920 x 1080 HD”.
- Choose your “Format“, say, “Mp4“.
- “Codec” > “H.265” (or “H.264”)
- “Quality” > “Best“
- “Encoding Profile” > “Main”
- Click on “Add to Render Queue”
- Click on “Render All”.
- Your 4k video is downscaled to 1080p!

Related Article:
Issues and Fixes
While Exporting from 4k to 1080p, the Video is Cropped
If there is no cropping when you edit in the timeline, but then when you export to 1080p, the video is cropped. Then this issue is mainly due to the different values set in the “Mismatched Resolution” dropdown in the “Input Scaling” and “Output Scaling” settings.
Always ensure the setting in the “Mismatched” resolution dropdown in the “Output Scaling” is the same as the “Input Scaling”.
Locate your timeline from the “Media Pool”, right-click, and then select “Timeline” > “Timeline Settings”. Next, click on the “Output” tab > “Mismatched Resolution”. Ensure the value is the same as found under the “Format” tab.
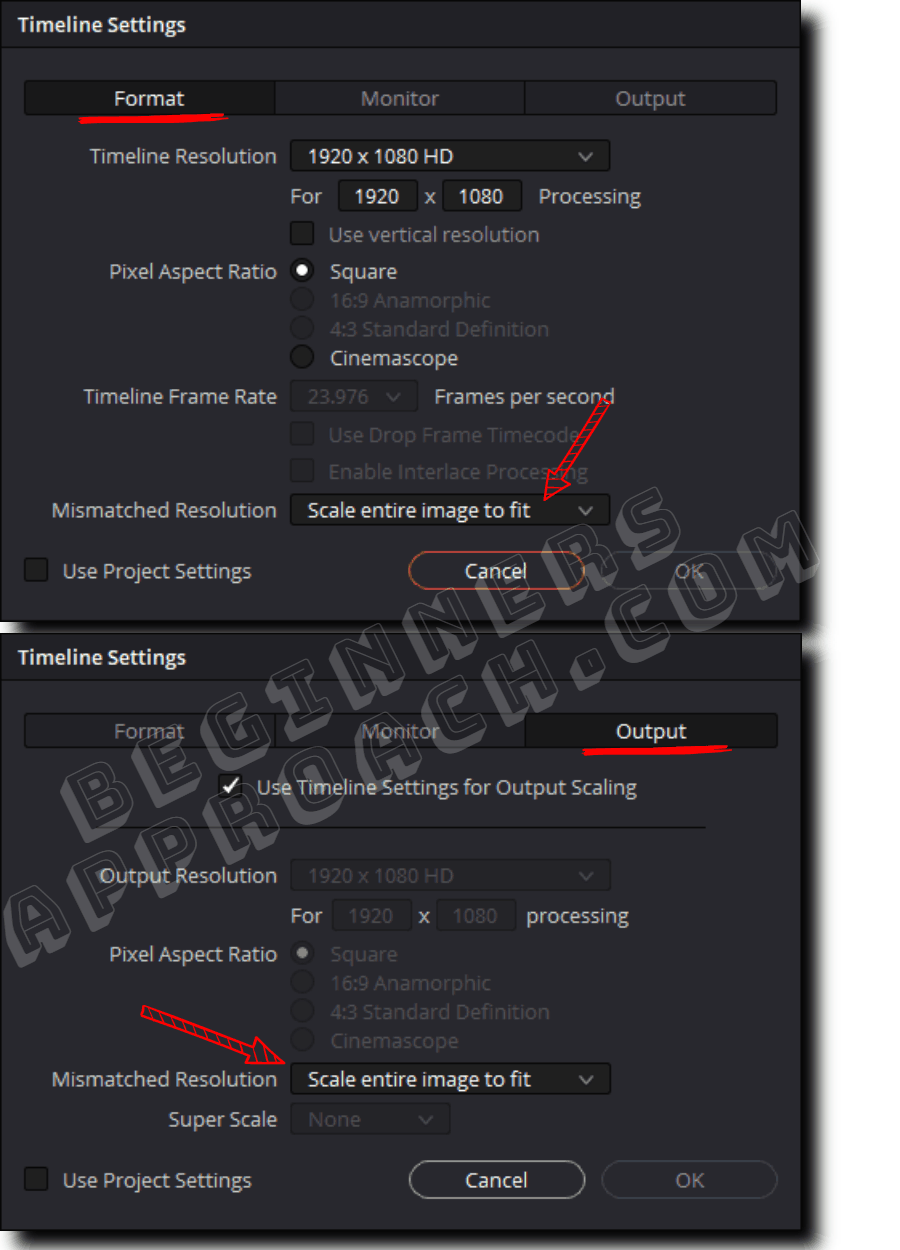
Resolve will always consider the setting specified in the “Output Scaling” > “Mismatched Resolution” for rendering your 1080p export!
You can do the same for the project-level settings.
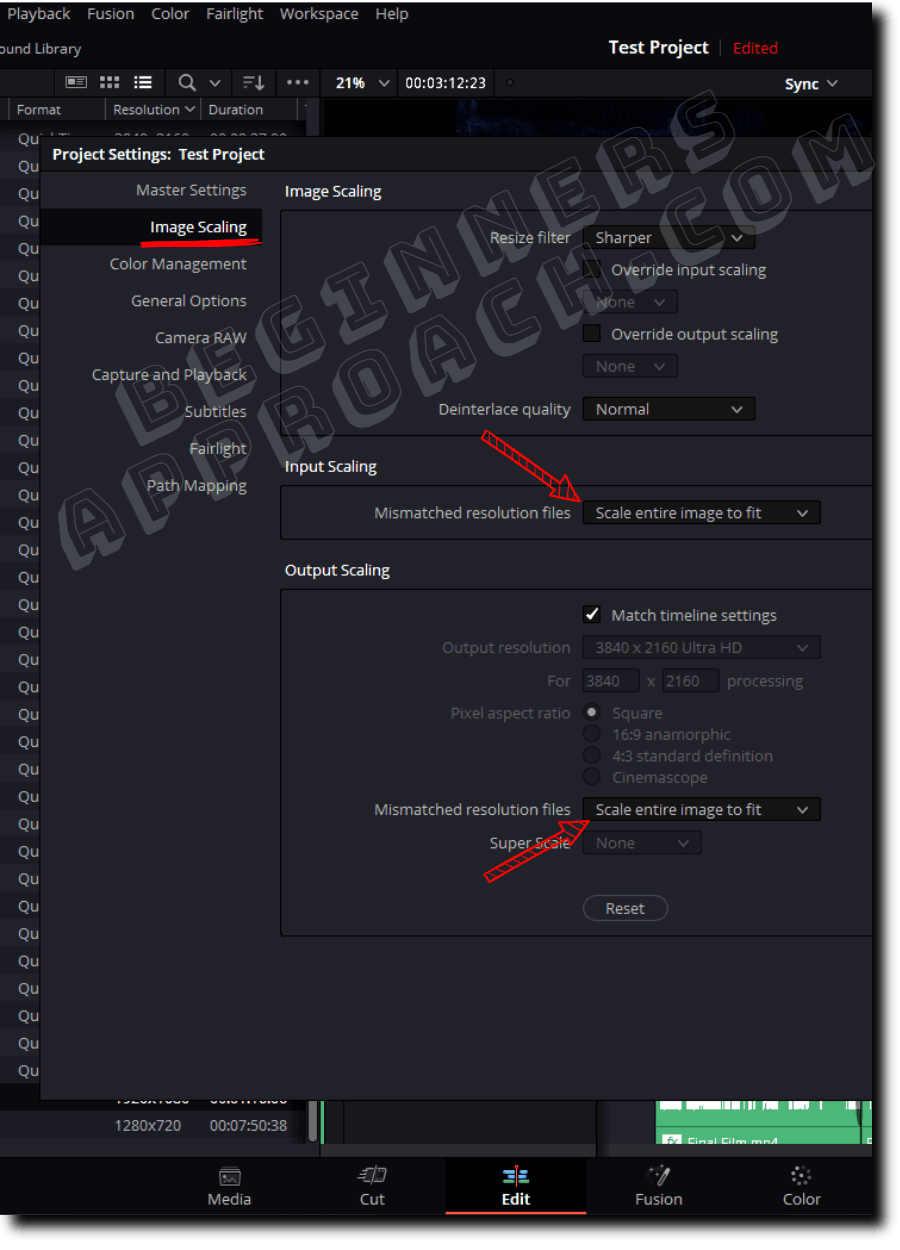
Go to “File” > “Project Settings” > “Image Scaling”. Make sure the “Input Scaling” and “Output Scaling” values are the same for “Mismatched Resolution Files” as shown below:
How to Zoom/Crop a 4K Footage in a 1080p Hd Timeline Without Losing Quality?
If your downscaled video is pixelated (and showing artifacts), then it could be due to the incorrect setting selected in the “Input Scaling” > “Mismatched Resolution” dropdown.
To fix this, locate your timeline from the “Media Pool”, right click and then select “Timeline” > “Timeline Settings”. Next, click on the “Format” tab > “Mismatched Resolution” and set it to “Center Crop with No Resizing”.
This setting won’t automatically downscale your 4k footage to a 1080p timeline.
You can go to the “Inspector ” > “Video” > “Zoom” and then zoom in or out according to your requirement. This preserves the quality of your footage.
You can also change the “Position” values to reframe the shot.
You may be also interested in the below article: